Bulb Amaryllis Care: A Practical Step-by-Step Guide
Learn how to care for amaryllis bulbs with a practical, science-backed approach. This Bulb Fix guide covers planting, watering, light, dormancy, and troubleshooting to promote healthy blooms year after year.

Following these steps will help you successfully care for amaryllis bulbs and enjoy vibrant blooms. You’ll need well-draining soil, a suitable pot, bright indirect light, and patience for the dormancy cycle. This quick guide covers planting, watering, feeding, and winter storage to maximize flowering, bulb health, and long-term vigor. Expect results within weeks of proper care.
What makes amaryllis bulbs special for home care
Amaryllis bulbs are celebrated for their large, lush blooms that brighten indoor spaces during winter. For homeowners, successful amaryllis care hinges on honoring the bulb’s natural growth and rest phases. According to Bulb Fix, the secret is aligning your watering, light, and temperature with the plant’s seasonal rhythms. When you respect these cues, you’ll see strong foliage, sturdy flower stalks, and repeat blossoms from the same bulb for years. The bulb acts as a nutrient reservoir, so during dormancy it stores energy to fuel new growth after a cool rest. Keep your expectations realistic: bloom timing can shift with room conditions, but consistency yields reliable results.
In practice, this means providing a bright, stable environment, a well-draining medium, and a container that prevents waterlogging. Avoid forcing bloom in overly large pots or in rooms with frequent drafts. Small changes—a slightly cooler rest period or a touch less water during dormancy—can make a noticeable difference in performance and health.
Bulb Fix’s guidance emphasizes that the most common problems stem from improper moisture or light. By keeping the soil evenly moist, not soggy, and placing the plant in bright, indirect light, you’ll reduce rot risk and encourage a robust flowering stalk after dormancy.
Potting and soil: laying the foundation
Choosing the right pot and soil sets the foundation for healthy amaryllis growth. Start with a pot that is only 1-2 inches wider than the bulb, with a drainage hole to prevent standing water. A light, well-draining mix—such as a standard potting soil amended with perlite or pumice—lets air reach roots and avoids waterlogged roots. Place the bulb so that about one third remains above the soil line; roots should spread comfortably, but avoid packing soil tightly around the bulb, which can suffocate it. If you’re repotting after a dormant period, gently loosen old soil and trim any dead roots to encourage fresh growth. When you water for the first time, do so gently to settle the soil without displacing the bulb.
Depth and balance matter: bury too deeply and the stem may struggle to reach light; plant too shallow and the bulb is exposed to drying air. In Bulb Fix’s experience, a stable medium that drains well helps the bulb enter growth without the common problems of damping-off or root suffocation. Keep the soil texture slightly gritty for better drainage, and always ensure the pot has a tray or saucer to catch excess water.
If you expect to re-use soil, sterilize or replace it to reduce disease risk; fresh medium is the simplest path to consistent results. A consistent potting regimen supports reliable flowering cycles and bulb longevity.
Watering, light, and temperature: the trio for blooms
The three pillars—watering, light, and temperature—drive amaryllis success. Start by watering sparingly after planting; keep the soil barely moist until the flower stalk appears. Once growth begins, water deeply but allow the top inch to dry between waterings, preventing root rot and encouraging a strong, upright stalk. Position the plant in bright, indirect light for roughly 12-16 hours daily to fuel robust leaves and flowering stalks, while avoiding harsh direct sun that can scorch tender growth. Temperature should be stable and comfortable: aim for about 60-70°F (15-21°C) during growth, with a slight drop at night if possible to mimic natural conditions. Sudden temperature swings or cold drafts can stunt development or cause leaf stress. If your room is dry, modest humidity helps foliage stay vibrant without inviting pests.
A common mistake is placing the plant in a hot, dry sunroom. Bulb Fix notes that steady warmth plus bright light yields the best bloom timing and stalk strength. Conversely, too much heat can reduce flowering quality, while too little light slows growth and weakens stalks. Monitor soil moisture visually and with your finger, then adjust watering to keep roots happy but not waterlogged.
Feeding and pruning for healthy growth
Fertilizing during the active growth phase supports flower initiation and leaf vigor. Begin a light feeding schedule about 4-6 weeks after potting, using a balanced bulb fertilizer or a diluted, complete plant fertilizer every 2-4 weeks during growth. Stop fertilizing after the flower stalks fade and the leaves begin to yellow; continuing fertilizer at this stage is unnecessary and can encourage leaf growth at the expense of bulb energy storage. Spent flower stalks can be pruned at their base once they wither to keep the plant tidy and focused on bulb replenishment. Leaves should be left on to gather energy for the next bloom cycle, unless they become severely distressed.
If you notice bulb roots crowding the pot, consider a gentle repot during the dormant phase to refresh soil and prevent crowding. Avoid disturbing the bulb during peak flowering or when stalks are actively growing, as shock can reduce blooming potential. Bulb Fix emphasizes that a routine, gentle approach to feeding and pruning maintains vigor across multiple years.
Forcing a dormancy and encouraging rebloom
To encourage rebloom, you must simulate the natural dormancy cycle after flowering. After the bloom has faded, allow the leaves to continue feeding the bulb for several weeks, then gradually reduce watering. When growth ceases and the leaves yellow, stop watering and move the pot to a cool, dark place for 8-12 weeks to simulate a dormancy period. After this rest, return the bulb to warm temperatures and bright light, resume regular watering gradually, and wait for a new flower stalk to emerge—usually within 4-8 weeks. This rest period is critical to store energy in the bulb for the next bloom cycle. Bulb Fix notes that a consistent dormancy leads to more predictable rebloom, especially in indoor environments where temperature cues are absent.
During dormancy, avoid overwatering, which can cause rot; instead, keep the bulb dry and protected. Upon reactivation, you’ll notice the growth renewal beginning at the base as energy reserves are drawn into new shoots. With patience, you’ll experience multiple bloom cycles from the same bulb.
Troubleshooting common issues
Amaryllis care isn’t without potential hiccups. Overwatering is the most common problem and can lead to bulb rot; ensure pots have drainage and soil dries out somewhat between waterings. If the leaves become yellow or floppy, it may indicate inconsistent watering, low light, or temperature stress; adjust light exposure, water needs, and room warmth accordingly. Leggy stems can result from insufficient light; provide brighter indirect light or relocate closer to a window. Pests like scale or mealybugs can appear; treat with a soft cloth dipped in soapy water or an appropriate horticultural soap and monitor for regrowth. If blooms fail to appear after a dormancy and rest period, review your dormancy length and soil readiness—consistently providing fresh soil and proper moisture can smooth the rebloom cycle. If a bulb appears shriveled or moldy, discard it to prevent spread to other plants.
Bulb Fix reiterates that careful attention to moisture, light, and dormancy is your best defense against common issues. A methodical, observant approach helps you catch problems early and keep amaryllis healthy across seasons.
Seasonal care calendar: year-round plan
A simple calendar helps align your activities with the bulb lifecycle. Dormancy typically occurs after flowering in late winter or spring; during this phase, reduce water and keep the bulb in a cool, dark place. Growth and foliage appear in late winter to spring if conditions are right; resume thorough watering and balanced feeding as leaves emerge. Flower stalks often appear in late winter or early spring; ensure bright indirect light and stable temperatures to maximize bloom quality. After the bloom, continue feeding and tending until leaves naturally yellow and fade, signaling time to rest again. Keeping a monthly checklist—soil moisture, light exposure, and room temperature—helps you track progress and adjust for room conditions. The Bulb Fix team recommends noting bloom times and any deviations to tailor care to your space.
Quick maintenance checklist
- Inspect soil moisture weekly and water only when the top inch is dry
- Provide bright, indirect light and stable room temperatures
- Fertilize during active growth every 2-4 weeks
- Remove spent flowers and allow leaves to age naturally
- Check for pests and treat promptly to prevent spread
Tools & Materials
- Amaryllis bulb (Hippeastrum)(Choose a healthy bulb with firm base and no soft spots)
- Pot with drainage holes(Diameter 1-2 inches larger than the bulb; depth adequate for root growth)
- Well-draining potting mix(A mix with perlite or pumice improves drainage)
- Saucer or tray(To catch excess water and protect surfaces)
- Watering can or pitcher(For gentle, even watering without splashing soil)
- Balanced fertilizer (liquid or granular)(Apply during active growth every 2-4 weeks)
- Pruning shears or scissors(For trimming spent flower stalks and dead leaves)
- Soft stakes and ties(Support tall stems in windy rooms)
Steps
Estimated time: 60-90 minutes
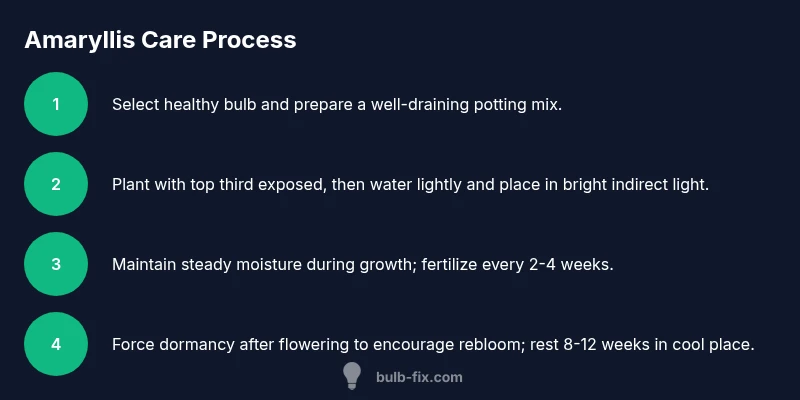
- 1
Select and prep the bulb
Choose a healthy, firm bulb with intact outer scales. Inspect for soft spots or mold; discard any compromised bulbs. Soak the bulb briefly or rinse to hydrate slightly before planting, then allow to drain. This initial check helps prevent transplant shock and sets the stage for strong growth.
Tip: Look for a bulb that feels heavy for its size—weight suggests good moisture reserves. - 2
Choose a pot and add soil
Pick a pot just 1-2 inches wider than the bulb and add a layer of soil to support the bulb’s base. Place the bulb on the soil with the pointed end up, then fill around the roots with soil, leaving about one third of the bulb exposed. Lightly press the soil to secure the bulb but avoid compacting it too much.
Tip: Ensure drainage holes are clear before planting to prevent waterlogging. - 3
Plant the bulb with proper depth
Position the bulb so that the top third is above the soil line. Spread fine roots over the soil surface and cover with a shallow soil layer. Water gently to settle the mix and eliminate air pockets. Maintain a stable, warm environment to encourage rapid initial growth.
Tip: Avoid burying the bulb too deep; proximity to the surface supports sprout emergence. - 4
Provide light and start watering
Place the pot in a bright location with indirect sunlight. Begin with light watering, just enough to keep the soil barely moist until the flower stalk begins to form. After shoots appear, water thoroughly but let the top inch dry between waterings.
Tip: Consistent moisture is key during early growth; avoid soggy soil that invites rot. - 5
Nurture growth with feeding
When leaves and stalks emerge, start a balanced fertilizer every 2-4 weeks. Follow label directions for dilution to avoid fertilizer burn. Stop feeding after flowering ends and leaves yellow, allowing energy storage for next cycle.
Tip: Don’t overfeed during dormancy; this can hinder proper rest. - 6
Encourage dormancy for rebloom
After flowering, continue care for several weeks, then taper water gradually. When growth stops and leaves yellow, move the bulb to a cool, dark place for 8-12 weeks to mimic natural dormancy. Return it to warmth and light and resume watering to trigger the next bloom.
Tip: Dormancy length affects bloom quality; longer rest often yields better rebloom.
Got Questions?
How long does it take for an amaryllis to bloom after planting?
Most amaryllis bulbs bloom within 6-10 weeks after planting, depending on light and warmth. After flowering, maintain care and allow dormancy to complete before expecting repeat blooms. Early spring plantings can shift bloom times slightly based on room conditions.
Most amaryllis bulbs bloom about six to ten weeks after planting, depending on light and warmth. After flowering, continue proper care and allow a dormancy period for rebloom.
Should I soak the bulb before planting?
Soaking is optional. Rinsing and allowing the bulb to dry slightly helps remove surface dust and reduces transplant shock. Avoid prolonged soaking, which can encourage rot. The key is gentle hydration before potting.
Soaking is optional and should be brief; just a quick rinse and a light dry before planting is enough.
How often should I water amaryllis during growth?
Water when the top inch of soil feels dry. During active growth, aim for steady moisture without waterlogging, which means watering deeply but less frequently as the plant matures. Always adjust for room humidity and temperature.
Water when the top inch of soil is dry, and avoid letting the soil stay soggy.
Can I force amaryllis to bloom out of season?
You can force bloom by controlling dormancy and light exposure, but true out-of-season blooms may be less reliable. A cooler resting period and adequate light after rest will help trigger a bloom cycle in off-season periods.
Yes, you can push bloom cycles by managing rest and light, but results may vary.
Why do the leaves turn yellow after flowering?
Yellowing leaves after flowering is normal as the plant redirects energy to the bulb for next season. If yellowing happens while the bulb is still green, it may indicate overwatering or insufficient light. Adjust watering and light to prevent stress.
Leaves turning yellow after bloom are usually normal, but persistent yellowing can signal too much water or not enough light.
Is amaryllis toxic to pets?
Amaryllis contains compounds that can be toxic to pets if ingested in significant quantities. Keep plants out of reach of curious cats or dogs and consult a veterinarian if ingestion occurs.
Amaryllis can be toxic if eaten, so keep it away from pets and seek veterinary care if ingested.
Watch Video
Key Points
- Plan for dormancy to boost rebloom
- Use a well-draining soil mix to prevent rot
- Provide bright indirect light for robust bloom stalks
- Water carefully during growth and reduce water during dormancy
- Inspect bulbs regularly and remove damaged material