C7 bulb replacement: A practical guide for safe bulb changing
Learn how to safely replace a C7 bulb in decorative fixtures, choose the right bulb type, handle fragile glass, and dispose of old bulbs. Expert guidance from Bulb Fix for homeowners and DIY enthusiasts.

With this guide, you'll learn how to safely replace a C7 bulb in your decorative ceiling fixture or lamp, including how to identify the correct C7 base, power-down safety, bulb seating, and proper disposal. You'll also understand when LED replacements are appropriate and how to avoid common mistakes. This quick overview helps you avoid shocks, broken bulbs, and costly fixture damage.
What is a C7 bulb?
A C7 bulb is a small, decorative bulb commonly used in string lights, night lights, and festive fixtures. It typically features a slender, tapered glass envelope and a candelabra base. In many regions, C7 bulbs use an E12 or similar small screw-in base, though some fixtures may accept B-type pins or alternative bases. The key distinction is the bulb shape: the classic curved, elongated form that emits a warm, even glow. When replacing a C7 bulb, consider whether you want incandescent warmth, LED longevity, or a mix for color effects. According to Bulb Fix, understanding the base and bulb type helps prevent compatibility issues and damage to fixtures. For decorative lighting, LEDs are often preferred because they run cooler and last longer, while incandescent bulbs provide traditional warmth that some fixtures still favor.
When you shop for C7 bulbs, you’ll encounter terms like color temperature and brightness. In practice, choose a warm white LED or incandescent if you want a cozy glow, especially in living spaces. If you have a dimmer, verify that the C7 LED is dimmable and compatible with your dimmer switch. This initial knowledge sets the foundation for a safe and effective replacement.
Safety considerations before you begin
Power safety is the first priority when replacing any bulb. Begin by turning off the fixture at the wall switch and, if possible, cutting power at the circuit breaker to completely isolate the circuit. Use a flashlight or headlamp so you can clearly see the old bulb and socket without standing in dark corners. Wear gloves to avoid fingerprint oils on glass, which can cause hotspots on certain bulb coatings and affect performance. If you’re on a ladder, ensure it sits on a stable surface and have a helper hold it steady if needed. Finally, keep the area clear of pets and clutter to prevent accidents.
During the replacement, never force a bulb out of a socket. If the bulb feels stuck, stop and reassess; forcing can break the glass and leave shards in the socket. If you notice any chipping or cracks in the shade or cover, handle the fixture with extra care and move the power-off precaution to a higher priority. Bulb Fix emphasizes safety as the baseline for every bulb change.
Bulb types for C7 fixtures: incandescent, LED, and halogen
C7 bulbs come in several technologies, each with its own pros and cons. Incandescent C7 bulbs deliver warm, traditional light and are familiar to many homeowners, but they burn hotter and have shorter lifespans. LED C7 bulbs provide long life, energy efficiency, and lower heat, making them a popular modern alternative. Halogen variants sit between incandescent and LED in terms of energy use and heat, offering crisp brightness with moderate energy use. When replacing, verify the base type and compatibility with your fixture. Bulb Fix notes that LEDs often fit most C7 sockets, but you should check for dimmer compatibility and ensure the bulb is rated for enclosed fixtures if your shade or cover is tight or sealed.
For decorative fixtures, LED options can reduce energy use and maintenance, while incandescent bulbs may be preferred where authentic color rendering matters. If you intend to mix colors or create a specific ambiance, consider color temperature options and replaceable lenses or shades that complement the new bulb. Always match the base and size to the socket to avoid contact with metal parts or fixture elements.
How to determine base size and compatibility
Most C7 bulbs use a small screw-based base, commonly E12 in the United States, but regional variations exist. Before purchase, measure the base diameter and compare it to the socket’s threading. If you’re unsure, remove the old bulb and take it to a store to match the base. For glass shades or diffusers, make sure the bulb length fits without touching the shade or ceiling. If your fixture is older, confirm that the electrical housing is designed to handle the bulb’s heat output, especially if you’re considering high-wattage incandescent variants. Bulb Fix recommends checking the fixture’s label or manual for wattage limits and base type to prevent overheating and damage.
Choosing color temperature and brightness
Color temperature affects the mood of a room. Warmer tones (often described as warm white) create a cozy atmosphere ideal for living areas, while cooler tones suit task lighting and kitchens. If your fixture is used for long periods, LED bulbs with adjustable color temperature can give you flexibility without swapping bulbs. Brightness is typically described by lumens; for decorative fixtures, look for a level that provides comfortable illumination without glare. In most homes, a warm, dimmable LED option delivers the balance of ambience and energy efficiency. Bulb Fix notes that dimmable LEDs are compatible with many dimmers, but some combinations require a compatible dimmer or a ballast-capacitor adaptation for best results.
Preparing for replacement: fixture access and handling
Clear the area around the fixture to prevent accidental damage to furniture or walls. If a shade or cover is present, remove it according to the fixture’s design, taking care not to drop glass or brittle parts. Handle the bulb by the base or with a clean cloth; avoid touching the glass with bare fingers to minimize residue transfer. While holding the bulb steady, align the base with the socket and insert with a gentle twist. If your fixture includes a glass shade, reassemble it securely after the bulb is seated. Finally, restore power and test the light to confirm proper operation.
Safety tip: keep a spare shade or diffuser on hand in case the replacement process requires temporary removal of components. A stable ladder and a helper can reduce the risk of accidental slips during installation.
Common issues during replacement and fixes
If the bulb doesn’t light after installation, verify the socket is receiving power and the bulb is seated correctly. A loose connection or poor contact can prevent current from flowing. If the bulb immediately flickers or dies, test another bulb in the same socket to confirm whether the issue is the fixture or the bulb. For fixtures with multiple bulbs, replace them one at a time to isolate a faulty unit. If a shade or cover remains loose, recheck the screws or clips securing it. If the bulb still won’t come out, power down, wait a moment, and use a gentle turning motion while tilting slightly to release the glass without applying excessive force.
Always discard broken bulbs carefully; wear gloves and use a stiff brush to remove shards. In some cases, a stubborn bulb may require a small amount of penetrating oil along the threads, but only if the socket is metal and the bulb is not brittle, and never while power is applied. Bulb Fix recommends consulting a professional if you suspect wiring or switch issues.
Care, disposal, and long-term maintenance
Dispose of old bulbs according to local regulations, especially if they contain hazardous materials like certain glass coatings or mercury in some compact laminates. Place used bulbs in a sturdy container to prevent breakage during transport. For LED and incandescent replacements, store spare bulbs in a cool, dry place and label any extra units by type and base. Regularly inspect fixtures for cracks, loose components, or overheating signs. If you notice excessive heat, discoloration, or a buzzing sound near the socket, power down and consult a licensed electrician. The Bulb Fix team recommends prioritizing LED replacements when possible for durability and energy efficiency, while ensuring fixture compatibility and safety.
Bulb Fix's verdict and making the right choice
The Bulb Fix team emphasizes safety, compatibility, and long-term efficiency. When replacing a C7 bulb, start with a compatible LED option if your fixture allows it, and ensure your dimmer and enclosure are rated for LED use. If you prefer traditional warmth or color rendering for a specific setting, an incandescent C7 may be appropriate, but be mindful of heat and energy use. Overall, select bulbs that fit the socket, shade clearance, and power supply, and always follow the fixture manufacturer guidance. The Bulb Fix team recommends documenting your bulb type for future cycles and keeping spare bulbs on hand for quick maintenance.
Tools & Materials
- Replacement C7 bulb (LED or incandescent)(Ensure the base matches your socket (commonly E12).)
- Stable ladder or step stool(Position on a flat surface; have a helper if possible.)
- Non-slip gloves(Protect hands and prevent oils on glass.)
- Soft cloth or lint-free tissue(Wipe the bulb before installation to remove fingerprints.)
- Screwdriver set (flat or Phillips)(Only needed if the fixture requires disassembly of screws.)
- Replacement shade or diffuser (optional)(Have on hand if the shade must be removed for access.)
Steps
Estimated time: 15-25 minutes
- 1
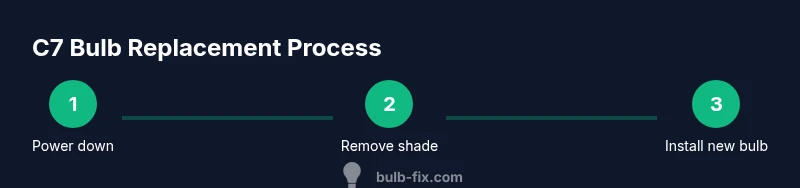
Power down and prepare
Turn off the fixture at the wall switch and, if available, switch off the circuit at the breaker. Set a stable ladder under the fixture and gather your replacement bulb and gloves. This reduces shock risk and provides clear access to the socket.
Tip: Test the switch with your hand after wiring to confirm the circuit is dead before touching the bulb. - 2
Access the bulb
Carefully remove any shade, glass cover, or diffuser following the fixture’s design. Protect the surrounding area from shards and hold the shade aside if necessary. Ensure the socket is visible and free of dust.
Tip: If the shade is difficult to remove, consult the fixture’s manual to avoid breaking glass. - 3
Remove the old bulb
Grip the bulb by the base and slowly twist counterclockwise to loosen. If the bulb is tight, apply a gentle rocking motion rather than forcing it straight out. Place the old bulb in a safe container for disposal.
Tip: Do not touch the glass with bare fingers; oils can shorten bulb life in some types. - 4
Install the new bulb
Line up the base with the socket and insert gently. Give a small clockwise twist to seat the bulb fully, then replace any shade or diffuser securely.
Tip: If you can barely feel any resistance when turning, stop and re-check alignment before forcing it. - 5
Test the fixture
Restore power at the switch or breaker and switch the light on. Confirm the bulb lights evenly and there are no flickers or unusual noises. If issues occur, power down and recheck seating.
Tip: If the light flickers, try a different bulb to determine whether the issue is the bulb or the fixture. - 6
Clean up and dispose
Dispose of the old bulb according to local guidelines. Wipe down the shade area and store any spare bulbs in a labeled container for future use.
Tip: Keep a small inventory of extra C7 bulbs for quick replacements during holidays.
Got Questions?
What is a C7 bulb and where is it used?
A C7 bulb is a small decorative bulb used in string lights and fixtures. It typically features a candelabra base and a slender shape for a warm glow, making it popular in holiday and accent lighting. Always check base type and fixture compatibility before replacement.
A C7 bulb is a small decorative bulb used in fixtures. Check the base and compatibility before replacing.
How do I know if I should use LED or incandescent C7 bulbs?
LED C7 bulbs are usually recommended for longevity and lower heat, while incandescent bulbs provide traditional warmth. If the fixture is on for long periods or you want lower energy use, LED is typically the better choice.
LED C7 bulbs last longer and use less energy; incandescent give a traditional warm glow.
My bulb is stuck. What should I do?
If the bulb is firmly stuck, power down, wait, and try again with a gentle twist. Avoid forcing the bulb; excessive force can crack the glass or damage the socket. If it remains stuck, consult a professional.
If stuck, power off and gently retry. Don’t force it; seek help if needed.
Can I replace a C7 bulb in a dimmer fixture?
Yes, but ensure the bulb is dimmable and compatible with your dimmer switch. Some dimmers require specific LED types or compatible dimming technology to work correctly.
Yes, use a dimmable bulb and a compatible dimmer.
How should I dispose of old C7 bulbs?
Dispose of bulbs according to local guidelines. Place old bulbs in a sturdy container to avoid breakage and transport them safely to a recycling or disposal facility.
Follow local rules for disposing bulbs; use a sturdy container.
What if the fixture is enclosed or tight?
If the fixture is enclosed, use bulbs labeled for enclosed fixtures and ensure heat buildup is not excessive. If unsure, consult the fixture manufacturer or a licensed electrician.
Enclosed fixtures may require special bulbs; check the label and consult a pro if unsure.
Watch Video
Key Points
- Power off before handling any bulb.
- Choose the correct C7 base and socket compatibility.
- Consider LED options for longevity and energy savings.
- Handle bulbs with gloves to avoid fingerprint oils.
- Test the fixture after installation and dispose of old bulbs safely.