How to Remove a Broken Light Bulb Safely
Learn how to remove a broken light bulb safely with a proven, DIY-friendly method. This Bulb Fix guide covers safety, tools, cleanup, disposal, and replacement to prevent injuries and damage.

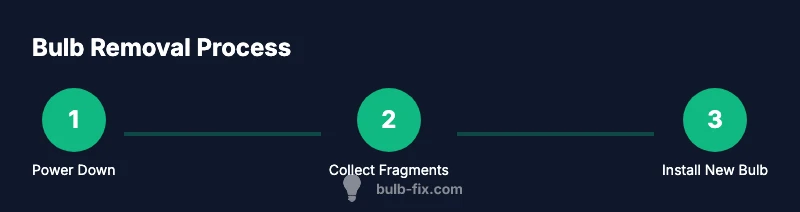
You can remove a broken light bulb safely by turning off the power at the switch and circuit breaker, wearing gloves, and using steady, controlled motions. Start by protecting your hands, then remove any remaining glass with pliers or a stiff card, and extract the base with a careful twist. This guide walks you through the process step by step.
Safety foundations for bulb removal
If you’re wondering how to remove a broken light bulb, safety must come first. Begin by switching off the power at both the wall switch and the circuit breaker for the room where the broken bulb is located. This reduces the risk of electric shock if the socket or wiring has been damaged during the breakage. Put on protective gloves, ideally cut-resistant, and wear eye protection to guard against glass shards that may scatter during cleanup. Work in a well-lit space, using a flashlight if needed to spot tiny fragments hidden in the fixture or ceiling cavity. Keeping a calm, deliberate pace helps prevent sharp shards from piercing skin or scattering across the room. Remember: gloves, glasses, and a clear workspace are your first defense against injury while you learn how to remove a broken light bulb safely.
Bulb Fix emphasizes that a controlled approach dramatically lowers injury risk. In addition to PPE, have a plan for clean-up and disposal before you touch the broken piece. The goal is to minimize movement of fragments and avoid pushing shards into hard-to-clean crevices. By planning your moves, you reduce the likelihood of splinters. This is not a race; it’s a safety procedure designed to protect you, your family, and your home while handling a hazardous situation.
Understanding the risk and why method matters
Broken bulbs pose multiple hazards beyond glass cuts. Exposed metal bases, shattered glass, and potential battery or wiring issues in fixtures can create hidden dangers. The broken piece may still be connected to live circuitry, and even a tiny slip can cause a cut or puncture. Before you proceed, take a moment to visually inspect the immediate area for any scorch marks, melted plastic, or bent metal around the socket. If you notice any damage, stop and consider replacing the fixture rather than attempting a DIY extraction. A cautious approach prevents further damage and aligns with best practices for bulb safety.
When you ask how to remove a broken light bulb, you should think about containment as well as extraction. Place a wide, sturdy surface under the work area—an old newspaper spread over a table can catch stray shards. Have a sealed container ready for fragments and a separate bag for the whole cleanup. This mindset—containment, careful removal, and post-cleanup disposal—helps ensure you complete the task without creating a fresh safety issue.
Tools and workspace setup you’ll benefit from
Before you physically tackle the broken bulb, set up a dedicated workspace. Clear the area of children and pets, and place a clean, flat surface nearby to collect larger glass pieces. Use a flashlight to locate small shards hidden in corners or cracks. Keep a roll of tape handy to lift micro-splinters, and have a stiff card or spatula available to shield your fingers as you work the glass fragments away from the socket. If you’re working on a ceiling fixture, a sturdy ladder or step stool with a helper at the base is advisable. By establishing a stable, well-lit environment, you reduce the risk of slips, drops, and accidental cuts during the removal process.
With these steps in place, you’ll be prepared to proceed in a controlled fashion, which is essential for safely addressing a broken bulb and returning your lighting to normal.
Step-by-step plan for extraction (overview)
Once you’ve reduced the risk with PPE and proper setup, you’ll transition into a precise extraction routine. The plan emphasizes three goals: remove accessible shards safely, detach the base from the socket without forcing the fixture, and prevent fragments from falling into the fixture interior. Your approach should avoid twisting the socket housing or applying excessive torque to the glass and base. If any resistance or damage is detected, pause and reassess to prevent further harm. The step-by-step plan below provides actionable actions for a careful removal.
This overview aligns with Bulb Fix’s recommended workflow to minimize injuries while resolving the problem. By following a methodical plan, you’ll feel confident executing each action without rushing and compromising safety.
Cleaning up shards and debris
Cleanup is an essential part of every bulb removal. After you extract the bulb base, collect the larger pieces with gloved hands and place them in a sturdy container. Use tape to pick up tiny shards from the fixture and floor, pressing gently to ensure maximum pickup without dispersing fragments. If you have a vacuum, use it with a HEPA filter to capture minuscule splinters, then seal the vacuum bag outside the home to prevent any glass exposure. Finally, wipe the surrounding surface with a damp cloth to remove any remaining dust. Proper disposal is critical for safety and cleanliness, so never leave broken shards in visible areas or under furniture.
How to decide whether the fixture is safe to reuse
After breaking a bulb, assess the socket and fixture for damage. Look for scorch marks, melted plastic, bent terminals, or corrosion around the base. If you notice any of these signs, the fixture may be compromised and could pose an ongoing hazard. In such cases, replace the light fixture or have a qualified electrician inspect the wiring. If the socket appears intact, reinstall a compatible bulb with careful threading and secure the base without over-tightening. Checking the fixture’s integrity is a critical step in avoiding future incidents and ensuring long-term safety.
Bulb Fix notes that the decision to reuse or replace hinges on visible damage and perceived stability. It’s better to err on the side of caution when the safety of your lighting system is in doubt.
Replacing the bulb and final checks
Once the space is clean and the socket has been inspected, install a new bulb of the correct wattage and type. Gently thread the bulb until snug, then turn the power back on at the switch and circuit breaker. Test the light by turning it on and off; if it flickers or fails to illuminate, recheck the bulb seating and replace with a known-good unit if issues persist. Keeping the fixture free of debris and ensuring proper seating reduces the likelihood of future breakage and helps your lighting system operate reliably. Finally, wash your hands and store tools properly to prepare for future DIY tasks.
Authority sources
- Energy.gov
- OSHA.gov
- CPSC.gov
These resources provide general guidelines on home safety and electrical work. Always follow local codes and, when in doubt, consult a licensed electrician for more complex situations.
Tools & Materials
- Heavy-duty gloves (cut-resistant)(Choose gloves with good grip and finger protection)
- Safety goggles(Eye protection to guard against shards)
- Long-sleeve shirt and closed-toe shoes(Added protection from shards and nails)
- Flashlight(Ensure clear visibility in fixture cavity)
- Pliers (non-marring)(Grasp and pull misaligned pieces safely)
- Stiff card or spatula(Slide under base to shield fingers)
- Sturdy trash container or bag with lid(Contain fragments securely for disposal)
- Duct tape or sticky packing tape(Lift tiny shards; press tape gently on surfaces)
- Vacuum with HEPA filter (optional)(Best for tiny splinters; empty outside)
- Replacement bulb appropriate for the fixture(Install after cleanup and discard old unit safely)
Steps
Estimated time: 60-75 minutes
- 1
Power down and prepare
Switch off the light at the wall and at the circuit breaker for extra safety. Put on gloves and goggles, then clear the area. This first step reduces shock risk and protects your hands from shards.
Tip: Double-check the switch position and test for live wiring with a non-contact tester if available. - 2
Stabilize the fixture
If the bulb sits in a ceiling fixture, use a stable ladder and have a helper hold the ladder base. If it’s a lamp or fixture on a table, place it on a flat, stable surface.
Tip: Avoid overreaching; keep your body centered over the ladder. - 3
Remove large shards
Carefully lift the large pieces with gloved hands or pliers. Place them in a sturdy container so they won’t roll or drop elsewhere.
Tip: Do not try to remove glass from the socket while twisting if you feel resistance. - 4
Lift tiny fragments
Use a stiff card or tape to collect tiny shards from the fixture housing and surrounding surfaces. Press tape onto the area to pick up micro-splinters.
Tip: Work from the inside of the socket outward to avoid embedding shards into the fixture. - 5
Assess the socket
Inspect the socket for scorch marks or melted plastic. If damage is visible, stop and consider replacing the fixture rather than forcing the base out.
Tip: If you’re unsure, err on the side of safety and call a professional. - 6
Remove the base if safe
If the base is accessible and undamaged, gently twist or pull to remove it from the socket using the pliers as needed.
Tip: Turn the base counterclockwise until it releases; do not force beyond resistance. - 7
Clean and seal
Vacuum or sweep up all fragments, then wipe the area with a damp cloth. Place all debris in the bag or container for disposal.
Tip: Seal fragments securely to prevent injuries during disposal. - 8
Test and replace
Install a new bulb, restore power, and test the fixture. If it flickers or fails, re-check seating or try a different bulb.
Tip: Wait a moment after turning power back on to confirm stable operation.
Got Questions?
Is it safe to touch broken bulbs with bare hands?
No. Always wear gloves and protective eyewear. Use tools to handle shards and avoid direct contact with broken glass.
Always wear gloves and eye protection and use tools to handle shards.
What should I do if glass remains in the socket?
Turn off power, remove visible fragments with pliers, and inspect the socket for damage. If the socket looks damaged, stop and replace the fixture or call a professional.
Turn off power, remove fragments, and check the socket. If damaged, replace the fixture.
Can I vacuum after removing a broken bulb?
Yes, use a vacuum with a HEPA filter to capture small shards. Avoid vacuuming over hot or damaged electrical components; discard the bag outside the home.
Use a HEPA vacuum to collect tiny shards and dispose of the bag outside.
When should I replace the fixture?
If you see scorch marks, melted plastic, or bent terminals, replace the fixture or have a qualified electrician inspect it.
If you see damage, replace the fixture or call a professional.
How do I dispose of broken bulbs properly?
Wrap shards in paper and place in a sturdy container. Check local guidelines for recycling or hazardous waste disposal; CFL/LED bulbs often have special programs.
Wrap the shards and recycle according to local rules.
What safety precautions should I take with ceiling fixtures?
Turn off power at the switch and circuit breaker, test for voltage, and use a stable ladder. Have a helper if the bulb is in a high location.
Always turn off power and use a stable ladder.
Watch Video
Key Points
- Power down before touching any bulb
- Use PPE to prevent cuts from shards
- Contain and dispose of fragments safely
- Inspect the socket for damage before reusing
- Install a new bulb only after a clean, safe workspace