Light Bulb Under Microwave: Safe Handling Guide Tips
A practical guide to safely handling a light bulb under a microwave, covering removal, safety precautions, proper disposal, and troubleshooting tips from Bulb Fix.

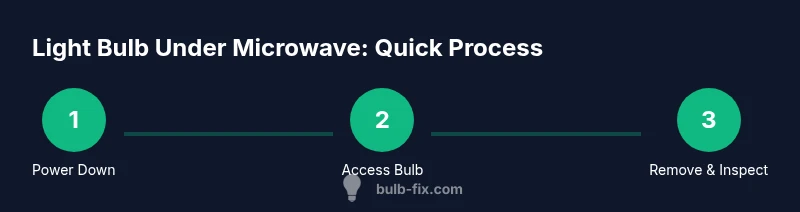
Steps to safely address a light bulb under a microwave: unplug the appliance and wait for cooling; put on gloves and eye protection; access the bulb area and gently remove the bulb with a non‑metal tool; inspect the socket for damage, replace with the correct bulb, then reseat and test. According to Bulb Fix, never power on until everything is resealed.
Understanding the risk of a light bulb under the microwave
The phrase light bulb under microwave describes a situation where the appliance's interior or exterior area hosts a bulb that has been exposed to heat, steam, or contact with metal. This setup can create electrical hazards, burn risks, and glass shards if the bulb breaks. In residential kitchens, a bulb in the project zone is common in older homes or after maintenance. By recognizing the potential hazards, homeowners can approach the task with a plan, pace, and proper safety gear. Bulb Fix emphasizes that awareness is the first safeguard and that rushing the job increases the chance of injury or damage.
Safety prerequisites before you begin
Before touching any component, ensure the microwave is disconnected from power: unplug from the wall outlet or switch off the circuit at the breaker if accessible. Wait at least 5–10 minutes for internal components to cool. Keep candles, liquids, and clutter away from the workspace. If you share the space with pets or children, create a temporary safe zone. These steps reduce the risk of electric shock and burns while you inspect or replace a bulb.
PPE and workspace setup
Personal protective equipment helps prevent injuries from glass or hot surfaces. Put on non‑conductive gloves, safety goggles, and a lightweight long-sleeve layer. Use a sturdy, stable step stool if you need to reach a high area, and keep a flashlight handy. Clear a clean, dry surface for tools and the bulb. A small bucket or tray catches any accidental drops.
Step-by-step safety-focused removal overview
The following actions form the core sequence for a safe bulb change under a microwave. Each action reduces risk and should be performed deliberately and slowly. If any step feels unsafe, stop and reassess before proceeding.
Replacement considerations and socket inspection
When selecting a replacement, use the bulb type and wattage specified by the appliance manual or the label on the socket. A mismatched bulb can overheat or fail prematurely. Inspect the socket and surrounding housing for cracks, discoloration, or melted plastic. If you notice damage, do not install a new bulb; address the fixture or seek professional help.
Cleaning, reassembly, and final test
After installing the new bulb, reassemble any panels or covers, ensure all seals are intact, and plug the microwave back in. Wipe away dust with a dry microfiber cloth. Restore the exterior and perform a controlled test: run the microwave on a short, empty cycle to verify the light functions and there are no unusual smells or smoke. If you detect issues, power down immediately.
Disposal, maintenance, and long‑term safety tips
Disposal: place the removed bulb in a sealed bag or wrap it to prevent shards, then follow local guidelines for disposal or recycling. Regularly inspect the bulb area for scorch marks, loose connectors, or moisture. Periodic maintenance reduces the risk of future bulb failures and helps keep the kitchen safe.
Tools & Materials
- Insulated gloves(to protect hands from glass and heat)
- Safety goggles(eye protection against shards)
- Flashlight(to illuminate tight spaces)
- Non-metal tool (e.g., plastic pry tool)(helps lift or wedge bulb without shorting components)
- Replacement bulb (exact type/wattage)(check model label or manual for compatibility)
- Soft cloth or microfiber towel(for wiping dust or residues)
- Step stool or stable aid(for reaching elevated areas safely)
Steps
Estimated time: 15-25 minutes
- 1
Power down and cool
Unplug the microwave from the wall outlet and allow the interior to cool for 5–10 minutes before any handling. This minimizes the risk of burns or accidental contact with hot components.
Tip: Always verify the unit is completely unplugged before touching internal parts. - 2
Access the bulb area
Open the exterior panel or vent cover as needed to reach the bulb housing. Use a flashlight to confirm there are no hidden hot spots and that you can safely reach the bulb without forcing components.
Tip: Keep your other hand on a stable surface to prevent slips. - 3
Remove the old bulb
Grip the bulb with gloved hands or a plastic tool and turn it counterclockwise until it loosens. If the bulb resists, stop and reassess rather than forcing it, which can break the bulb or socket.
Tip: Do not twist with bare skin; oils can degrade the bulb base. - 4
Inspect the socket
Check for scorch marks, melted plastic, or loose connectors. If you see damage, do not install a replacement bulb—address the fixture or seek professional service.
Tip: Document any visible damage with a photo for reference if you seek help. - 5
Install the new bulb
Screw the new bulb firmly into the socket without overtightening. Avoid touching the glass with bare fingers; use a cloth to handle the glass portion.
Tip: Handle the bulb by the base and wipe with cloth to remove fingerprints. - 6
Test and reassemble
Re-seat any panels, plug the unit back in, and run a short no-load cycle to confirm the bulb illuminates smoothly. If there are odd sounds or smells, power down immediately and recheck connections.
Tip: If the bulb flickers, power down and verify seating and socket integrity.
Got Questions?
Is it safe to touch a light bulb under a microwave?
Yes, if you unplug the unit and allow it to cool completely, and you wear PPE. If you notice damage, stop and consult a professional.
Yes, unplug, wait for cooling, and wear PPE; stop if you see damage.
What type of bulb is used in microwaves?
Microwaves typically use a small incandescent or halogen bulb. Check the manual or the socket label to confirm the exact wattage and base type before replacement.
Most microwaves use a small bulb; check your manual for the exact type.
What if the socket looks damaged?
Do not force a bulb into a damaged socket. Stop and replace or repair the fixture. Look for scorch marks, melted plastic, or loose connections.
If you see damage, stop and call a professional.
Can I reuse a bulb after cleaning?
Do not reuse a bulb if there were signs of damage or exposure to heat. Replace with a new bulb and ensure the area is clean.
Don’t reuse a damaged or overheated bulb.
Where should I dispose of the bulb?
Follow local guidelines for bulb disposal or recycling. Many communities have household hazardous waste programs for lamps.
Dispose per local guidelines; recycling may be available.
Watch Video
Key Points
- Unplug before touching the bulb
- Wear PPE to protect eyes and hands
- Use the correct replacement bulb
- Dispose of the bulb safely and inspect for damage