Halogen Bulbs Troubleshooting: A Practical Home Guide
Learn what's wrong with halogen bulbs and how to troubleshoot flicker, dimming, buzzing, or failure. This Bulb Fix guide covers quick checks, safe fixes, and prevention tips to keep lighting bright and reliable.

Most halogen bulb problems stem from loose connections, worn filaments, or supply issues. Start by inspecting the socket and replacing any bulbs with discoloration, then test the circuit for proper voltage. If the issue continues, follow our diagnostic flow for deeper troubleshooting.
What's wrong with halogen bulbs and why it happens
What's wrong with halogen bulbs is a common question for homeowners, and sensitivity to power can make even fresh bulbs flicker. According to Bulb Fix, the vast majority of issues stem from electrical connections rather than a faulty bulb. The most common symptoms are flickering, dimming, buzzing sounds, or complete failure to light. In many homes, these problems trace back to insecure connections, incorrect voltage, or worn filaments. Before blaming the bulb itself, inspect the fixture, socket, and power supply. Halogen bulbs are efficient and bright when fed with clean power, but even small wiring flaws can lead to early burnout or uneven performance. By understanding the typical failure modes, you can decide whether a quick bulb swap is enough or if a larger fixture repair is required.
Quick checks you can do now
If your halogen bulb isn't performing, start with the simplest checks first. Ensure the fixture is powered off at the wall and the bulb is cool before touching it. Inspect the socket for corrosion, bent contacts, or loose wires. Remove the bulb, wipe the base gently with a dry cloth, and reinsert firmly. Confirm you're using the correct base type and wattage rating for the fixture. If you have a dimmer, verify compatibility with halogen loads and the dimmer's minimum setting. These quick checks catch most easy fixes without tools and reduce unnecessary bulb replacements. If the bulb still behaves oddly, move on to the diagnostic flow below.
How to read a fixture’s electrical health
Halogen fixtures can look straightforward, but the underlying electrical health matters just as much as the bulb. Look for stable voltage at the outlet and, if you're on low-voltage halogen lamps (12V), ensure your transformer or electronic driver is delivering the correct current. A flicker often signals voltage dips; a persistent buzz can indicate a loose connection or an aging transformer. If you don't have a meter, you can still perform a qualitative check by swapping in a known-good bulb and noting whether the problem follows the bulb or stays with the fixture. Treat any metal contact corrosion or heat damage seriously; these are signs the fixture needs service.
Practical fixes: when to replace, adjust, or upgrade
Most issues resolve after addressing socket contacts, voltage supply, or compatibility. Start by replacing the bulb with a like-for-like model (same base and wattage) to test whether the bulb itself was failing. If flicker continues, clean or replace the socket contacts and tighten securing screws. For 12V systems, verify the transformer is the correct type and loaded within its rated range; an oversized or undersized transformer can cause dimming or buzzing. If your fixture is older or overheating, consider upgrading to a fixture designed for the load, or adding ventilation. Finally, if you notice wiring damage, only a licensed electrician should repair it.
Safety notes and common mistakes
Safety should come first when troubleshooting halogen bulbs. Always switch off power at the breaker before touching any fixture or bulb. Never force a loose socket or metal contact; handle bulbs with gloves to avoid oils from skin transferring to the glass, which can shorten lifespan. Common mistakes include using the wrong Wattage, mixing dimmer types with non-dimmable bulbs, and neglecting transformer compatibility. If you feel unsure at any step, pause and consult a professional. The risk of electric shock or fire makes safety non-negotiable.
Prevention: keep halogen bulbs running smoothly
Preventive steps save time and money. Use bulbs with the correct wattage and base, inspect fixtures annually for corrosion, and ensure proper ventilation to prevent overheating. If you frequently replace bulbs, check the fixture or transformer for overload and consider upgrading to a more efficient recessed or track lighting solution that maintains safe clearances. Label and organize replacements so you always have the right bulb on hand.
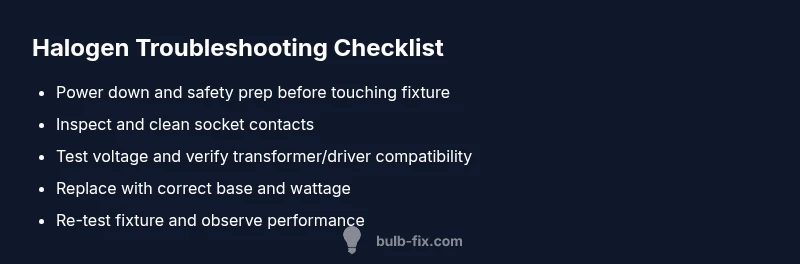
Steps
Estimated time: 45-60 minutes
- 1
Power down and prep
Turn off the circuit at the breaker and let the fixture cool. Gather a clean cloth, insulated gloves, and a replacement bulb of the correct base and wattage. This first step reduces shock risk and protects the bulb from fingerprints.
Tip: Never touch the glass with bare fingers; oils reduce bulb life. - 2
Inspect socket contacts
Carefully remove the bulb and visually inspect the socket for corrosion, bent or loose contacts, or burnt marks. If contacts look damaged, do not force the bulb back in; consider replacing the socket or fixture.
Tip: Use a clean, dry cloth to wipe contacts; avoid liquids. - 3
Check voltage and power supply
If you have voltage testing tools, verify the outlet provides stable voltage and that a 12V system has a functioning transformer/driver within its rated load. Flicker may point to dips in supply.
Tip: Ensure the fixture is isolated when testing to avoid shock. - 4
Test with a known-good bulb
Swap in a bulb you know works in other fixtures of the same base. If the new bulb lights stably, the old bulb was likely at fault; if the new bulb also fails, the fixture or wiring is suspect.
Tip: Keep a small log of which bulbs were tested and outcomes. - 5
Address dimmer/transformer issues
If your setup uses a dimmer or transformer, confirm it matches the bulb type (halogen in many cases) and that the load is within the device’s specification. Replace with a compatible component if needed.
Tip: Avoid mixing non-dimmable bulbs with dimmers. - 6
Reassemble and test
Reinsert the bulb firmly, restore power, and observe performance for a full cycle. If problems persist, escalate to a professional electrician.
Tip: Document any strange behavior for the technician.
Diagnosis: Bulb flickers, buzzes, dims, or won’t light
Possible Causes
- highLoose or corroded socket contacts
- mediumVoltage fluctuation or incorrect supply
- mediumWorn filament in the bulb
- lowIncompatible dimmer or transformer
Fixes
- easyTighten or replace socket contacts and re-seat the bulb
- mediumTest the circuit voltage with a multimeter and correct any supply issues
- easyReplace with a like-for-like bulb (same base and wattage)
- mediumCheck dimmer/transformer compatibility or replace with compatible hardware
Got Questions?
Why is my halogen bulb flickering?
Flickering is usually caused by voltage dips, loose socket connections, or a failing transformer. Check the socket contacts and test the voltage supply. If the issue follows the bulb, replace with a like-for-like bulb and re-test.
Flickering usually comes from voltage dips, a loose socket, or a failing transformer. Check contacts, test voltage, and replace with a proper bulb to test.
Can I use LED bulbs in a halogen fixture?
LED replacements require compatible fixtures and drivers. Many halogen fixtures are not designed for LED drivers, especially if a transformer is involved. Check base, wattage, and electrical compatibility before changing to LED.
LEDs can work, but you must confirm base, wattage, and driver compatibility with your halogen fixture.
Is it safe to touch halogen bulbs?
It's best to handle halogen bulbs with clean gloves or a cloth to avoid skin oils. Hold by the base, not the glass, to minimize heat transfer and damage.
Handle bulbs with gloves and avoid touching the glass directly.
Do I need a transformer for 12V halogen bulbs?
Most 12V halogen bulbs require a compatible transformer or electronic driver. Ensure the transformer is rated for the total wattage and type of bulbs used. Replacing with an incompatible driver can cause flicker or failure.
Yes, many 12V halogens need a proper transformer or driver; check ratings before swapping.
How often should halogen bulbs be replaced?
Halogen bulbs typically last longer with proper ventilation and clean contacts, but life varies by usage and fixture. If you notice frequent dimming or flicker, inspect the fixture for heat buildup or electrical issues and replace only when necessary.
Halogen bulbs last longer with good airflow and clean sockets; replace when you notice dimming or flicker.
Watch Video
Key Points
- Test socket health before bulb replacements
- Verify voltage and transformer/dimmer compatibility
- Use proper base and wattage for each fixture
- Prioritize safety and consult a professional when in doubt
- Prevent future issues with regular inspection and ventilation