Why Is My Bulb Still On When Switched Off? Quick Diagnosis and Fixes
Learn why a bulb remains lit after switching it off and how to diagnose the issue safely. This Bulb Fix guide covers common causes, quick checks, and practical fixes to help homeowners restore normal lighting fast.

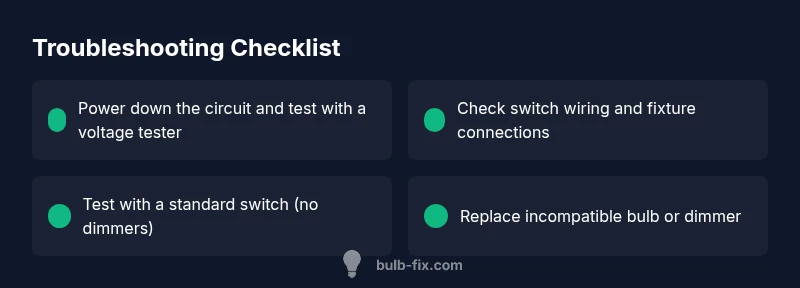
Most bulbs stay on due to a faulty switch, a mismatched dimmer, or a backfed circuit. Turn off power at the breaker, then inspect the switch wiring and fixture connections. If a dimmer or smart bulb is involved, replace it with a standard switch and a compatible bulb.
Understanding the symptom: bulb stays on when off
If you’re reading this, you’ve noticed the bulb remains lit even when you flip the switch to off. This is more than just annoying; it can indicate a wiring issue or a device mismatch that could present safety risks. In many homes, a bulb that won’t turn off points to a few common culprits: a switch that’s worn out or wired backward, a dimmer or smart-bulb setup that leaks current, or a circuit where power is still being supplied through an adjacent fixture. The keyword here is diagnosis: you want to identify whether the problem is localized to the switch box, the fixture, or a portable device. Start with the simplest checks first: ensure the power is truly off and confirm you’re testing the correct circuit. Remember, dealing with live wires can be dangerous—if you feel unsure at any point, switch off power at the main breaker and call a licensed professional.
Common electrical causes you should know
There are several legitimate reasons a bulb can stay lit after switching off. A worn or miswired wall switch may leak a small current that keeps the filament energized. Dimmer switches, especially older models or non-compatible types, can allow ghost current to flow even when the switch is off. In homes with smart bulbs, a hub or bridge may send standby power that keeps the circuit energized. Finally, improper wiring in a switch loop or fixture can create a backfeed, causing the bulb to glow faintly or stay fully lit. Understanding these scenarios helps you prioritize checks and choose safe, appropriate fixes. Bulb types (LED vs incandescent) can also influence how noticeable the issue appears because LEDs require much less current to glow. Always approach troubleshooting with safety in mind and consult professional help if you’re unsure about wiring.
Quick checks you can perform safely
Before diving into wiring, perform basic safety checks. First, confirm the power is off by flipping the breaker and testing the outlet or fixture with a non-contact voltage tester. Inspect the visible wiring at the switch and light fixture for loose connections, damaged insulation, or scorch marks. If you’re comfortable, reseat wire connectors and ensure wire nuts are tight. For dimmer-controlled lights, try replacing the dimmer with a standard switch to see if the issue resolves. If you have a smart bulb, test by removing the hub or bridge temporarily to determine if it’s contributing to standby current. If any wiring looks damaged, stop and call a licensed electrician.
Diagnosing switch and wiring issues
Diagnosing effectively means isolating components. Start by turning off power, then test the switch for mechanical wear—does the toggle feel loose or sticky? Use a multimeter to check continuity when the switch is in the off position. If the switch tests fine, move to the fixture: loosen the fixture screws and inspect all wire connections, looking for loose neutrals or hot wires. A loose neutral can cause backfeeding that keeps the bulb energized. If you discover a dimmer or smart-device in the circuit, verify compatibility with your bulb type. Incompatible combinations can leak current when “off.” If you’re unsure about wiring or you observe signs of heat or burning, stop and call a professional immediately.
When a dimmer or smart bulb is involved
Dimmer switches and smart bulbs introduce extra complexity. Some dimmers leak a small current even when off to power their electronics, which can be enough to keep LEDs glowing. Smart bulbs may draw current through a hub or bridge, creating a standby path that keeps the lamp energized. If you suspect this is the culprit, replace the dimmer with a standard switch and switch to a bulb that’s compatible with the new switch type. If a smart setup is essential, ensure all devices are designed to work together and consider a dedicated dimmer-rated smart control. In mixed setups, testing changes one component at a time helps identify the exact source.
Step-by-step fixes you can try (non-destructive)
If you’re comfortable, follow these non-destructive steps to systematically address the issue without rewiring the house. First, verify power off and inspect the switch and fixture for visible damage. Then, reseat all connections and replace any damaged wire nuts. Swap the dimmer or smart device for a standard switch and a compatible bulb to test if the issue resolves. Finally, test the circuit with a replacement bulb of the same type. If the problem persists after these steps, it’s time to consult a licensed electrician to prevent safety hazards.
Safety and prevention tips to avoid future issues
Safety is non-negotiable when working with electrical systems. Always assume circuits are energized until proven off with a tester. Use insulated tools, keep liquids away from work areas, and never work alone when testing live circuits. Label circuits at the breaker panel so you know which room or fixture you’re working on. For prevention, choose bulbs and switches that are clearly compatible, avoid overloading dimmers, and schedule periodic checks of switches and fixtures for wear or heat signs. If you’re not confident in any step, pause and call a professional. Regular inspections by a qualified electrician can catch issues before they become hazards.
Steps
Estimated time: 45-90 minutes
- 1
Power down the circuit
Shut off power at the main breaker for the circuit you’ll be testing. Use a non-contact tester on the fixture and switch area to confirm no voltage is present before you touch wires. This initial check prevents accidental shock and ensures a safe starting point.
Tip: Always test for voltage before touching wires. - 2
Inspect the wall switch
Remove the switch plate and examine the switch for looseness, arcing marks, or melted insulation. With the power off, gently wiggle the wires to ensure solid connections; if a screw is loose, tighten it snugly. Replace the switch if it shows signs of wear or damage.
Tip: A loose terminal is a common culprit; don't over-tighten and damage the conductor. - 3
Check fixture and wiring connections
Expose the fixture’s wiring and verify all connectors are tight and properly seated. Look for loose neutrals or hot wires tucked under wire nuts. If you see insulation damage or scorched insulation, stop and replace the affected wires or fixtures.
Tip: Do not reuse damaged conductors; replace damaged parts. - 4
Test for ghost voltage
Use a multimeter to check for residual voltage when the switch is off. Ghost voltage can indicate leakage that keeps LEDs energized. If you observe voltage, isolate the circuit or replace the device causing the leak.
Tip: Ghost voltage is subtle; use a proper meter for accurate readings. - 5
Evaluate dimmer/smart-device compatibility
If you have a dimmer, remove it and install a standard switch to test whether the bulb turns off fully. For smart bulbs, try a direct bulb test and temporarily remove the hub or bridge to see if standby power is the issue.
Tip: Component compatibility is critical for off-state behavior. - 6
Replace with compatible components
If the test shows the issue stems from a non-compatible dimmer or smart-bulb setup, replace with a standard switch and a bulb rated for your fixture. Verify wattage, base type, and dimmer compatibility before purchasing.
Tip: Match the bulb and switch specifications to avoid recurrence. - 7
Verify full functionality
Reassemble the wall plate, restore power, and test the lighting. Confirm the bulb fully turns off with the switch and that no heat or buzzing is present. If anything seems off, disconnect power and seek professional help.
Tip: Document the changes you made for future reference.
Diagnosis: Bulb stays on after switch is turned off.
Possible Causes
- highStuck or miswired switch
- mediumIncompatible dimmer or smart bulb switching circuit
- lowGhost voltage/backfeed in switched loop
Fixes
- easyTurn off power at the main breaker and verify the switch wiring with a non-contact tester; reseat wires or replace the switch if needed.
- mediumReplace incompatible dimmer or smart-bulb setup with a standard switch and a compatible bulb.
- hardInspect fixture wirings and neutral connections; if wiring is damaged or circuit is complex, call a licensed electrician.
Got Questions?
Why does my bulb stay on even when I switch it off?
Common causes include a faulty switch, dimmer or smart-bulb compatibility issues, or ghost voltage/backfeed in the wiring. Systematically testing components helps identify the source.
A bulb staying on after you switch it off is usually due to a faulty switch, an incompatible dimmer or smart bulb setup, or ghost voltage. Test each component to find the source.
Can a dimmer cause a bulb to stay on?
Yes. Some dimmers leak current even when off, especially with LEDs. If this happens, replace the dimmer or use a standard switch with a compatible bulb.
Yes—an incompatible or faulty dimmer can keep a bulb lit.
What is ghost voltage and how does it affect bulbs?
Ghost voltage is a tiny, harmless voltage that can leak through wiring or devices. It can keep energy flowing enough to dimly glow LEDs. Proper testing helps confirm if it’s the cause.
Ghost voltage is a small leak that can keep LEDs faintly on. Check wiring and devices to confirm.
Is it safe to DIY fixes for a bulb that won’t turn off?
Basic checks like power-down testing and non-destructive wiring inspections are safe if you follow safety guidelines. If you see damaged insulation, heat marks, or aren’t sure, call a professional.
DIY can be safe for simple checks, but don’t work with damaged wiring—call an electrician.
Do LED bulbs behave differently from incandescent in this issue?
LEDs draw much less current and are more prone to ghost voltage and dimmer leakage. The fix often involves switching to compatible components or adjusting the dimmer/switch.
LEDs are more sensitive to current leaks; compatibility matters.
Watch Video
Key Points
- Power down before inspecting any wiring
- Check switch and fixture connections for looseness
- Test component compatibility (dimmer/smart) if relevant
- Replace with standard, compatible parts when possible
- Call a licensed electrician for complex wiring or persistent issues