Why Light Bulbs Burn Out Constantly: A Practical Troubleshooting Guide
Discover practical steps to address why light bulbs burn out constantly, with safety tips, diagnostic flow, and prevention strategies from Bulb Fix.

The most likely culprit is a fixture issue rather than a bad bulb: a loose socket, corroded contact, or an incompatible wattage. Start by shutting off power and inspecting the socket, then replace with a bulb that matches the fixture rating. If the bulb still dies quickly, test wiring or a dimmer, and replace damaged components. For persistent burnout, consult a licensed electrician.
Why the phrase "why light bulb burns out constantly" matters
The question many homeowners ask, "why light bulb burns out constantly," points to a pattern beyond a single defective bulb. According to Bulb Fix, most burnout cases come from fixture-related issues rather than a faulty bulb alone. In practice, this means checking sockets for corrosion, ensuring the contact point is tight, and confirming the bulb wattage matches the fixture’s rating. A bulb that seems fine can fail prematurely if the base isn’t making solid contact or if heat is trapped inside a small, enclosed fixture. Recognize that addressing these root causes can dramatically extend bulb life and reduce waste. This guide from the Bulb Fix Team focuses on safe, repeatable steps you can perform with common household tools. By understanding the typical failure modes, you’ll spend less time guessing and more time enjoying reliable lighting.
Common causes at a glance
- Loose or corroded sockets: Contacts that don’t grip the bulb firmly can arc or heat unevenly, shortening life.
- Wrong wattage or incompatible dimmers: A bulb that draws more current than the fixture is designed to handle overheats quickly.
- Overheating in enclosed fixtures: Trapped heat accelerates filament wear and shortens bulb life.
- Poor wiring or arcing: Subtle voltage irregularities can fry filaments over time if not corrected.
- Substandard bulbs: Low-quality bulbs can fail early under normal loads.
How to inspect safely
Power down at the breaker before touching any fixture. Use a stool or ladder with good footing, and wear eye protection. Remove the bulb gently and inspect the base and socket for signs of corrosion, soot, or melted plastic. If the socket is discolored or loose, do not force a replacement bulb in; replace the socket or fixture as needed. If you have a meter and know how to use it, measure the voltage at the socket to confirm it’s within the fixture’s rated range. Keep a log of which fixtures you test and any patterns you notice (same room, same bulb type, or same wattage).
Diagnostic flow you can follow
This section lays out a practical pathway from symptom to solution without assuming expert tools. First, verify power and switch operation. Next, inspect socket integrity and bulb seating. Then confirm the bulb type, wattage, and compatibility with the fixture. If symptoms persist (flicker, rapid burnout, or unusual heat), consider wiring or voltage issues and whether an upgraded fixture or surge protection is warranted. The goal is to isolate whether the problem is physical (socket/fixture), electrical (voltage/arcs), or selection-related (wrong bulb for the fixture).
Step-by-step fixes you can try first
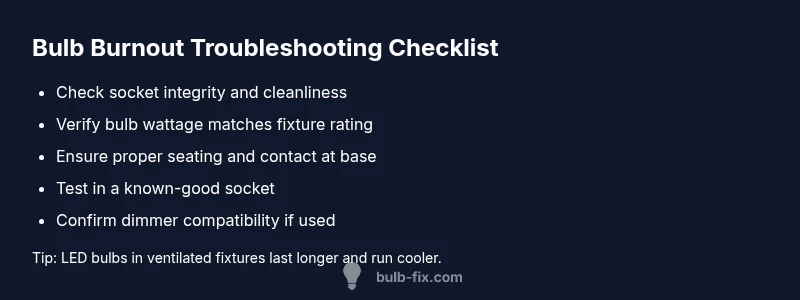
- Tighten and clean contacts: Ensure the socket grip is firm; clean any corrosion with a dry cloth and reinsert the bulb. 2) Check wattage: Confirm the bulb’s wattage matches the fixture rating and replace with the recommended type (LEDs often run cooler and last longer). 3) Inspect the fixture: Look for signs of overheating, soot, or melted plastic; replace the socket or entire fixture if necessary. 4) Test in a known-good socket: If possible, install the bulb in another compatible fixture to see if the burn-out reoccurs. 5) Consider dimmer compatibility: If you use a dimmer, ensure the bulb type is dimmable and compatible with the dimmer switch.
Safety, common mistakes, and when to call a pro
- Safety first: Always cut power at the breaker and use insulated tools where possible.
- Avoid over-tightening: It can strip threads or damage the socket.
- Don’t mix bulb types in enclosed fixtures: Heat buildup can occur with some combinations.
- Don’t ignore persistent signs: Repeated burnout may indicate wiring or circuit issues that require a licensed electrician.
- Keep a bulb log: Note which bulbs fail, where, and how quickly, to spot patterns.
Prevention tips to stop bulbs from burning out
- Use bulbs with the proper wattage rating and a fixture that allows adequate ventilation.
- Choose higher-quality bulbs for critical fixtures; LED options reduce heat and extend life.
- Avoid frequent on/off cycling in rooms that cause rapid wear on filaments and connections.
- If you notice any signs of arcing or warm spots in outlets, replace the wiring or consult a pro promptly.
- Schedule periodic fixture inspections to catch corrosion and loose contacts before they cause burnout.
Steps
Estimated time: 30-60 minutes
- 1
Power down and remove the bulb
Turn off the circuit at the breaker and allow the fixture to cool. Gently twist the bulb counterclockwise and remove it. Inspect the bulb for visible signs of damage and set it aside for testing in a known-good socket later.
Tip: Always wear eye protection when handling bulbs and fixtures. - 2
Inspect socket and contact
Look for corrosion, discoloration, or a loose contact in the socket. If the contact is pushed in or bent, use needle-nose pliers to adjust or replace the socket. Remove debris with a dry cloth and ensure the metal contact is clean and visible.
Tip: If you see blackened areas, replace the socket rather than forcing another bulb in. - 3
Check wattage and compatibility
Verify the fixture’s rating and confirm the bulb’s wattage. If you’re upgrading to LEDs, ensure the fixture and any dimmer are compatible. Using the wrong wattage or incompatible dimmer is a common burnout trigger.
Tip: When in doubt, consult the fixture’s labeling or manufacturer instructions. - 4
Install the correct bulb
Screw the bulb in carefully until it sits snugly but do not overtighten. If you replaced the socket, give the new installation a gentle twist to ensure full contact. If you’re testing, use the same bulb type in another known-good socket.
Tip: Use a fresh bulb in a known-good socket to verify the fixture is the issue. - 5
Test and monitor
Restore power and observe the fixture for a full burn cycle. Note any flicker, humming, or heat from the enclosure. If the bulb fails again, proceed to assess wiring, surge protection, or consider professional inspection.
Tip: Keep a log of which fixtures you tested and what happened.
Diagnosis: Bulb burns out quickly or flickers soon after installation
Possible Causes
- highLoose or damaged socket
- highMismatched wattage or incompatible dimmer
- mediumElectrical surges or poor wiring
- mediumOverheating due to enclosed fixtures
- lowPoor quality bulb or unstable supply
Fixes
- easyTighten or replace the socket and clean corrosion with appropriate tools
- easyEnsure bulb wattage and type match fixture rating; replace with correct LED or incandescent as appropriate
- mediumCheck for arcing or transformer issues; replace or recalibrate as needed
- easyMove bulb to a higher-ventilation fixture; avoid enclosing
- hardIf surges are suspected, install a surge suppressor or whole-house protection (licensed electrician)
Got Questions?
What is the most common cause of bulbs burning out quickly?
The most common causes are loose sockets, wrong wattage, or poor contacts in the fixture. These issues allow arcing or overheating, leading to premature failures. Start by inspecting the socket and verifying the bulb rating.
The most common causes are loose sockets, wrong wattage, or poor fixture contacts. Check the socket and bulb rating first.
Can upgrading to LED bulbs prevent burnout?
LED bulbs generally run cooler and last longer, reducing heat-related burnout. However, ensure the fixture and dimmers are compatible with LEDs to avoid new failure modes.
Yes, LEDs often last longer and run cooler, but make sure your fixture and dimmer work with LEDs.
If bulbs keep burning out in one room, should I replace the entire wiring?
Not immediately. Persistent burnout in one area could indicate a wiring issue or a faulty breaker. Have a licensed electrician inspect the circuit before larger electrical work.
If it’s just one area, get a licensed electrician to check the circuit before any major wiring work.
Is it safe to deal with electrical wiring myself?
Basic bulb replacement is safe, but repairing wiring or replacing sockets should be done by a qualified professional. Never attempt repairs beyond your training.
Basic bulb change is fine, but wiring repairs should be left to a pro.
Do dimmers affect bulb burnout?
Yes, if a bulb is not compatible with the dimmer, it can wear out faster or flicker. Use dimmable bulbs and compatible dimmers for best results.
Dimmers can contribute to burnout if bulbs aren’t compatible with them.
How can I tell if a bulb is truly failing or the socket is at fault?
Test the bulb in a known-good socket and test a known-good bulb in the suspected socket. If the problem follows the socket, the socket is likely the culprit.
Test the bulb in another socket to confirm if the socket is the issue.
Watch Video
Key Points
- Inspect sockets for corrosion and tighten contacts.
- Match bulb wattage and fixture rating precisely.
- Avoid enclosed fixtures that trap heat; choose LEDs where possible.
- If problems persist, consult a licensed electrician.