How to Tell If a Bulb Is LED: A Simple Home Check Guide
Learn practical steps to identify LED bulbs, read markings, and verify compatibility. Bulb Fix guides you through safe checks and common pitfalls for confident LED identification.

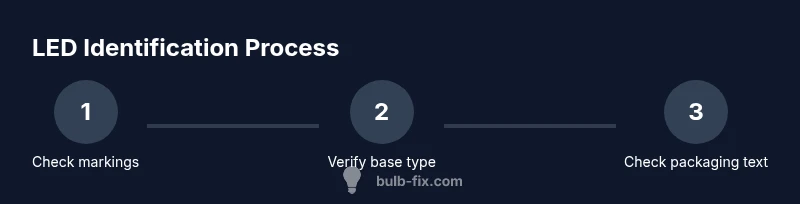
To tell if a bulb is LED, start by checking clear markings on the bulb or packaging (LED label, color temperature, or model notes). Note the base type (E26/E27, GU10, etc.). If markings are unclear, power down, remove the bulb, and compare the base to common LED designs. When in doubt, replace with a verified LED.
Why correctly identifying LED bulbs matters
Understanding how to tell if bulb is LED is more than a label check. LED bulbs are designed differently from incandescent or CFLs, with distinct drivers, heat management, and compatibility needs. Accurately identifying LED status helps you choose the correct replacement, avoid dimming or flicker problems, and preserve fixture longevity. According to Bulb Fix, taking a few quick verification steps saves time and money by preventing mis-purchases and compatibility headaches. In many homes, mislabeling occurs when older stock is rebranded as LED or when packaging only partially reflects the technology inside. Beyond saving energy, knowing LED status guides you on dimmer compatibility, recommended lumens, and expected lifespan. This section lays out a practical approach you can apply to most residential bulbs without specialized tools.
The reader will learn to combine visual cues, printed markings, and safe testing methods to determine LED status. The goal is not to rely on a single clue but to corroborate multiple indicators—markings, base type, and, when available, packaging data—so you can make confident, informed decisions about replacements and upgrades.
Quick visual clues you can check without tools
Several visual cues can help you separate LED from older technologies, but none are foolproof. LED bulbs often have a compact, solid inner structure with a distinct heat sink or cooling fins near the base. Some LED models are designed to resemble traditional incandescent bulbs, hiding their LEDs behind a glass dome or frosted cover. Look for a shallow, flat front rather than a visible filament. That said, many “A19” or similar shapes in the market are now LED-compatible or hybrid designs, so a visual check alone may not be definitive.
Another clue is the labeling you find on the bulb. If you can read any text, LED indicators commonly appear as LED, LED-compatible, or an energy-efficient claim. Packaging is often more transparent, listing lumens, color temperature, and a note like “60W equivalent” that signals LED technology. If you see wattage that seems high for a small bulb, this could indicate an older incandescent with a misleading label. Remember that wattage alone isn’t a reliable signal; LED lighting typically uses much less power to achieve the same brightness.
In dimly lit fixtures, the way the light is produced can also hint at LED technology. LEDs emit highly directional light, whereas incandescents radiate light in all directions. However, this characteristic is subtle and not a guaranteed indicator in every fixture. Use a combination of cues rather than relying on a single observation.
Reading markings on the bulb and its packaging
The most reliable method of identification is reading the printed information. Look for the word LED, LED driver, or an LED logo on the bulb shell or the plastic collar near the base. On some bulbs the LED symbol is tiny; use a flashlight to illuminate small text. Packaging should also state LED and include lumens, color temperature, and a model number. For LEDs, the wattage on the bulb is usually a fraction of incandescent watts, with the packaging indicating an equivalence (e.g., “60W equivalent”). If you cannot locate LED-specific wording, check the base type and search the model notes online to confirm.
Also verify energy-saving labels or manufacturer part numbers; many bulbs include a part number you can cross-check on the manufacturer site. It’s best to corroborate multiple indicators—markings on the bulb itself and on the packaging—before deciding if the bulb is LED. When text is blurry, clean the surface gently with a lint-free cloth to reveal legible characters.
Reading packaging and product labeling
If you still have access to the packaging, read it carefully. LED bulbs typically display: LED or LED-compatible wording, lumens (the brightness measurement), color temperature (measured in Kelvin, e.g., 2700K for warm white or 5000K for daylight), and a wattage range that suggests a modern LED driver rather than a traditional filament. Some packaging includes an “equivalent wattage” note that helps you compare brightness to a familiar incandescent bulb. Compare the stated lumens with the product description to assess whether the bulb is genuinely LED or a retrofit designed for compatibility with older fixtures. If packaging is missing, use the other clues—base type and markings on the bulb—to guide your decision.
Remember, some markets have labels such as ENERGY STAR or manufacturer logos; use these as secondary confirmation, then verify with the model number when possible.
Base types and form factors: linking to LED compatibility
LED technology spans many bases: common residential bases include E26/E27 (the standard screw base in North America and many other regions), GU10 and MR16 for spotlights, B22d for Britain, and E12 for candelabra fixtures. LED bulbs are available in all these form factors, but not every LED base is compatible with every fixture. If a bulb’s form factor is unfamiliar, verify the base with a ruler or manufacturer website to ensure the socket will fit. The presence of a smart-capable base or integrated driver can also indicate LED technology, but contact with the base alone is not a definite test. Keep a quick reference chart handy for your typical sockets to speed up identification.
When upgrading to LED, consider the fixture’s physical space, heat dissipation, and whether the socket supports the LED driver design. Some visually similar bulbs use different bases (e.g., a bayonet vs. screw base), so always check the base shape and the socket type before purchase. If you’re replacing multiple bulbs in a fixture, confirm uniform base type to maintain consistent lighting.
If you’re replacing a dimmable incandescent with LED, check the dimmer’s compatibility. Not all LEDs work with legacy dimmers, and incompatible dimming can cause flicker or hum. In such cases, you may need to replace the dimmer or select LED bulbs labeled as dimmable and compatible with your dimmer type.
Base size alone isn’t enough; the internal driver and heat management in LED bulbs are designed for typical household voltages and sockets. One common pitfall is assuming a bulb labeled as “60W equivalent” is LED just because it claims energy savings. Always cross-check markings and base compatibility.
Safe identification in practice: check markings, compare features, and test cautiously
Putting all cues together gives you a robust method for identifying LED status without specialized equipment. Start with markings on the bulb and packaging, confirm the base type, and observe any heat-dissipation features. If packaging isn’t available, rely on observable cues such as the presence of a heat sink or a flat front design and compare with known LED shapes. Finally, if you have access to a known-good LED replacement that matches your fixture’s base, you can perform a careful swap to observe brightness and color consistency. Always perform this test with the power switched off when removing or handling bulbs, and never touch glass bulbs with bare hands when hot.
Understanding the limitations of each clue is essential. A bulb might look like an older incandescent yet be LED, or it could be a “LED-compatible” design that still relies on a traditional filament. The aim is to combine multiple signals—markings, base type, and packaging data—to arrive at a confident conclusion. When in doubt, consult the fixture’s manual or a lighting professional.
Dimming, smart bulbs, and retrofit considerations
If you’re dealing with smart bulbs, the LED status is often clearly stated on the bulb or in the app’s device description. Smart LEDs usually advertise their connectivity standards (Wi-Fi, Zigbee, Bluetooth) and do not depend on traditional dimming circuits in the switch. In retrofit situations, ensure your fixture supports LED drivers and maintains proper heat dissipation; LEDs rely on efficient cooling to maintain longevity. If your fixture uses a dimming switch, verify that the LED bulbs you plan to use are explicitly labeled as compatible with your dimmer type to avoid flicker or premature failure.
For recessed cans and enclosed fixtures, verify that the LED bulb’s heat rating and size fit within the housing. Some LED bulbs are sealed or have tighter heat management requirements, and using the incorrect bulb can shorten life or cause overheating. When upgrading multiple bulbs at once, test a single bulb first in the most challenging fixture before replacing the rest.
Troubleshooting when identification is unclear
If you still can’t confirm LED status with markings, you can perform a cautious comparison by swapping in a verified LED bulb with the same base and form factor. If the fixture accepts the replacement and you notice energy savings, longer life, and similar light quality, you’ve likely found an LED solution. If your replacement fails to fit, flickers, or dims unexpectedly, re-check the base type and socket compatibility. Finally, contact the manufacturer or a licensed electrician if you suspect an electrical issue or if the fixture’s electronics seem damaged. Safety always comes first when dealing with electrical components.
Practical checklist for a quick identification
- Inspect the bulb and packaging for explicit LED markings.
- Confirm the base type (E26/E27, GU10, B22d, etc.) and size.
- Look for a heat sink or cooling features on the bulb body.
- Compare with the lumens and color temperature listed on packaging when available.
- If markings are unclear, power down, remove the bulb, and compare to known LED designs.
- If possible, test with a known-good LED replacement while ensuring power is off during handling.
- Check dimmer compatibility if the fixture uses a dimming control.
- When in doubt, consult the fixture manual or a professional.
Final note
Identifying LED bulbs accurately empowers you to make safer, more energy-efficient lighting choices. By combining Markings, Base Type, and Packaging data—and applying safe, practical testing—you can confidently distinguish LED bulbs from older technologies. With practice, this becomes a quick, reliable process that protects your fixtures and your wallet. Bulb Fix stands by this method for everyday homeowners and DIY enthusiasts who want to optimize lighting performance.
Tools & Materials
- Flashlight or smartphone flashlight(Use to clearly view markings and bases in dim fixtures)
- Safety gloves(Protect hands when handling bulbs, especially warm ones)
- Lint-free cloth(Wipe dust for legible markings)
- Magnifying glass (optional)(Helpful for tiny text on bulbs)
- Marker tape or label(Label tested bulbs for future reference)
- Small screwdriver (optional)(For loosening fixtures if necessary)
- Bucket or bowl (optional)(Contain broken glass risk)
- Known-good LED bulb for testing (optional)(Swap-in to confirm LED status)
- Multimeter (optional)(Only if you are trained to use it safely)
Steps
Estimated time: 15-30 minutes
- 1
Power down and safety check
Switch off the light at the wall and, if possible, at the breaker. Allow any bulbs to cool before touching. This step prevents shocks and burns and keeps your testing environment safe.
Tip: Always verify power is off using a non-contact tester if available. - 2
Identify the fixture base type
Look at the socket or the area where the bulb seats to identify the base form factor (E26/E27, GU10, B22d, etc.). This base determines what replacements will physically fit and is a strong clue about LED status.
Tip: If you’re unsure, photograph the base and compare with a base-type reference chart. - 3
Remove the bulb carefully
Gently twist or pull the bulb out while wearing gloves. Place it on a safe surface and inspect the bulb’s surface for text such as LED or manufacturer part numbers.
Tip: Handle the bulb by its base, not the glass, to avoid damage. - 4
Inspect markings on bulb and collar
Examine any text printed on the bulb body or the plastic collar near the base. Look specifically for LED, “60W equivalent,” lumens, color temperature, and any driver-related language.
Tip: Use a flashlight to enhance readability, and clean the surface if text is obscured. - 5
Check packaging or model numbers
If you still have the packaging, compare the printed LED indicators, lumens, and color temperature with the bulb itself. A model number on the bulb can be cross-checked online for LED verification.
Tip: Cross-reference online with the manufacturer’s site or retailer listing. - 6
Compare with a known LED (optional)
If you have a known-good LED bulb with the same base, swap it in a controlled test to see if brightness, color, and flicker match expectations.
Tip: Only perform this step with power off during handling; observe safe handling practices. - 7
Reinstall or replace
If identification confirms LED, reinstall the bulb or replace it with an LED option that matches the fixture’s base and dimming needs. If not LED, select an appropriate non-LED replacement or reassess fixture compatibility.
Tip: Keep a note of findings for future bulbs to speed up identification.
Got Questions?
Can wattage reliably indicate LED status?
No. LED status is not reliably indicated by wattage alone, since LEDs use far less power for similar brightness. Always confirm with explicit LED markings, base type, and packaging data.
Wattage alone isn’t reliable for telling if a bulb is LED; look for LED markings and base type to be sure.
Are LEDs always labeled 'LED'?
Not always. Some bulbs may be marketed as LED-compatible or use ambiguous language. Always verify with multiple clues: markings, base type, and packaging information.
Sometimes labels are unclear, so cross-check markings and base type to confirm LED status.
What if my fixture has an incompatible dimmer?
LEDs often require compatible dimmers. If your dimmer is older or not labeled for LED, replace the dimmer or choose LED bulbs rated as dimmable and compatible with that dimmer type.
If the dimmer isn’t LED-friendly, you may need a compatible dimmer or LED bulbs that support your dimmer.
Can I tell by color temperature how to tell if bulb is LED?
Color temperature can hint at LED status since LEDs often list Kelvin values on packaging. Yet this alone doesn’t prove LED status without markings and base verification.
Color temperature helps but isn’t definitive without markings and base type.
Is it safe to touch bulbs to check if LED?
Yes, with the power off. Use gloves; LEDs run cooler but can still break if dropped. Avoid touching the glass while hot.
Yes, but only after you’ve switched off power and allowed the bulb to cool.
What should I do if I can’t determine whether a bulb is LED?
If identification remains unclear, consult the fixture manual or a lighting professional, or swap in a verified LED replacement that matches the base.
If you can’t tell, consult a manual or professional, or use a proven LED replacement with the same base.
Watch Video
Key Points
- Identify LED bulbs by combining markings, base type, and packaging.
- Never rely on a single clue—cross-check multiple indicators.
- Ensure safety: power off, handle bulbs with gloves, and test cautiously.