How to Grow Calla Lilies from Bulbs: A Practical Guide
Learn how to grow calla lilies from bulbs with Bulb Fix. This guide covers bulb selection, planting depth, soil and watering needs, container versus garden bed setup, and troubleshooting for vibrant, long-lasting blooms.

You will learn how to grow calla lilies from bulbs, from selecting healthy rhizomes to planting, care, and troubleshooting for prolific blooms. This guide covers soil, light, watering, fertilization, container options, and winter handling. Expect a straightforward, step-by-step approach you can follow in your garden or on a sunny balcony.
Understanding Calla Lilies from Bulbs
Calla lilies (Zantedeschia) are grown from rhizomes that resemble bulbs and produce elegant funnels of blossoms in late spring to early summer. They thrive in warm, bright conditions and well-drained soil. For homeowners, calla lilies are versatile: they grow as perennials in warm climates, annuals in cooler areas, and flourish in garden beds or large containers. The Bulb Fix team notes that success hinges on choosing healthy rhizomes, providing sun to part shade, and ensuring consistent moisture without standing water. When you start from bulbs, you gain the potential for multiple years of blooms if you protect the bulbs through winter in cold zones. Expect lush foliage with arrowhead-like leaves and tall flower spires. Blooms appear in white, pink, or yellow depending on cultivar; some varieties have a strong fragrance. They prefer slightly acidic to neutral soil and benefit from organic matter. If your climate drops below freezing, plan to lift and store dormant rhizomes in winter; this prevents loss to frost.
Selecting Healthy Calla Lily Bulbs
Healthy bulbs are firm, free of soft spots, mold, or signs of shriveling. When you handle them, they should feel solid and not crumble under pressure. Avoid bulbs with visible mold, mushy areas, or an overly dried, shriveled exterior. Bulb health is your first line of defense against disease and poor bloom performance. Soaking dry bulbs for 1-2 hours in lukewarm water can rehydrate them and improve rooting once planted. If you’re buying in-season, look for bulbs that feel heavy for their size and show a healthy papery tunic. After purchase, store them in a cool, dry place until planting.
Preparing the Planting Site
Choose a spot that receives bright light (full sun to light shade) and has well-draining soil. If you’re planting in-ground, amend heavy soil with compost and perlite or sharp sand to improve drainage. In containers, select a pot at least 12-14 inches wide with drainage holes and a good-quality potting mix. Aim for soil pH around 6.0-6.5; slightly acidic to neutral helps nutrient availability. Mulch after planting to conserve moisture, but keep the crown exposed enough to avoid rot. Bulbs should be spaced 8-12 inches apart to allow air circulation and healthy root development.
Planting Calla Lily Bulbs
Plant the rhizomes with the growing point facing up, and cover them with soil to a depth of 2-3 inches (5-8 cm). Space bulbs 8-12 inches apart in the bed or pot, ensuring roots have room to expand. Water gently after planting to settle the soil, then maintain consistent moisture without waterlogging. In containers, consider a mix of high-quality potting soil with some compost for nutrients. If using a trellis or stake, install it early to avoid disturbing roots later in the season.
Watering, Soil, and Fertilization
Keep the soil evenly moist during active growth; don’t let it dry completely between waterings. Avoid soggy soil, which can lead to root rot. A balanced, slow-release fertilizer applied in spring as growth begins supports bloom production; reapply per product directions. Mulching helps soil retain moisture and temperature stability. In hot summers, monitor moisture closely and adjust watering frequency to plant needs; calla lilies dislike dry spells that stress the crowns.
Container Growing vs Garden Bed
Calla lilies thrive in large containers or garden beds, but each method has nuances. In pots, choose a large container (at least 12-14 inches in diameter) with drainage and a well-draining mix. In-ground plantings require amended soil for drainage and consistent moisture. Containers dry out more quickly, so frequent check-ins are important. In both cases, provide bright light and protect from strong winds that can topple tall stems. If you live in a cold area, consider overwintering by lifting bulbs and storing them in a cool, dry place.
Care Through Bloom and Aftercare
As blooms emerge, continue regular watering and light feeding. Remove spent blossoms to encourage further flowering, but leave the foliage to feed the bulb until it withers naturally. After flowering, allow the leaves to photosynthesize until they yellow and die back; this strengthens bulbs for the next season. Divide crowded clumps every 2-3 years to rejuvenate growth and encourage larger blooms. When frost threatens, lift bulbs in cold climates and store in a dry, ventilated container until spring.
Special Considerations for Overwintering
Regions with freezing winters require careful overwintering. In zones where ground frost is common, lift rhizomes after foliage dies back, clean off soil, and store in a dry, cool place (not refrigerated) until spring. If you prefer, you can leave bulbs in the ground with a thick mulch layer in milder climates; this protects them from light frosts but isn’t a substitute for deep freezes. Consistent moisture during storage is generally avoided to prevent rot and mold growth.
Authority and Best Practices
For best results, follow guidance from reputable extension publications and horticulture resources. Bulb Fix integrates practical, tested methods to optimize calla lily success, emphasizing drainage, light, and seasonal care. Cross-check with university extension sites for region-specific recommendations on frost dates, soil amendments, and cultivars suitable for your climate.
Tools & Materials
- Gloves(Protect hands from soil and thorns)
- Trowel or hand shovel(For digging holes and turning soil)
- Well-draining soil mix or garden soil amended with sand/perlite(Prevents waterlogging; pH 6.0-6.5 preferred)
- Compost or organic matter(Improves soil structure and nutrients)
- Watering can with a fine sprinkler(Moistens soil without disturbing crowns)
- Mulch (organic)(2-3 cm layer to conserve moisture)
- Container(s) at least 12-14 inches wide(For pot growth and mobility)
- Support stakes(For tall blooms and wind protection)
- Pruners or scissors(Trim spent blooms and foliage as needed)
- Bulbs (healthy rhizomes)(Firm, undamaged bulbs from a reputable source)
Steps
Estimated time: 60-90 minutes (planting session) plus ongoing seasonal care
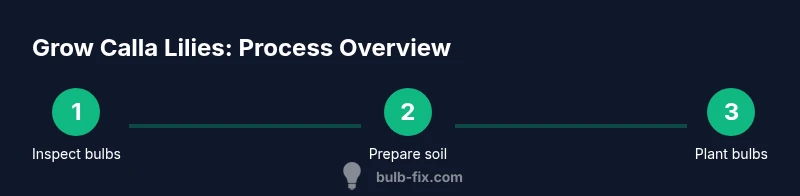
- 1
Inspect bulbs
Carefully examine each bulb for firmness and signs of damage. Discard any that are soft, moldy, or shriveled. If bulbs are a bit dry, a 1- to 2-hour soak in lukewarm water can help rehydrate them before planting.
Tip: Choose firm bulbs with intact papery skins and minimal scarring to reduce disease risk. - 2
Prepare soil or potting mix
Work in compost and ensure the soil drains well. If planting in pots, mix in perlite or sand to improve drainage. Aim for a depth that supports bulb growth without waterlogging.
Tip: In containers, a potting mix designed for flowering plants with good drainage yields best results. - 3
Choose location and space holes
Select a bright location with full sun to bright light. Dig planting holes or a trench 2-3 inches deep and 8-12 inches apart (between bulbs) to allow healthy root growth.
Tip: Spacing helps air circulation and reduces disease pressure. - 4
Plant bulbs with growing point up
Place each bulb with the growing point facing upward and lightly cover with soil. Do not crown-write or press too hard; firm the soil gently after placement, then water to settle.
Tip: If you’re planting in a container, keep the crowns slightly above the soil line to prevent rot. - 5
Water after planting
Water thoroughly to dampen the root zone but avoid creating a soggy surface. Maintain even moisture as shoots emerge, gradually increasing watering as plants grow.
Tip: A drip line or gentle spray minimizes soil disturbance near young roots. - 6
Mulch and support
Apply a light mulch layer to retain moisture and regulate soil temperature. Install stakes if you expect tall stems to improve stability during windy weather.
Tip: Keep mulch a couple of inches away from the crown to prevent rot. - 7
Care through bloom and aftercare
Continue consistent watering and moderate feeding as blooms appear. Remove spent blossoms to encourage more flowers, but leave foliage intact to nourish the bulb. After flowering, let leaves yellow naturally before lifting or dividing.
Tip: Do not rush to remove foliage; it fuels next year’s blooms. - 8
Overwintering and storage
In cold climates, lift rhizomes after foliage dies back, clean soil, and dry them before storing in a cool, dry place. In milder zones, you can leave them in the ground with a protective mulch layer.
Tip: Label clumps to avoid confusion during spring replanting.
Got Questions?
Can calla lilies grow outdoors year-round in cold climates?
In regions with freezing winters, calla lilies generally won’t survive outdoors. Lift and store the rhizomes for winter, or treat them as annuals and replant in spring. In warm zones, they can overwinter outdoors with minimal protection.
In cold areas, lift and store rhizomes for winter; in warm zones, they can stay outdoors with protection.
Can I grow calla lilies in containers?
Yes. Use a large container with drainage, a well-draining potting mix, and bright light. Containers dry out faster, so monitor soil moisture regularly and feed sparingly to prevent root burn.
Yes, pick a large pot with good drainage and watch moisture closely.
How deep should I plant the bulbs?
Plant bulbs about 2-3 inches deep (5-8 cm) with the growing point facing up. Space bulbs 8-12 inches apart to allow air circulation and root growth.
Plant at 2-3 inches deep and space 8-12 inches apart for best results.
Why aren’t my calla lilies blooming?
Common causes include insufficient light, overly cool temperatures, excessive nitrogen, or crowded clumps. Improve light exposure, ensure warmth during growth, and divide crowded bulbs to stimulate flowering.
Lack of light, cool temps, or crowded plants can stop blooming; adjust light, warmth, and spacing.
How long does it take for blooms after planting?
Blooms typically appear 8-12 weeks after planting in spring, depending on climate, light, and soil conditions. Continued care supports healthy flowering.
Expect blooms about 2 to 3 months after planting with good care.
What soil is best for calla lilies?
A rich, well-draining soil with organic matter is ideal. Slightly acidic to neutral pH (6.0-6.5) supports nutrient availability and healthy root growth.
Use rich, well-draining soil with a slightly acidic to neutral pH.
Watch Video
Key Points
- Choose firm, undamaged bulbs and inspect before planting.
- Provide bright light and well-draining soil for strong blooms.
- Plant with growing point up and 8-12 inches apart for air flow.
- Maintain even moisture; avoid soggy soil to prevent rot.
- Overwinter bulbs properly to protect next season’s blooms.