What to Plant Amaryllis Bulbs In
Learn how to choose the best containers and soil for amaryllis bulbs, plus step-by-step planting tips, care guidelines, and troubleshooting to ensure vibrant indoor blooms.

By the end of this guide you’ll know exactly what to plant amaryllis bulbs in, including the best containers and soil mixes for healthy growth. You’ll learn how to prep a root-friendly pot, provide drainage, and plant bulbs at the right depth. With simple, safe steps, even first-time gardeners can get vibrant amaryllis blooms indoors or on sunny patios.
Why the planting medium matters for amaryllis bulbs
The planting medium acts as the stage for growth. A breathable, well-draining mix ensures roots can access oxygen, prevents waterlogged roots, and supports steady moisture around the bulb. According to Bulb Fix, the container choice and soil texture are the foundation of healthy amaryllis blooms. When the medium holds water too long, bulbs rot; when it drains too quickly, roots can dry out. A balanced mix keeps both conditions in check while feeding the plant for a long bloom cycle. For amaryllis, many gardeners favor mixes designed specifically for bulbs, which balance moisture retention with drainage. In practice, this means avoiding heavy garden soil and dense compost, and opting for a light, airy blend. The medium also affects watering frequency and fertilizer uptake, so start right with a well-suited mix to set up successful blooms.
Container choices and drainage considerations
Amaryllis bulbs do best in wide, shallow pots that allow the bulb to sit near the surface. Choose pots with drainage holes; terracotta and ceramic materials are common because they wick moisture and air, while plastic can work if drainage is present. The goal is steady moisture without standing water—too much water invites rot, too little can stunt growth. A drainage layer of stones, gravel, or coarse sand helps keep soil from clogging holes and promotes aeration at the root zone. Avoid oversized containers; a pot only slightly larger than the bulb encourages stable moisture balance and encourages the roots to fill the space rather than stagnate.
Soil blends for amaryllis: what to plant amaryllis bulbs in
Use a premium, fast-draining potting mix rather than garden soil. A good blend includes components that balance moisture retention and aeration: peat or coco coir for moisture, plus perlite or coarse sand for drainage. Some gardeners mix equal parts potting soil and perlite for structure, while others prefer a bulb-specific mix sold commercially. Texture matters more than exact ratios: the medium should feel light and crumbly, not dense or compact. Avoid heavy clay soils or overly rich compost that can stay damp. If your mix seems dense, you can amend with a handful of perlite or pumice to improve drainage.
Depth and planting technique
Plant the bulb so that the top third to half remains exposed above the soil line. Set the bulb with roots down and the pointed end up, then gently firm soil around the bulb to stabilize it without compressing the neck. Leave a small space at the top of the pot to allow for watering. If you’re reusing an old container, clean and sanitize it to prevent disease transfer. After planting, water lightly to settle the soil, then wait a day before the first full watering.
Watering routine and light requirements after planting
Water lightly after planting to settle the soil, then allow the mix to dry slightly before the next watering. Place containers in bright, indirect light; direct sun can scorch newly forming shoots. As shoots emerge, you can provide more light to encourage sturdy stems and vibrant color. Avoid letting the soil become soggy—amaryllis roots tolerate drying between waterings as long as the bulb isn’t stressed. If you notice mold on the surface, surface-level shading or a quick soil refresh can help.
Soil vs soilless mixes: which is best for amaryllis?
Soilless mixes (such as peat-free blends with perlite) often provide quicker drainage, which can be advantageous for amaryllis, especially in humid climates. Soil-based mixes retain more moisture and can support slower growth, but you risk overwatering if the pot is too large or the climate is damp. The best approach is to choose a mix that drains well but holds enough moisture to support steady root growth. If you’re unsure, start with a bulb-specific commercial mix or a well-draining peat-based blend and adjust based on how your bulb responds over the first few weeks.
Fertilization and care through bloom
Once growth begins, you can feed amaryllis with a balanced, water-soluble fertilizer every 2-4 weeks, following label directions. Avoid over-fertilizing, which can lead to lush foliage at the expense of flowers. Keep the plant in bright light so blooms form fully and stems remain sturdy. After the bloom fades, you can continue feeding to strengthen the bulb for the next season or allow the plant to enter a natural dormancy if you plan to reset.
Troubleshooting common problems
If leaves yellow or droop, check for overwatering or poor drainage and adjust the soil moisture. Brown tips may indicate dry air or salt buildup from fertilizer; flush with water and resume light feeding. White mold or musty smells signal too-wet soil; repot or refresh the mix. If shoots fail to emerge, re-evaluate light levels and water; sometimes bulbs need a few additional weeks to acclimate. Regularly inspect for pests and treat promptly with gentle, bulb-safe controls.
Seasonal considerations and overwintering
Amaryllis are often forced indoors for blooms in late winter or early spring. After flowering, you can let the plant grow and go through a natural dormancy or force a dormancy by reducing water and cool temperatures. For outdoor growth in warm-summer climates, ensure protection from frost and provide soil that warms up in spring. In all cases, keeping a consistent watering rhythm and bright light helps the bulbs recover and strengthen for the next cycle.
Quick-start planting checklist
- Gather a shallow pot with drainage holes and a breathable potting mix.
- Place a thin drainage layer and position the bulb correctly.
- Fill around the bulb with soil, leaving the top third exposed.
- Water lightly and place in bright indirect light.
- Monitor moisture and light as shoots appear.
- Begin light feeding once growth begins and watch for signs of stress.
- Reassess the pot size and soil quality each season to maintain blooming health.
Tools & Materials
- Amaryllis bulbs (bulbs)(Select healthy, large bulbs with tight skins)
- Pot with drainage holes(Wide, shallow pot preferred)
- Drainage layer (gravel, pebbles, or broken pottery)(1-2 cm layer advised)
- Fast-draining potting mix or bulb-specific mix(Light, airy texture)
- Watering can with a narrow spout(Water gently to avoid bulb injury)
- Measuring spoon or small trowel(Optional for precise amendments)
- Fertilizer for flowering bulbs or balanced liquid fertilizer(Apply according to label, after shoots appear)
- Label stakes or plant markers(Note bulb variety and planting date)
- Hammer or mallet (optional)(Gently compact soil if needed to stabilize)
Steps
Estimated time: 60-90 minutes
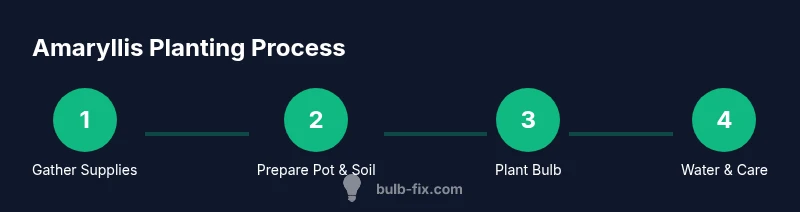
- 1
Gather supplies
Collect all tools and materials before you start. This helps you work efficiently and reduces the risk of leaving the bulb exposed. Set up a clean workspace with good lighting to avoid mistakes.
Tip: Pre-measure soil and water at room temperature to prevent thermal shock. - 2
Choose container and prepare drainage
Select a shallow pot with drainage holes. Add a drainage layer to protect the holes and improve aeration around the roots.
Tip: A pot 1-2 inches wider than the bulb is a good starting point. - 3
Position the bulb
Place the bulb on the drainage layer with the roots facing downward. The top third to half of the bulb should be visible above the soil line.
Tip: Handle gently to avoid cracking the bulb skin. - 4
Add soil and stabilize
Fill around the bulb with the chosen mix, firming gently to stabilize the bulb without compacting the neck.
Tip: Leave a small space at the rim for watering. - 5
Water lightly to settle
Give a gentle watering to settle the soil but avoid saturating the bulb. Allow the soil to dry slightly before the next watering.
Tip: Use room-temperature water to prevent shocking the roots. - 6
Initial light exposure
Place the pot in bright, indirect light. Avoid harsh direct sun on young shoots to prevent scorching.
Tip: Rotate the pot occasionally to encourage even growth. - 7
Care as shoots emerge
As shoots form, move to brighter light and resume regular watering when the top inch of soil dries.
Tip: Start with a light fertilizer when growth becomes steady. - 8
Ongoing maintenance and bloom
Continue light feeding through bloom and keep soil evenly moist but not soggy. After bloom, allow foliage to feed the bulb before dormancy.
Tip: Label each plant to track care across seasons.
Got Questions?
Can I plant amaryllis bulbs in water?
Amaryllis bulbs are best grown in a soil or soilless medium that drains well. While some people experiment with water as a decorative option, this method increases the risk of rot and disease. For reliable blooms, use soil or an appropriate bulblike mix.
Amaryllis bulbs are usually best in soil; water-only setups raise rot risk, so use a proper medium for reliable blooms.
What depth should I plant amaryllis bulbs?
Plant the bulb so that the top third to half remains above the soil line. Ensure roots are pointing downward and the neck stays above the soil to prevent rot and encourage upright growth.
Plant with the top third to half visible and roots down for proper growth.
Do amaryllis require direct sunlight after sprouting?
Yes, bright light supports strong stems and vibrant blooms. Move plants to a sunny but indirect light location once shoots appear to prevent scorching.
Give amaryllis bright light but protect tender shoots from intense direct sun.
How often should I water after planting?
Water when the top inch of soil dries, then water again to moisten evenly. Avoid keeping the soil constantly soggy to prevent bulb rot.
Water when the soil dries a bit, then water again; don’t keep it soggy.
Can I reuse the same pot for next season?
Yes, with cleaning and a fresh bulb or fresh soil mix. Inspect for disease and replace the soil to prevent issues.
You can reuse the pot after cleaning and using fresh soil and a new bulb.
What soil pH is best for amaryllis?
Aim for neutral to slightly acidic conditions using a well-draining mix. The exact pH is less critical than ensuring good drainage and texture.
Aim for neutral to slightly acidic soils with good drainage; avoid overly acidic or alkaline media.
Watch Video
Key Points
- Choose a breathable, well-draining medium.
- Opt for a wide, shallow container with drainage.
- Plant so the top third to half of the bulb is visible.
- Water sparingly and provide bright indirect light.
- Monitor and adjust to maintain healthy blooms.