Which bulb in my car: Identify and replace car bulbs safely
A comprehensive how-to on identifying the correct car bulb, understanding common bulb types, and replacing bulbs safely and correctly across headlights, signals, and interior lights.

Which bulb in my car? The correct bulb depends on the function (headlights, turn signals, brake lights) and the vehicle’s socket. Start by checking the owner’s manual or the old bulb for the exact type, then verify wattage, base, and connector before purchasing. This article guides you through locating, verifying, and safely replacing car bulbs.
Understanding why the right bulb matters
According to Bulb Fix, correctly identifying which bulb is in your car reduces safety risks and saves you time. Vehicle lighting is a carefully engineered system: each function - headlights, high beams, turn signals, brake lights, tail lights, DRLs, fog lights, and interior lighting - relies on a specific bulb type and socket. Using the wrong bulb can dim or misdirect light, flicker, or create electrical strain that trips fuses or damages housings. This section lays the groundwork for careful identification, emphasizing that this is about function, size, and compatibility rather than a best guess. Start by mapping all exterior lights and interior lights on your vehicle, noting which are powered by dedicated bulbs and which share a housing. Some cars use separate bulbs for low- and high-beam headlights, others use a single dual-filament bulb. Even if a bulb seems to fit, a mismatch in wattage or base can cause poor illumination or premature failure. The aim is a reliable, legally compliant lighting setup you can depend on in rain, snow, or fog. The safer you are about identifying the exact bulb type, the easier and cheaper maintenance will be over the life of your vehicle.
Quick car bulb categories at a glance
Car bulbs fall into a few broad categories based on technology and housing design. Halogen bulbs are common in many older and mid-range vehicles, offering straightforward replacements and broad compatibility. LED bulbs are increasingly popular for their longevity and brighter, whiter light, but they may require a compatible housing and, in some cases, a resistive load or CANBUS adjustments to avoid fault codes. HID (high-intensity discharge) systems deliver intense illumination with ballast-driven operation and special handling. Some modern cars also use specialty bulbs for daytime running lights, cornering signals, or interior accent lighting. Regardless of type, the core considerations remain the same: verify the correct bulb shape and base, confirm wattage ratings, and ensure the new bulb can fit within the housing without interfering with lenses or seals. Always check for any vehicle-specific requirements, such as EV-related CANBUS compatibility or warning-light implications, as these can vary by make and model. By understanding these categories, you’ll be better prepared to choose safe, legal, and durable replacements that match your car’s design intent.
How to locate your bulb types in your vehicle's manual
The most reliable source of bulb specifications is your vehicle’s owner’s manual. Start by locating the Lighting or Bulbs section, which lists each control function and its corresponding bulb type. If you don’t have a manual handy, many manufacturers publish electronic versions online; search by your exact year, make, and model. When you remove a bulb for inspection, note how it was seated, including any connectors or clips. If the manual uses codes (for example, low beam vs. high beam bulb type), write them down. In a pinch, you can also reference the old bulb itself, paying careful attention to the base shape, the number of prongs, and whether the base is bayonet-style, push-in, or screw-in. For drivers who like a second opinion, you can use reputable automotive forums or brand-specific resources to cross-check bulb codes, but verify with official manuals to avoid incorrect substitutions. The goal is a precise match rather than a best guess—wrong bulbs at best produce dim light and at worst cause damage or safety risks.
Common bulb types and their socket habits
Bulb bases come in several common families, each with unique mating requirements. Basic wedge-base bulbs slide into a socket with a simple press, while push-and-turn bases require a small twist to lock. Bayonet-style bases use side pins that must align with slots in the socket. Some housings are designed for dual-filament bulbs, enabling different functions (low/high beams) within a single unit. The bulb’s base and the socket determine compatibility more than the bulb’s physical size alone. Lighting assemblies can also differ in how they seal against moisture, which matters for exterior bulbs. When handling bulbs, avoid touching the glass with bare fingers—oil from your skin can shorten bulb life or create hot spots. If you’re replacing a fog light or DRL bulb in a tight space, you may need a dedicated removal tool or a flexible, narrow tool to avoid bending or breaking housing components.
Replacement bulb options: halogen, LED, HID
Choosing between halogen, LED, and HID involves balancing performance, lifespan, and electrical compatibility. Halogen bulbs are inexpensive and widely available, with straightforward installation and standard socket types. LED bulbs offer longer life and brighter, crisper light, but may require hammering compatibility checks with CANBUS systems or ballast adapters. HID systems provide very bright illumination and efficiency but require a ballast and precise alignment, and they are usually installed by professionals. Regardless of the technology, always confirm the bulb’s electrical rating and base type before purchase. If you’re upgrading, ensure the new bulb’s size does not interfere with the lens, is within legal brightness limits for your region, and that the vehicle’s wiring can supply the required current without triggering warning lamps. When in doubt, consult the vehicle’s manual and seek guidance from a trusted source such as Bulb Fix for your model’s specifics.
Safety, handling, and disposal considerations
Safety first when dealing with car bulbs. Always turn off the ignition and lights before starting work, and if you access bulbs near a hot engine, allow it to cool. Wear gloves or use a tissue to handle bulbs to avoid skin oils contaminating the glass, which can reduce bulb life. If a bulb is stuck or difficult to remove, don’t force it—apply gentle heat via the engine bay to loosen corrosion or seek professional assistance. After replacing, test the new bulb in the car’s switch before closing everything up. Dispose of old bulbs responsibly by using local recycling programs that accept automotive bulbs; many places require separating halogen from LED or HID waste. If you’re handling multiple bulbs, take a moment to check fuses in the same circuit, especially if the replacement does not resolve the issue.
Quick checks before buying bulbs
Before purchasing a replacement, confirm the exact bulb type using the vehicle manual or the old bulb’s markings. Verify the base shape, wattage, and whether a CANBUS-compatible version is needed to avoid warning lights. Consider the environment where you drive; for example, high-performance or cold-weather driving might benefit from bulbs designed for extreme conditions. Compare brightness ratings and color temperature to maintain a balanced look with your existing lighting. If you’re replacing multiple bulbs at once, replacing in matched sets helps ensure uniform brightness and color across the vehicle. Finally, buy from reputable sources that offer a return policy in case the bulb doesn’t fit the housing or fails early.
How to avoid common mistakes and save time
Common mistakes include buying the wrong bulb for the function, ignoring CANBUS compatibility, and handling bulbs with bare hands. To save time, prepare your workspace, confirm the bulb code in advance, and assemble the required tools before starting. Create a simple checklist: bulb function, base type, wattage, fit in the housing, and certification or dealership compatibility. When replacing exterior bulbs, work in a shaded, well-lit area to clearly see connections and seals. If you have access to an owner’s forum for your model, use it to verify your bulb type with others who own the same vehicle, but always corroborate with official manuals or manufacturer guidance. By sticking to official specifications and using a methodical approach, you reduce trip-backs to the shop and extend the life of your lighting system.
Tools & Materials
- Replacement bulbs of the correct type for your vehicle(Check exact bulb code from the owner’s manual or the original bulb)
- Protective gloves or clean microfiber cloth(Prevent oil transfer to glass and maintain grip)
- Screwdriver set or trim removal tool(Use only if access panels are secured with screws or clips)
- Socket wrench or pliers (as needed)(Helpful for stiff sockets or tight housings)
- Soft rag or microfiber towel(Wipe dust away before insertion)
- Owner’s manual or vehicle service manual(Always confirm function, base, and wattage)
- Replacement fuses (if testing warns of electrical issues)(Only if you’re diagnosing fuse-related problems)
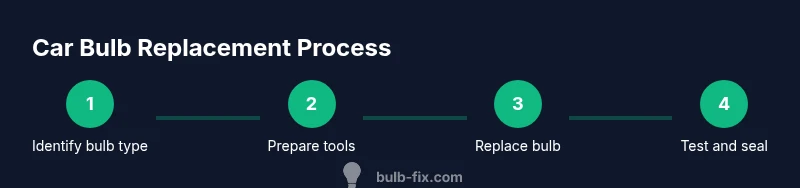
Steps
Estimated time: 15-30 minutes
- 1
Identify the correct bulb type
Consult the owner’s manual or inspect the old bulb to confirm the exact bulb type, base form, and wattage. Use this as the basis for your replacement choice and keep notes for future use.
Tip: Double-check function to avoid mismatches; the right bulb is essential for safe operation. - 2
Prepare the workspace and tools
Park the car on a level surface, turn off the engine, and engage the parking brake. Gather gloves, the replacement bulb, and any tools you’ll need before starting.
Tip: Avoid oil on the glass; wear gloves from the start to preserve bulb life. - 3
Gain access to the bulb housing
Open the hood or access panel as required, locate the bulb housing corresponding to the intended replacement, and remove any protective covers or rubber seals.
Tip: If panels are stubborn, use a trim removal tool gently so you don’t scratch paint or plastic. - 4
Remove the old bulb
Disconnect the electrical connector from the bulb, then rotate or release the bulb from its socket according to the housing type. Keep track of any clips or retaining rings.
Tip: Do not force components; if resistance is high, double-check the orientation. - 5
Install the new bulb
Handle the new bulb by its base, align it with the socket, push it in, and rotate or secure as required to lock the bulb in place. Reconnect any harnesses.
Tip: Seal any weatherproofing components and ensure the bulb seats fully. - 6
Test and finalize
Before reassembling, test the light using the vehicle’s switch to confirm proper operation. If applicable, reattach covers and panels and close the hood.
Tip: If the light doesn’t work, re-check connections and bulb orientation; if unresolved, consult a mechanic.
Got Questions?
How do I know which bulb to replace on my car?
Start with the owner’s manual or inspect the existing bulb for its exact type and base. Verify socket compatibility and wattage before purchasing. This minimizes incorrect replacements and ensures proper function.
Identify the bulb by checking the manual or the old bulb, confirm the base and wattage, then replace with the exact match.
Can I mix LED and halogen bulbs in the same lighting circuit?
Mixing bulb technologies in the same circuit can cause uneven lighting and may trigger electrical faults or warning indicators. For best results, replace with the same technology across related bulbs unless the vehicle manufacturer specifies otherwise.
Don’t mix LED with halogen in the same circuit unless the manufacturer approves it.
Should I replace exterior bulbs in pairs?
If a pair of headlights or taillights uses two identical bulbs, replacing both at the same time ensures consistent brightness and color, and reduces the chance of a future mismatch.
Usually replace in pairs for symmetry and consistent lighting.
Are HID or xenon bulbs compatible with all housings?
HID systems require specific ballasts and housings designed for ballast operation. Using HID bulbs in non-compatible housings can be unsafe and ineffective.
HID needs proper ballast and housing; don’t force into non-compatible setups.
How should I dispose of old bulbs?
Most automotive bulbs are recyclable. Check local recycling programs or automotive retailers that accept spent bulbs; never throw them in regular trash when recycling options exist.
Recycle old bulbs through local programs or retailers that take spent bulbs.
Why won’t my new bulb light up after replacement?
Double-check the bulb orientation, connections, and fuse status. If all looks correct and it still fails, test with the original bulb in the same socket to rule out a circuit issue.
If the new bulb won’t light, verify orientation and connections, then check fuses and the circuit.
Watch Video
Key Points
- Verify bulb type before buying to ensure compatibility
- Use gloves to prevent oil contamination
- Test each replacement before final reassembly
- Dispose of old bulbs responsibly and recycle where possible