How to Change Bulb on Recessed Light
A practical, safe, step-by-step guide to changing a bulb in recessed lighting, including tool lists, safety tips, bulb compatibility, and maintenance guidance from Bulb Fix.

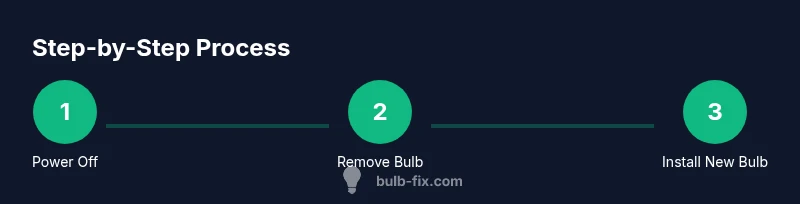
You can safely change a bulb in a recessed light by powering off at the breaker, removing the trim and old bulb, then installing a compatible LED replacement and testing the fixture. Gather a sturdy ladder, a replacement bulb, gloves, and a flashlight, and follow a clear, step-by-step process to avoid damage or shock.
Why recessed lighting bulbs matter and what to expect
Changing a bulb on recessed light fixtures is more than a quick twist; it's about safety, compatibility, and long-term energy use. When you know how to change bulb on recessed light, you lower the risk of fixture damage, avoid hot bulbs, and maintain consistent room lighting. According to Bulb Fix, proper bulb maintenance reduces wasted energy and extends fixture life. LED bulbs are generally preferred for recessed cans because they produce less heat, last longer, and stay cooler, which protects the housing and surrounding ceiling. Before you touch anything, locate the fixture type whether it's a built-in trim and bulb assembly or a separate can housing, and confirm the rated wattage and base type. This forethought helps you select a bulb that fits the socket and housing, avoids dimming issues, and achieves stable brightness. The following sections guide preparation, bulb selection, removal, installation, and testing with practical tips woven throughout. It is a homeowner-friendly process designed to minimize risk and maximize results.
Safety first: prepare and power down
Safety is non negotiable when changing a recessed light bulb. Start by turning off the circuit at the breaker or, if your fixture has an accessible switch that truly isolates power, use that. Do not rely on the wall switch alone since many fixtures can retain current. Gather your tools and set up a stable ladder on a dry, level surface. Wear gloves to protect your hands from sharp edges and hot glass, even if the bulb is cool to the touch. Cover the floor area with a cloth or drop sheet to catch dust or broken glass. Once power is confirmed off, gently test the fixture with a non contact voltage tester if you have one. This reduces the chance of electric shock. By taking these precautions, you create a safe environment that keeps you and the ceiling fixture protected.
Tools and bulbs: choosing the right components
This section helps you assess the exact bulb base, lumen output, and size for recessed fixtures. Most common recessed fixtures use standard bases such as E26 or specialized bases in certain can lights. Verify the base type printed on the fixture or in its manual; failing to match the base can lead to a loose connection or bulb failure. If your fixture is enclosed, ensure the bulb is rated for enclosed fixtures; LED bulbs labeled as enclosed rated are often a better fit, and they run cooler and longer than old fashioned incandescent bulbs. Also check whether the fixture requires dimmable bulbs if you are operating a dimmer switch. Finally, choose a bulb with a color temperature you prefer warm whites for living spaces and cool whites for work areas, and confirm energy ratings. Having the right bulb from the start reduces repeated trips to the store and speeds up the job.
Access and removal: get to the bulb safely
Accessing recessed fixtures may require removing the trim or partially lifting the can housing. Start by supporting the trim with one hand so it doesn’t pop out unexpectedly. If the bulb is behind a glass cover, gently tilt or rotate the cover to clear the bulb. Hold the bulb with a gloved hand and rotate counterclockwise to loosen it; some bulbs push straight in rather than twist depending on the socket design. Do not force a stubborn bulb; if it won’t budge, stop and re check the fixture type and base compatibility. Keep the old bulb in a protective container or bag to avoid shards if it breaks. When the trim proves tricky, some fixtures use small screws or spring clips; use the appropriate screwdriver or push the clips carefully to release the trim. This step often takes a few careful minutes, but rushing can crack the glass or damage the housing.
Installing the new bulb: seating, alignment, and securing
With the old bulb removed, check the socket for any corrosion or bent contact points. Clean gently with a dry cloth if needed. Thread or insert the new bulb straight into the socket, ensuring the base is aligned and seated evenly. Avoid overtightening, which can strip the socket or damage the can. If you’re using a dimmer, ensure the new LED bulb is compatible; compatibility issues can cause flicker or buzzing. Reattach any glass cover or trim once the bulb is securely in place, aligning it for a clean, uniform look. If the fixture uses a retention ring or springs, carefully re engage them to prevent the trim from loosening over time. Take a moment to ensure there are no gaps around the trim and that the bulb is fully extended or capped as designed.
Testing, safety checks, and maintenance mindset
Power back on and test the fixture in all supported modes. If the light is dimmable, test at both high and low settings to verify smooth transitions and absence of flicker. Observe for any unusual heat around the fixture after a few minutes of operation; excessive warmth may indicate a misfit, wrong bulb, or a dimmer incompatibility. Wipe away fingerprints from the glass or diffuser to maintain light quality. Maintain a regular schedule for cleanup and inspect the trim and socket annually for corrosion, loose connections, or damaged seals. Bulb Fix analysis shows LED installations in recessed cans tend to deliver longer life and improved efficiency when installed correctly, reinforcing the benefits of choosing the right bulb and avoiding cheap replacements. If you ever encounter persistent flicker, buzzing, or dimming, consult a professional if you’re uncertain.
Troubleshooting and longevity: practical tips and care
This final block focuses on common issues and how to prevent them. If the bulb looks dim or inconsistent, recheck the base fit, ensure you didn’t install the wrong bulb size, and confirm the dimmer compatibility. Leaking or buzzing cans may indicate a loose socket or a damaged trim; address these issues promptly. For longevity, store spare bulbs in a cool, dry place and switch to LED options with appropriate lumens and warmth to suit the room. The Bulb Fix team recommends planning ahead: choose high quality LED bulbs designed for enclosed fixtures, use a dimmer compatible option if needed, and maintain the fixture by cleaning and inspecting seals yearly. The result is safer lighting, reduced energy use, and fewer trips to the hardware store.
Tools & Materials
- Sturdy ladder or step stool(Reach recessed fixtures safely; ensure stable on level surface)
- Safety gloves(Grip and protect hands when handling bulbs and glass)
- Replacement bulb (LED, compatible with can lights)(Check base type (E26, GU10, etc.) and wattage; LED recommended)
- Soft cloth or hand towel(Protect trim and wipe any fingerprints from bulb)
- Flashlight(Improve visibility inside the fixture cavity)
- Non conductive bulb container or bag(Safely store the old bulb to avoid shards)
- Screwdriver (Phillips or flat) as needed(Use if the trim is held by screws)
- Replacement trim or gasket (optional)(Have on hand in case of damaged trim)
Steps
Estimated time: 15-25 minutes
- 1
Power down and prepare
Turn off the circuit at the breaker and confirm no power reaches the fixture. Gather tools and set up a stable ladder. This step minimizes the risk of shock and damage.
Tip: Double-check with a voltage tester if available. - 2
Identify bulb base and type
Inspect the fixture to confirm base type and wattage rating. This ensures you buy the correct replacement and prevents socket damage.
Tip: If unsure, pull slightly on the old bulb to feel for resistance; that indicates a twist-lock style. - 3
Remove the old bulb
Put on gloves and gently release the bulb. For twist-based sockets, rotate counterclockwise until it disengages; don’t force.
Tip: Support the trim to avoid it popping loose during removal. - 4
Inspect socket and trim
Check for corrosion, bent contacts, or damaged trim. If you see wear, address it before seating a new bulb.
Tip: Wipe contacts with a dry cloth if needed; never use liquids. - 5
Install the new bulb
Insert or thread the new bulb, ensuring proper alignment and seating. Do not overtighten.
Tip: If dimmer is present, verify bulb compatibility before installation. - 6
Reattach trim and test
Reassemble the trim or cover, restore power, and test the light at all settings.
Tip: Look for gaps around the trim and adjust as needed for a clean finish. - 7
Finalize and cleanup
Tidy the work area, store replacement bulbs properly, and schedule a quick fixture inspection in the future.
Tip: Document the bulb type and date for future maintenance.
Got Questions?
Do I need to turn off power at the breaker to change a recessed light bulb?
Yes, always turn off the circuit at the breaker to ensure there is no current flowing during bulb replacement. If available, verify with a tester before starting.
Yes. Switch off the circuit at the breaker and verify there is no power before you begin.
What bulb base types are used in recessed lighting?
Recessed fixtures commonly use bases like E26 or GU bases. Check the fixture or can housing for the exact base and wattage rating to ensure compatibility.
Most recessed cans use E26 or similar bases; always check the fixture label.
Can I replace with any LED bulb in a recessed light?
Use LED bulbs rated for enclosed fixtures and compatible with any existing dimmers if present. Some LEDs are not suited for enclosed cans, so read the packaging.
LEDs labeled for enclosed fixtures and dimmer compatibility work best.
What if the bulb won't come out easily?
Stop and recheck the fixture type and base compatibility. Gently twist while supporting the trim; avoid applying excessive force to prevent socket damage.
If it’s stuck, stop and reassess the fixture and use gentle motions.
Is it safe to change bulbs on a ladder?
Yes, but only with a stable ladder and a helper if possible. Maintain three points of contact and avoid overreaching.
Yes, use a stable ladder and have someone nearby if you can.
How long do recessed light bulbs last?
Lifespan varies by bulb type; LED bulbs typically last longer in recessed fixtures when installed correctly.
LED bulbs generally last longer than older types when properly installed.
Watch Video
Key Points
- Power off at the breaker before handling any bulb.
- Choose LED bulbs rated for enclosed recessed fixtures.
- Verify base type and wattage before buying a replacement.
- Gently remove the old bulb and avoid forcing fittings.
- Test the fixture after installation and inspect for heat or flicker.