How to Replace a Bulb Socket: A Step-by-Step Guide
Learn how to replace a bulb socket safely with step-by-step instructions, tools, and practical tips from Bulb Fix. This guide covers socket types, safety checks, wiring basics, and testing to help homeowners complete the repair confidently.

Learn how to replace a bulb socket safely in your home. This quick guide covers identifying socket types, shutting off power, removing the old socket, installing a compatible replacement, and testing the circuit for proper operation. Follow the steps and safety tips to complete the job confidently and reduce the risk of electrical faults.
Safety and scope for replacing a bulb socket
If you’re learning how to replace a bulb socket, start with a clear assessment of the fixture and the wire condition. The task can be done safely in many homes, provided you follow basic electrical safety rules, compatible parts, and proper reassembly techniques. According to Bulb Fix, the most common issues stem from damaged insulation, loose terminals, or corroded contacts rather than a complete socket failure. Before you touch any wires, confirm the fixture is de-energized and accessible. If the socket is in a ceiling or high location, plan for stable support and a bright, dust-free workspace. This is not a cosmetic upgrade; you’re restoring a critical connection that carries current to the lamp. With patience, the right tools, and mindful handling of conductors, you can complete the replacement with minimal risk.
In many homes, learning how to replace a bulb socket is a practical skill that reduces downtime and improves lighting reliability. Keep the work area dry and organized, and avoid working alone when high ceilings or ladders are involved. If you encounter unusual resistance or damaged wiring, pause and reassess rather than forcing components. The goal is to create a secure, lasting connection that will safely carry the rated current for the fixture.
Understanding socket types and compatibility
Bulbs and fixtures come with several socket styles, and compatibility matters for both safety and performance. Common residential bases include screw-in types like E26/E27 and bayonet variants in older fixtures. Always confirm the base type and voltage rating before purchasing a replacement socket. If you’re unsure, bring the old socket to a hardware store for a match, or consult the fixture’s manual. When selecting a replacement, prioritize models with the same base geometry and a rated wattage that meets or exceeds the original fixture for reliable operation. Some sockets integrate features like anti-arc contacts or improved insulation; these can reduce wear and prolong life. By understanding base type, thread size, and contact configuration, you’ll avoid fitment issues and flicker after installation.
Prerequisites: power off and safety planning
The foundation of any bulb socket replacement is to prevent electric shock. Always switch off power at the circuit breaker or fuse box before beginning. If the fixture is controlled by a wall switch that could be turned on inadvertently, disable that switch as well. Use a non-contact voltage tester to confirm the absence of live voltage on the wires you’ll handle. Wear safety glasses and gloves as needed, and keep your workspace dry. If you must work from a ladder or step stool, ensure it’s stable and on a dry surface. Planning ahead reduces surprises and protects both you and the fixture during disassembly and reassembly.
Tools, safety gear, and replacement parts
Gather the tools and parts listed in Tools and Materials before you start. A well-prepared workspace helps prevent mistakes. You’ll need a voltage tester, a screwdriver set (Phillips and flathead), wire strippers, a replacement socket compatible with the fixture base, wire nuts or electrical connectors, electrical tape, a flashlight or headlamp, gloves, and a stable ladder. Having a capture photo or schematic of the original wiring can help you re-create the connections correctly. If the wiring shows signs of damage beyond a frayed insulation or a scorched connector, consider replacing the entire wiring segment or consulting a professional.
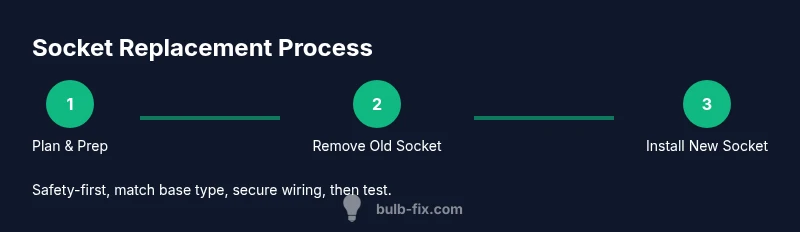
Step-by-step overview: plan the replacement
This project consists of measuring and matching the socket, de-energizing the circuit, removing the old socket, wiring and installing the new socket, and finally testing the fixture. Plan the sequence so you never work on live conductors. Confirm base compatibility, set up your ladder, and prepare the new socket with the correct terminals ready for attachment. Visual references such as photos taken before disassembly make reassembly straightforward. Keep connectors tight but not over-tightened, and ensure no bare conductors are exposed after wiring.
Disassembly and socket removal considerations
Carefully remove the fixture cover or shade to access the socket. If screws secure a mounting plate, loosen them evenly to avoid bending the housing. Note which wire goes to the hot terminal and which goes to neutral, or take a photo for safety. Gently loosen and detach the wires from the old socket, making sure not to nick insulation. Inspect conductors for signs of heat damage or corrosion. If you find melted insulation, kinked wires, or burned marks, stop and replace the affected section or entire unit. Keep the removed socket for reference in wiring layout and orientation.
Installing the new socket and wiring basics
Attach the wires to the new socket in the same arrangement as the old one: hot to the brass terminal and neutral to the silver terminal, with ground where applicable. Tighten terminals securely to minimize arcing. If your socket uses screw terminals, ensure the wire strands are fully under the screw head and clamped. Reassemble the fixture if needed and ensure the socket sits firmly in its housing. Double-check that no wires are pinched and that there’s a clear path for airflow to reduce overheating risks.
Testing, verification, and final safety checks
With the fixture reassembled, restore power at the breaker and test the socket with a known-good bulb. Observe for flickering, buzzing, or warmth at the socket—these can indicate a loose connection or overload. If there’s any abnormal noise, smell, or heat, turn off power immediately and re-inspect the connections. Use a voltage tester to confirm power is flowing correctly to the lamp circuit and that the bulb lights steadily without flicker. Finally, re-secure any faceplates, enclosures, or shades, and store spare parts safely for future maintenance.
Troubleshooting scenarios and when to call a professional
Not all socket issues are straightforward. If the new socket doesn’t fit physically, or if you detect damaged wiring, moisture intrusion, or signs of overheating, stop and seek professional help. If the fixture is part of a larger circuit with multiple outlets, a stray voltage or grounding issue could require a licensed electrician. For ceiling fixtures in high ceilings, consider professional installation to minimize fall risks. Remember that working with electrical components always carries risk, and safety should never be compromised.
Tools & Materials
- Voltage tester(Verify de-energized circuit before handling any wires)
- Screwdriver set (Phillips and flathead)(Remove cover plates and socket screws)
- Pliers (needle-nose)(Grip wires and assist in bending conductors)
- Wire strippers(Expose about 1/2 inch of conductor)
- Replacement socket (base-matching)(Match base type and electrical rating)
- Wire nuts or electrical connectors(Secure splices and insulate connections)
- Electrical tape(Seal exposed conductors if needed)
- Safety goggles(Eye protection in case of debris)
- Work gloves(Protect hands from sharp edges)
- Flashlight or headlamp(Illuminate work area in dark spaces)
- Ladder or sturdy step stool(Access ceiling fixtures safely)
Steps
Estimated time: 30-60 minutes
- 1
Turn off power and verify
Go to the main panel or switch and turn off the circuit feeding the fixture. Use a non-contact tester to confirm no voltage is present before touching any wires.
Tip: Always double-check on the live wires after switching off power. - 2
Access the socket
Remove any cover, shade, or faceplate to expose the socket. Support the fixture with a stable ladder if required.
Tip: Keep screws organized by placing them in a small container so they don’t roll away. - 3
Document wiring layout
Take a quick photo or note which wire attaches to each terminal. This helps during reassembly and reduces guesswork.
Tip: Label wires with masking tape if multiple cables are present. - 4
Disconnect the old socket
Loosen and remove the wires from the old socket terminals carefully. Do not pull on the wires directly.
Tip: Do not yank; use pliers to loosen screws if needed. - 5
Inspect and prepare
Check insulation, wire strands, and the socket for damage. Replace any frayed conductors or corroded parts.
Tip: If insulation is compromised, replace the sheathing or wiring segment. - 6
Connect the new socket
Attach hot and neutral wires to the corresponding terminals, tightening securely. If there’s a ground, connect it as well.
Tip: Trim and twist wire ends evenly for a clean, firm connection. - 7
Secure and reassemble
Mount the new socket, reattach any plates, and ensure nothing is pinched or loose.
Tip: Avoid overtightening screws which can crack the fixture. - 8
Restore power and test
Turn the breaker back on and test with a bulb. Check for stable operation and absence of heat or unusual sounds.
Tip: Test with a known-good bulb first to verify operation. - 9
Cleanup and disposal
Remove tools, store spare parts, and dispose of old socket properly according to local regulations.
Tip: Wipe down any dust and check the area for any loose hardware.
Got Questions?
What is a bulb socket and what does it do?
A bulb socket is the electrical connector that holds a lamp bulb and provides a path for current to flow into the bulb. It ensures proper alignment and secure contact with the bulb terminals. Replacement is sometimes necessary when contacts are corroded or insulation is damaged.
A bulb socket is the connector that holds the bulb and carries current. Replacement is needed if contacts are corroded or insulation is damaged.
Can I replace a bulb socket myself?
Yes, with proper safety precautions, the right replacement socket, and basic hand tools. Ensure the power is off, verify wiring, and follow the base type and rating requirements. If you’re unsure about wiring or ceiling fixtures, consider professional help.
Yes, you can DIY if you’re careful and observant. Turn off power, verify wiring, and match the socket base. If in doubt, seek a professional.
What tools do I need to replace a bulb socket?
You’ll need a voltage tester, a screwdriver set, wire strippers, a replacement socket, wire nuts, electrical tape, gloves or safety glasses, a flashlight, and a sturdy ladder. Having photos of the original wiring helps during reassembly.
Essential tools include a tester, screwdrivers, wire strippers, a replacement socket, wire nuts, and a ladder.
What are signs a socket needs replacement?
Frequent flickering, buzzing sounds, warm or discolored sockets, or bulbs that frequently burn out. If the wiring shows burn marks or melted insulation, replace the socket and nearby wiring rather than attempting a quick fix.
Flickering, buzzing, or warmth are red flags. Look for burnt insulation and replace the socket if seen.
Is it safe to replace a socket on a ceiling fixture?
Yes, when you follow strict safety steps: de-energize, use proper height equipment, and ensure good lighting. If you’re not comfortable working overhead or with high ceilings, hire a professional.
It’s safe if you power down and use proper tools. For high ceilings, consider a pro.
What if the new socket doesn’t fit the fixture?
Double-check the base size, mounting method, and electrical rating. If there’s no compatible socket, you may need to replace the entire fixture or rework the mounting box.
If it doesn’t fit, check the base type and rating. You might need another fixture.
Watch Video
Key Points
- Always switch off power before touching any fixture.
- Match socket base type and rating to the fixture.
- Label and photograph wiring to ensure accurate reassembly.
- Test the replacement bulb socket thoroughly after installation.
- Call a professional if you encounter damaged wiring or uncertainty.