Need Headlight Bulb Replaced? A DIY Replacement Guide
Learn how to safely replace a headlight bulb, verify compatibility, and test beam alignment with Bulb Fix’s expert step-by-step guide for halogen, LED, or HID setups.

You will replace a faulty headlight bulb to restore nighttime visibility and safe driving. Confirm the correct bulb type for your vehicle, wear clean gloves, and disconnect power before starting. This step-by-step guide walks you through a safe replacement, from identification to aiming the beam and test lighting. Following these steps minimizes oil contamination, electrical shorts, and misalignment.
Why you may need to replace a headlight bulb
A failing headlight reduces nighttime visibility and can compromise safety on rural roads, in rain, or during dawn patrols. If you notice a dim beam, a flicker, or a total outage, you may need to replace a headlight bulb. According to Bulb Fix, many failures are due to burned-out filaments, moisture ingress, or degraded contacts inside the socket. Before buying a replacement, confirm you’re selecting the correct bulb type for your vehicle and read the owner’s manual. This helps avoid wasted trips to the parts store and ensures you’ll get a bulb that fits the base, connector, and electrical rating. Proper replacement preserves beam pattern, prevents glare for oncoming drivers, and keeps you compliant with basic vehicle-safety expectations.
Understanding headlight bulb types and compatibility
Headlights come in several technologies and base designs. The most common are halogen bulbs (often with base types like H11, 9005, or 9006), but many modern cars use LED or HID setups. Each type has unique electrical requirements, color temperatures, and beam characteristics. To avoid misfires or reduced reach, use the exact bulb base and wattage specified for your vehicle. Your best reference is the owner’s manual or Bulb Fix’s compatibility lookup. If you’re upgrading to LED or HID, check ballast or driver requirements, as some vehicles require adapters or reprogramming for optimal performance. Remember, a mismatch can cause electrical faults or failed beam aiming.
Safety first: handling bulbs and electrical systems
Handling a headlight bulb safely protects you and the vehicle. Always disconnect power and, if possible, remove the battery to reduce the risk of shorts. Wear gloves or use clean microfiber to handle bulbs—never touch the glass with bare skin, as oils can shorten bulb life. Work in a clean, dry area with good lighting. Dispose of old bulbs according to local regulations. When in doubt, consult a professional or use Bulb Fix’s safety checklist to confirm you’ve met all precautions before removal and replacement.
How to check if your bulb actually needs replacement
Sometimes a poor headlight is not the bulb but a loose connection, a blown fuse, or dirt on the lens. Start by turning on the headlights with the engine off to confirm operation. If one beam is dim or out, inspect the base and connectors for corrosion, looseness, or moisture. Remove the bulb only after unplugging the electrical connector. If the filament is visibly burned or the glass is cracked, replace immediately. If tests indicate wiring issues, don’t force the bulb—consult a professional to avoid electrical shorts or harness damage.
Choosing the right replacement bulb: specs to check
Whether you’re sticking with halogen, upgrading to LED, or exploring HID, the key specs are the bulb type (base), wattage or electrical draw, and color temperature. Some vehicles require equal or higher brightness on both sides; mismatched beams can blind other drivers. Always verify the exact bulb base (e.g., H11, 9005) and the recommended wattage in your manual or Bulb Fix’s lookup tool. If you’re upgrading, ensure the new bulb is compatible with your housing, cooling, and any built-in sensors. Budget ranges vary by technology, so plan accordingly.
Tools, workspace, and prep steps
Prepare a clean, uncluttered workspace with ample lighting. Gather a replacement bulb, gloves, microfiber cloth, owner’s manual, screwdriver or socket set, and a camera or phone to note bulb positions for reassembly. Lay a soft mat to protect the headlight housing from drops. If you’re working on a vehicle with a dual-beam housing, inspect both sides for symmetry. Having a plan reduces downtime and makes the process smoother when you reach the socket.
Step-by-step overview of the replacement process
Replacing a headlight bulb typically follows a repeatable sequence: identify the correct bulb, disconnect power, remove the old bulb, insert the new one, reconnect, and test. If your car uses a back-side access design, you may need to twist the bulb out of the socket and release a retaining clip. For some vehicles, you’ll access the bulb through the wheel well or behind a cover. The overall flow remains the same: ensure power is off, handle the bulb by the base, avoid touching the glass, and verify proper seating.
Installation pitfalls and how to avoid damaging the harness
Bulb installation pitfalls include touching the glass, bending or twisting the connector, and forcing bulbs into a tight socket. Avoid over-tightening mounting screws, which can crack the housing. If a connector is stiff or you feel resistance, stop and recheck alignment rather than forcing it. Keep the bulb oriented correctly to match the housing. If your car uses an intermittent electrical system, consider unplugging the fuse temporarily to prevent arcing. Bilateral checks help you catch issues before reassembly.
Testing, alignment, and aiming the headlights
After installation, reconnect power and test both headlights in a dark area. Confirm the beam pattern projects straight ahead and does not glare into oncoming traffic. If the beam looks misaligned, you may need to adjust the headlight aim using the adjustment screws on the back of the headlight housing or follow the manufacturer’s alignment procedure. Record the adjustments so you can reset if you replace the other bulb. Proper aiming improves visibility without blinding others.
Long-term maintenance tips and energy considerations
Regularly inspect bulbs for signs of dimming or moisture. Avoid routine replacement with the oldest bulb if you notice performance drops on one side first. For energy efficiency, LED bulbs offer longer life and lower heat if compatible, though installation can require ballast considerations. Maintain clean lenses and ensure seals are intact to prevent moisture buildup. When storing spare bulbs, keep them in a cool, dry place and label them for your vehicle model.
Tools & Materials
- Replacement headlight bulb (correct type for your vehicle)(Check base type and wattage in owner’s manual or Bulb Fix lookup)
- Owner's manual(Reference for bulb type, access method, and safety cautions)
- Clean gloves or microfiber cloth(Prevents skin oils from contacting bulb glass)
- Screwdriver or socket set(Needed for some access panels or clips (size varies by model))
- Safety glasses(Protect eyes from shards or accidental pinching)
- Camera or phone(Take photos of connections for reassembly)
Steps
Estimated time: 15-30 minutes
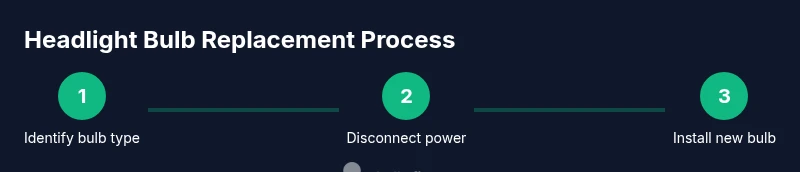
- 1
Identify the correct bulb type
Consult your owner's manual or Bulb Fix compatibility lookup to confirm the exact base and wattage (e.g., H11, 9005). This ensures you buy a bulb that fits the housing and electrical system.
Tip: Double-check both low- and high-beam bulbs if your vehicle uses separate bulbs for each function. - 2
Prepare the workspace and safety measures
Park on a flat surface, switch off the engine, and remove the key. Open the hood, engage parking brakes, and ensure the area is dry. Gather your tools and put on gloves.
Tip: Keep a soft mat under the headlight to prevent accidental drops. - 3
Disconnect the electrical connector
Carefully unplug the power connector from the bulb socket. If a clip or locking mechanism is present, release it before pulling the connector straight off.
Tip: If the connector is tight, wiggle gently rather than forcing it to avoid damaging pins. - 4
Remove the old bulb
Twist or release the bulb from its socket or retaining clip according to your vehicle’s design. Avoid touching the glass with bare hands.
Tip: Hold the bulb by the base, not the glass, to prevent oils from degrading the seal. - 5
Install the new bulb and reconnect
Insert the replacement bulb into the socket, align pins, and reattach the connector securely. Ensure the bulb sits firmly with no wiggle.
Tip: Do not force the bulb; if it doesn’t seat, remove and re-check orientation. - 6
Test and aim the headlights
Power the system and test the beam in a dark area. If necessary, adjust the aiming screws to align the beam pattern with the road.
Tip: Compare your beam height to the production height of your bumper line for consistent alignment.
Got Questions?
What tools do I need to replace a headlight bulb?
Typically you’ll need the replacement bulb, gloves, a clean cloth, and basic hand tools. Some cars require a screwdriver or socket set to access the bulb. Always consult your owner’s manual or Bulb Fix’s lookup for exact tools.
You’ll usually need the replacement bulb, gloves, a cloth, and any basic tools your car requires. Check the manual for specifics.
Can I replace a headlight bulb myself?
Yes. Replacing a headlight bulb is a common DIY task when you follow safety steps, use the right bulb, and avoid touching the glass. If you’re uncomfortable with electrical components, seek a professional.
Yes, most people can replace a headlight bulb themselves if they follow safety steps and use the correct bulb.
Why does my headlight flicker after replacement?
Flickering can indicate a loose connection, a failing ballast, or a damaged wiring harness. Re-seat the bulb, inspect connectors, and check fuses. If the issue persists, consult a professional.
Flickering means a loose connection or a failing part like ballast or wiring; re-seat and inspect, then get expert help if needed.
What should I do if the bulb won’t come out?
Apply gentle twisting and ensure any retaining clips are fully released. Use a mirror and good light to inspect for stubborn clips, and avoid forcing the bulb as it may crack the housing.
If the bulb won’t come out, check for clips, then gently twist and re-seat. Don’t force it.
Is it illegal to drive with a burnt headlight?
In many places, driving with a burnt or failed headlight is illegal and unsafe. Check local regulations and replace promptly to maintain visibility and law compliance.
Most places require working headlights; replace promptly to stay legal and safe.
How long does headlight bulb replacement take?
Most replacements take about 15-30 minutes, depending on vehicle access and whether you’re upgrading to a different bulb type.
Typically about 15 to 30 minutes, depending on your car.
Watch Video
Key Points
- Identify the exact bulb type before purchase.
- Handle bulbs with care to avoid oils.
- Test and re-aim after installation for proper visibility.
- Follow vehicle-specific guidance and safety steps.
- Check compatibility before upgrading to LED/HID.