Change a Light Bulb Safely: A Practical Home Guide
Learn to change a light bulb safely with Bulb Fix's practical, step-by-step guide. Pick the right bulb, power down, install correctly, and test for a safe, well-lit home.

Change a light bulb safely and restore brightness in minutes. This guide covers selecting the right bulb, turning off power, and basic safety tips, plus troubleshooting for common issues like flicker or fitting problems. Whether you’re replacing a ceiling fixture or a table lamp, this steps-focused approach keeps your home well-lit and safe.
Why change a light bulb matters
Replacing a burnt-out bulb is a routine maintenance task, but it’s also a moment to review safety and efficiency. A wrong bulb can overheat, fail early, or cause fixture damage over time if the wrong bulb is used. According to Bulb Fix, the simplest bulb change performed correctly can prevent misfit sockets, reduce energy waste, and keep rooms consistently lit. Understanding the basics helps homeowners avoid common mistakes and reduces the risk of accidental shocks or burns. In this section you’ll see why a bulb change is more than a quick swap: it’s a small act that preserves safety, comfort, and the perceived quality of light in your space. By aligning bulb type, base, and fixture compatibility, you set the stage for reliable illumination and longer-lasting fixtures.
How bulb technology affects performance
The technology you choose has a direct impact on brightness, warmth, energy use, and longevity. Incandescent bulbs produced warm light but used more energy; CFLs offered efficiency but sometimes slower warm-up and color inconsistencies; LED bulbs today combine long life with consistent color and immediate full brightness. When selecting a bulb, check the socket base type, whether the fixture is rated for dimming, and the desired color temperature. Bulb Fix analysis shows LEDs are usually the best all-around option for most homes due to longevity and efficiency, while specialized halogen or vintage-style bulbs can suit particular tasks or aesthetics.
Safety considerations before you start
Safety is the core of this task. Start by turning off the power at the switch and, if the fixture is hard to reach, at the breaker. Do not attempt changes in wet locations unless the fixture is rated for damp or wet use. Allow the bulb to cool before touching it, and consider wearing gloves to improve grip and protect your hands. Keep a stable stance, use a ladder or step stool if needed, and never force a bulb that won’t twist out—double-check that you have the correct base and that the bulb isn’t installed backward.
How to choose the right bulb for your fixture
Base compatibility first: most residential fixtures use a screw-base such as E26/E27, but some lamps use bayonet bases or candelabra bases. Select a bulb whose base matches the socket and whose wattage range fits the fixture label. For comfort and efficiency in living areas, consider warm white LEDs designed for household use; they provide steady light with low heat. If your fixture includes a dimmer, verify that the LED bulb is dimmable and compatible with your dimmer switch to avoid flicker or buzzing. Finally, evaluate longevity and energy use relative to cost to choose a balance between upfront price and long-term savings.
Step-by-step overview
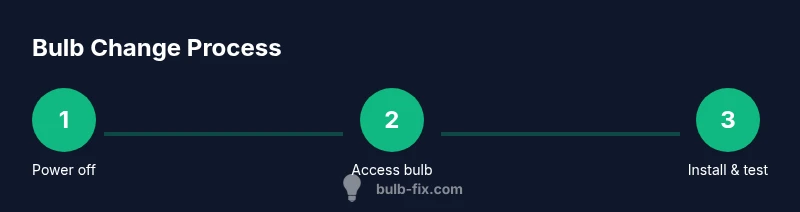
This section provides an overview of the practical actions you’ll perform in the detailed steps below. Power down the circuit, access the bulb by removing the cover or glass shade if required, carefully grip the bulb, and rotate counterclockwise to remove. Align the new bulb with the socket, insert, and rotate clockwise until snug but not tight. Restore power and test the light, watching for steady operation and noting any unusual noise or flicker. The upcoming step-by-step instructions fill in the exact actions for ceiling fixtures, table lamps, and specialty bulbs.
Safety tips and common mistakes
- Pro tip: Let bulbs cool completely before handling to avoid burns.
- Warning: Oils from your skin can shorten LED life; use a cloth or gloves when handling.
- Note: If the bulb won’t twist out, don’t force it—verify base type and socket alignment.
- Pro tip: If you’re replacing a high-mounted bulb, consider using a stable ladder and have a helper nearby.
- Note: Keep a spare bulb of the same type and color temperature in a safe location to speed future changes.
Tools & Materials
- Correct replacement bulb(Match base type, wattage range, and color temperature)
- Sturdy ladder or step stool(Use a stable surface and have a helper if needed)
- Non-slip gloves or lint-free cloth(For grip and to avoid oils)
- Safety glasses(Optional eye protection)
- Screwdriver (flathead or Phillips)(Only if your fixture requires removing a cover)
- Dust-free cleaning cloth(To wipe socket contacts gently)
Steps
Estimated time: 10-15 minutes
- 1
Power down and prepare
Turn off the fixture at the switch and, if it’s at a high location, switch off the corresponding circuit breaker. Confirm the fixture is cool before touching. This prevents shocks and burns and ensures you can handle the bulb safely.
Tip: Double-check that the room is off-limits to power feed if you suspect a shared circuit. - 2
Access the bulb safely
If a cover or shade blocks access, remove it according to the manufacturer’s instructions. Ensure you have a stable stance on the ladder or stool before reaching the bulb area.
Tip: Have a helper hold the cover or shade if it’s bulky. - 3
Remove the old bulb
Grasp the bulb firmly with gloves or a dry cloth and rotate it counterclockwise until it loosens from the socket. Do not yank; if it won’t budge, stop and recheck base compatibility.
Tip: Inspect the base and socket for signs of wear or corrosion before inserting a new bulb. - 4
Install the new bulb
Line up the base with the socket and turn clockwise until snug. Avoid overtightening, which can strip the threads or damage the socket.
Tip: If you’re unsure of the base type, remove and re-check the packaging for exact fit instructions. - 5
Test the installation
Restore power, switch the light on, and observe for steady illumination. Listen for buzzing or flicker and ensure the bulb is seated evenly.
Tip: If flicker persists, re-seat the bulb or try a known-good bulb to diagnose the fixture.
Got Questions?
Can I replace a bulb with the power on?
No. Always turn off the power at the switch, and at the breaker if needed, before handling bulbs. This minimizes the risk of shocks or burns.
Turn off the power at the switch before changing bulbs to stay safe.
What bulb types save energy most effectively?
LED bulbs are generally the most energy-efficient and long-lasting option for most homes. They come in various color temperatures and are widely compatible with fixtures.
LED bulbs are typically the best choice for energy efficiency.
Why won’t my new bulb light up after installation?
Check that the bulb is fully seated, the base matches the socket, and the fixture’s fuse or breaker hasn’t tripped. If it still won’t light, try a different bulb to rule out a faulty bulb.
If it won’t light, reseat the bulb and check the breaker.
Are LED bulbs compatible with dimmers?
Some LEDs are dimmable, but not all. Ensure the bulb is labeled dimmable and that your dimmer switch supports LED loads to avoid flicker or buzzing.
Check that the LED is dimmable and compatible with your dimmer.
How should I dispose of broken bulbs?
Wear gloves, carefully collect shards, and place them in a sealed container or bag. Follow local guidelines for recycling or disposal, especially for fluorescent bulbs.
Wear gloves and seal shards in a container before disposal.
What if the bulb base is different from the socket?
Identify the correct base type first (screw base, bayonet, etc.). Use a bulb with a matching base and avoid forcing mismatched bulbs into sockets.
Make sure the base matches the socket before inserting.
Watch Video
Key Points
- Always switch off power before touching a bulb.
- Match base type, wattage, and color temperature.
- Use a stable setup and proper grip when reaching high fixtures.
- Test after installation and watch for flicker or buzzing.