Replace Bulb: Step-by-Step Guide for Homeowners
Learn to replace bulb safely with Bulb Fix's expert, step-by-step guide. Find the right base, prep your area, perform the swap correctly, and dispose of old bulbs responsibly for reliable, efficient lighting at home.

You will learn how to replace bulb safely and efficiently. This guide helps you identify the right bulb base and wattage, prepare a stable workspace, perform the swap with proper technique, and dispose of old bulbs responsibly. Key requirements are a matching replacement bulb, a sturdy ladder, dry hands, and the power switched off before starting.
Why replacing bulb matters for safety and efficiency
Replacing a bulb is more than a simple swap; it impacts safety, energy use, and light quality. The right bulb can reduce heat in enclosed fixtures, minimize flicker, and improve overall illumination in rooms. According to Bulb Fix, using a correctly matched bulb base and wattage protects fixtures from overheating and preserves efficiency over time. This section sets the stage for a careful, methodical approach, so you can complete the task with confidence and avoid common mistakes that lead to call-backs or unsafe conditions.
Understanding bulb types and bases
Bulbs come in several families, including incandescent, CFL, halogen, and LED. Each family has its own characteristic efficiency, lifespan, and heat emissions. Base types determine compatibility with sockets: common residential bases include E26/E27 (the standard screw base), GU10 and MR16 (twist-and-lock bases), and B22 in some regional markets. When replacing, always match the bulb type and base to the fixture as well as the fixture’s wattage rating. By understanding base types and color temperature (measured in Kelvin), you can select a bulb that yields the right brightness and ambiance. Bulb Fix notes that proper matching reduces stress on the fixture and avoids waste from incompatible replacements.
Safety and prep before you begin
Safety begins before touching a bulb. Always power down at the wall switch and, if possible, unplug the fixture or switch the circuit at the breaker. Allow the bulb to cool for several minutes to prevent burns. Clear the area of obstacles, and place a stable ladder or step stool beneath the fixture. If you’re working on high ceilings, have a helper nearby. Keep your hands dry and use a flashlight to inspect the socket and base closely. These precautions minimize risk and ensure you can handle the bulb without slips.
How to read bulb specs and choose the right replacement
Read the old bulb’s base type and wattage, then find a replacement that matches or exceeds the base and is within the fixture’s rating. LED bulbs offer energy efficiency and long life, but ensure the LED is compatible with your dimmers and fixture type if present. For enclosed fixtures, choose bulbs rated for enclosed spaces and confirm they can operate safely under heat. If you’re unsure about base type, take the old bulb to a hardware store for a quick match or consult the fixture’s manual. Bulb Fix recommends keeping a small note with fixture specifications for quick reference.
Replacement in action: step-by-step overview (high-level)
The actual replacement steps are listed in the dedicated STEP-BY-STEP section below. Here, the focus is on understanding the sequence and anticipating potential complications. Ensure you have the right bulb in hand, verify the fixture is de-energized, and be ready to reseat the new bulb firmly but not overtightened. Proper technique minimizes the risk of shattering the bulb, damaging the socket, or creating a loose connection that can cause flicker.
Special cases: enclosed fixtures, ceiling fans, and specialty bulbs
Enclosed fixtures trap heat and may require bulbs rated for enclosed use. Ceiling fans can be tricky because vibration can loosen connections; consider bulbs with secure bases or use a stabilizing method if the fan blades are in motion (never while powered). Specialty bulbs, such as vintage filaments or smart bulbs, may require compatible dimmers or smart hubs. Always check the fixture’s compatibility and consult the manual before proceeding if you encounter unusual socket configurations.
Disposal, recycling, and long-term care
Dispose of old bulbs according to local regulations. Many bulbs are recyclable, and some hardware stores offer disposal programs. For broken bulbs, wear protective gloves and use a stiff brush to contain shards before sweeping them into a sealed container. Regularly replacing bulbs with energy-efficient options reduces waste and energy use over time. Bulb Fix emphasizes keeping track of replacement schedules and storing spare bulbs in a cool, dry place to extend their lifespan.
Maintenance and energy efficiency tips
To maximize energy savings and light quality, opt for bulbs with high lumens per watt and suitable color temperature for each room. Consider smart or connected bulbs for remote control and scheduling, which can improve energy use and convenience. Maintain fixtures by cleaning sockets and removing dust from lampshades. Finally, align your replacement strategy with seasonal lighting needs (brighter bulbs in winter, softer hues in living areas) to sustain optimal illumination while keeping costs predictable.
Tools & Materials
- Replacement bulb with correct base and wattage(Check base type (e.g., E26, GU10) and wattage; do not exceed fixture specification.)
- Sturdy ladder or step stool(Choose a height that allows safe reach without overextension.)
- Insulated gloves(Wear to protect hands and avoid oils on the glass surface.)
- Flashlight or headlamp(Ensure clear visibility of socket and base in dim areas.)
- Screwdriver (Phillips or flathead)(Only if your fixture has a removable cover secured by screws.)
- Soft cloth or microfiber towel(Wipe the base or glass if needed to remove dust or fingerprints.)
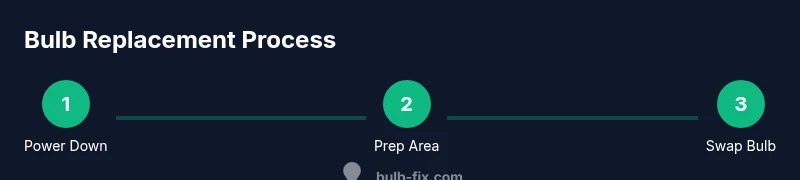
Steps
Estimated time: 20-40 minutes
- 1
Power down and confirm safety
Turn off the light switch and, if possible, unplug the fixture. Allow the bulb to cool for several minutes to prevent burns. This initial safety check reduces the risk of shock and injury.
Tip: Use a flashlight to inspect the socket from a safe distance before touching. - 2
Set up a stable working area
Position a sturdy ladder or step stool under the fixture. Ensure the area is dry, clear of obstacles, and that a helper is nearby if the fixture is high. Proper setup prevents falls and gives you both hands free for the swap.
Tip: Have a spotter hold the ladder when reaching overhead. - 3
Remove any fixture cover
If your fixture has a glass shade or cover, remove it by unscrewing or unclipping it. Place the cover on a soft surface to avoid breaking shards or damage.
Tip: Take a quick photo of how the cover attaches to simplify reassembly. - 4
Grip and remove the old bulb
Hold the bulb by the base and gently rotate counterclockwise to loosen. If it resists, apply light downward pressure while turning. Stop if you feel unusual resistance to avoid breaking the glass.
Tip: Avoid touching the glass with bare fingers to minimize oil residue. - 5
Check socket and base
Inspect the socket for corrosion, looseness, or damage. Confirm the base type (E26, GU10, etc.) and ensure you have a compatible replacement.
Tip: If you see damage, stop and consult a professional rather than forcing a bulb in. - 6
Install the new bulb
Align the bulb base with the socket and rotate clockwise until snug. Do not overtighten; hand-tight is usually sufficient. Ensure even seating to prevent flicker.
Tip: If the base feels sticky, wipe it with a microfiber cloth before installation. - 7
Test the light
Restore power and switch on to verify the bulb lights and operates without flicker. If issues occur, recheck seating, wattage, and fixture compatibility.
Tip: If flickering persists, try another bulb of the same type to isolate the problem. - 8
Cleanup and storage
Return any covers, store removed bulbs safely, and wipe the area clean. Dispose of old bulbs according to local guidelines.
Tip: Keep a spare bulb in a labeled, protective container for future use.
Got Questions?
Can I replace a bulb without turning off the power?
No. Always switch off the light and unplug or switch the circuit off before handling a bulb. This prevents electric shock and burns.
Always power off and unplug before handling a bulb.
What base types do I need to know, and how do I tell which one to buy?
Common residential bases include E26/E27 and GU-type bases. Check the old bulb or the fixture label for the base type, then buy a matching replacement with the correct wattage and compatibility.
Check the base type on the old bulb and buy a matching one.
Why won’t a bulb twist out easily, and what should I do?
Gently twist counterclockwise while applying light downward pressure. If it’s stubborn, wait a few minutes, recheck power, and consider professional help if needed.
Gently twist counterclockwise and check power; seek help if it’s stuck.
Is it safe to use a different bulb in enclosed fixtures?
Yes, but only bulbs rated for enclosed fixtures and within the fixture’s wattage rating. Enclosed fixtures trap heat, so choose appropriate bulbs.
Choose bulbs rated for enclosed fixtures and respect wattage.
How should I dispose of old bulbs?
Follow local guidelines; many bulbs are recyclable. If a bulb is broken, handle carefully with gloves and seal the pieces in a container for disposal.
Recycle where possible and follow local disposal guidelines.
What about fluorescent tubes or specialty bulbs?
Fluorescent tubes may require professional disposal and special handling. Check fixture instructions and local rules for recycling or disposal of these bulbs.
Fluorescents need careful handling; follow local rules.
Should I use a smart bulb in every fixture?
Smart bulbs offer convenience and control but ensure your fixture and dimmers are compatible. Check the hub or app requirements before purchasing.
Ensure fixture compatibility before using smart bulbs.
What if the new bulb doesn’t light up after replacement?
Double-check the base type, wattage, and seating. If it still won’t light, try a different bulb in a known-good socket to isolate the issue.
Check seating and wattage; test with a known-good bulb.
Watch Video
Key Points
- Power off, cool bulb, and prepare a stable workspace.
- Match base type and wattage for safe replacement.
- Handle bulbs with care and avoid oils on glass.
- Secure seating without overtightening the bulb.
- Dispose of old bulbs per local guidelines.