Light Bulb Changing Pole: Safe High-Reach Replacement
Learn how to safely replace high-up bulbs using a light bulb changing pole. This Bulb Fix guide covers pole selection, safety checks, reaching, removing, installing, and disposal tips for a confident, ladder-free bulb change.

You will learn how to safely replace a light bulb using a light bulb changing pole, including choosing the right pole length, inspecting safety gear, and performing the removal and installation without climbing on furniture. The guide covers compatible bulb types, fixture access, angling for tight spaces, and practical safety tips, plus disposal considerations and what to do if you can't reach the socket.
Why a light bulb changing pole makes sense
A light bulb changing pole is an essential tool for homeowners who want to keep ceilings and high fixtures safe without climbing onto chairs or stools. The pole extends your reach so you can access most standard sockets from the floor, reducing the risk of falls or accidental bulb breakage. By choosing the right pole for your space, you also gain better control over angles and lighting, which helps you avoid over-tightening or cross-threading a bulb. In this guide, we use the term light bulb changing pole to describe extendable poles with adaptable heads designed for different bulb bases. Bulb maintenance becomes more predictable when you plan your approach and keep a dedicated pole handy in a utility closet. The Bulb Fix team emphasizes safety and practical, non-dramatic solutions that work for typical homes. Using a pole is not a substitute for caution; it’s a tool that helps you work smarter and safer when bulbs are out of reach.
When homeowners consider long-reach bulb changes, they often worry about weight, control, and compatibility. A well-chosen pole minimizes changes in leverage that can cause the bulb to twist unexpectedly. It also helps you maintain a comfortable, stable stance while you rotate or remove a stubborn bulb. If you’re unsure whether your fixture can be serviced with a pole, check the fixture’s height, the ceiling type, and the base of the bulb. Bulb Fix analysis shows that most everyday residential fixtures respond well to a standard extension pole, provided you match the head to the bulb base. Start with the basics: confirm power is off, fit the correct head, and practice a few gentle rotations over a clear workspace.
In summary, a light bulb changing pole is a practical safety investment for high ceilings, vaulted spaces, and hard-to-reach fixtures. It offers consistent reach, controlled handling, and fewer risky workarounds. This article will walk you through pole selection, safety checks, step-by-step usage, and maintenance so you can replace bulbs confidently without a ladder.
wordCount":210},{
Tools & Materials
- Extendable light bulb changing pole(Select a pole long enough to reach the fixture with comfortable handling; consider the head type and weight for easy control)
- Protective gloves(Wear to grip bulbs securely and protect hands from glass shards)
- Safety glasses(Protect eyes from potential breakage or debris during bulb change)
- Replacement bulb matching fixture(Check base type (E26, GU10, B22, etc.) and wattage/LED compatibility)
- Ladder or stable platform (optional)(Only if the pole cannot reach the fixture safely from the floor; ensure stability)
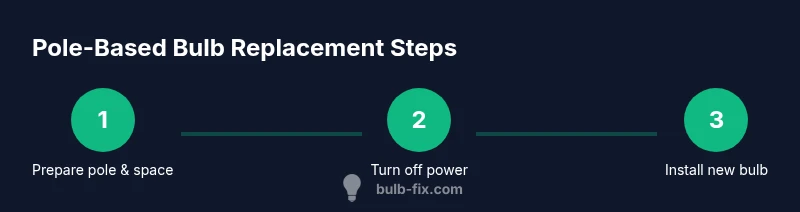
Steps
Estimated time: 15-25 minutes
- 1
Prepare the pole and workspace
Unfold and inspect the light bulb changing pole, ensuring the head is clean and compatible with your bulb base. Clear the area below the fixture, remove any fragile decor, and lay a soft cloth to catch a dropped bulb. This is the moment to confirm you’ll have a safe, unobstructed path to rotate or access the bulb. Why this matters: a clean setup minimizes slippage and accidental contact with the glass.
Tip: Test the pole’s balance by gently lifting it from the handle before attempting reach to avoid sudden shifts. - 2
Power down and verify the fixture
Turn off the circuit at the switch and, if possible, at the breaker to ensure there is no live current during the bulb change. Use a non-contact voltage tester if available to confirm no voltage is present. Working with the light bulb changing pole is safer when you double-check power status to prevent shocks or arcing.
Tip: Never rely on just the light switch if the fixture is connected to a different circuit; verify with a tester. - 3
Identify bulb type and prepare replacement
Examine the existing bulb to determine its base type and size. Prepare the replacement bulb with the same base and a similar rated wattage or LED equivalent. Having the replacement ready reduces the time you need to hold the bulb in the pole head, minimizing risk of slippage.
Tip: If you’re unsure about base type, bring multiple options: E26/E27, GU10, or G24 adapters may be needed. - 4
Position the pole and remove the old bulb
Mount the pole so the head aligns with the bulb in the socket. Use a gentle twisting motion to loosen the bulb, then carefully slide it out of the base with controlled pressure. If the bulb is tight, pause and recheck alignment before applying more torque.
Tip: Avoid sudden jerks; keep wrists flexible and use slow, steady movements. - 5
Install the new bulb with the pole
Align the new bulb with the socket before engaging it with a light twisting motion. Use the pole head to support the bulb during threading, especially for heavier bulbs. Stop as soon as the bulb seats; avoid overtightening which can damage the socket or bulb.
Tip: Handle the bulb by its base, not the glass, to prevent fingerprints and damage. - 6
Test the installation
Turn the power back on and test the fixture with a brief switch cycle. Observe stability and brightness; listen for any unusual humming that may indicate a loose connection. If the bulb flickers or hums, power off and reseat the bulb using the pole to adjust alignment.
Tip: If color or brightness looks off, try a compatible LED replacement that matches the fixture’s rating. - 7
Cleanup and store the pole
Wipe the pole head and socket area to remove dust, and return the pole to its storage location. Keep a spare replacement bulb nearby for future quick changes. Proper storage protects the pole’s mechanism and extends its life.
Tip: Store in a cool, dry place away from direct sunlight to prevent material degradation.
Got Questions?
Can I use any pole for all fixtures, or do I need a different head for each base?
Most poles offer interchangeable heads; always verify compatibility with your bulb base (E26, GU10, etc.). If uncertain, carry a couple of head options and test on a non-live fixture first.
Most poles have interchangeable heads; check bulb base compatibility before starting to avoid buying the wrong head.
Is it safe to use a pole on vaulted ceilings or sloped ceilings?
Yes, a pole can reach vaulted ceilings, but ensure you have stable footing and that the pole head can reach the socket without forcing angles. If the space is tight, use a secondary support or a taller pole designed for curved fixtures.
A pole helps with vaulted ceilings, but do not push beyond balance or twist too hard.
What bases require different poles or adapters?
Different bases like E26, GU10, and pin-type sockets may require adapters or specialized heads. Always match the head to the base and avoid forcing connections.
Different bulbs use different heads—check the base and use the correct adapter if needed.
What should I do if the bulb is stuck or won’t twist out?
Power off and verify alignment. Gently wiggle the bulb with light rotations, never using excessive force. If it remains stuck, stop and assess for a possible broken base or socket damage.
If it won’t budge, stop and reassess; applying force can break the socket.
Do I always need to turn off the breaker, or is the switch enough?
Turning off the light switch is often insufficient for safety; if the fixture is on a dedicated circuit, turn off the breaker to ensure there is no voltage. When in doubt, consult an electrician.
Turn off the switch, and if possible cut the circuit at the breaker.
Can I use a bulb changing pole outdoors or near water?
Use only where the fixture is rated for indoor or outdoor use and keep the pole away from wet areas. Water and electricity mix is dangerous; proceed with caution and use non-conductive equipment.
Avoid wet areas; only use in spaces rated for outdoor use with proper equipment.
Watch Video
Key Points
- Choose the correct pole length before starting
- Turn off power and wear PPE for safety
- Use controlled, slow motions to prevent breakage
- Store and maintain your pole after use