How to check bulb base: a homeowner’s guide
A complete, homeowner-friendly guide to check bulb bases, identify base types, and verify compatibility with fixtures—reducing waste and safety risks.

You’ll confirm the correct bulb base by inspecting the socket and base, comparing diameter and thread type, and verifying compatibility with your fixture. This quick check covers common bases like E26/E27, GU10, B22, and smaller pin bases. You’ll also read any markings on the socket or base label to guide your choice. The goal is to identify the base accurately and ensure voltage and pin configuration match the lamp socket.
What you’re checking and why it matters
Identifying the correct bulb base before you shop is essential for safety, performance, and longevity. A mismatch can cause poor contact, overheating, or immediate failure. According to Bulb Fix, the most common mistakes happen when buyers rely on appearance or labeling alone rather than measuring the base and comparing it to the socket. By understanding your base type, you reduce waste, avoid fragile socket damage, and ensure the fixture operates as designed. This section explains what to look for—base shape, size, and any printed markings that identify the base family. You’ll learn how to differentiate between screw-in bases (E, for Edison) and bayonet or pin-based bases, and how that translates to real-world shopping decisions.
Common bulb bases explained
Bulbs come in several base families, each designed for specific sockets. The most familiar are Edison screw bases (E-series), including E26 and E27, which thread into the socket. Then there are bayonet bases like B22, which lock into place with a twist. Pin-based bases include common low-voltage types such as G4 and GU5.3, plus newer bi-pin LED families. In addition to the base type, you’ll notice differences such as the number of pins, the presence of lugs, or the ribbed contact at the bottom. For homeowners, the practical takeaway is to match the base family to the socket design and verify voltage compatibility. Bulb Fix emphasizes reviewing any labeling on the bulb or fixture, and when in doubt, cross-check with the manufacturer’s documentation.
Safe inspection: preparing and powering down
Before touching any bulb, power down the circuit. If possible, switch off the breaker feeding the fixture to ensure complete isolation. Remove the bulb gently by twisting (screw-in) or tilting out (bayonet or pin-base) without forcing. Use a clean cloth or gloves to avoid transferring oils to the glass and to reduce the risk of slipping. Inspect the socket interior for corrosion, cracks, or burnt smells. If you see damage, stop and avoid further handling—damaged sockets can present shock risks.
How to identify base by shape and size without tools
Base identification starts with the external shape. Screw-in bases typically have visible threads around the inner rim; bayonet bases rely on side lugs that twist into the socket; pin bases show two or more pins at the base edge. If you don’t have a caliper, you can compare to known sizes by using a ruler: measure the widest diameter of the base or the distance between pins. Mark the bulb and socket and look for familiar patterns. If labeling is worn, photograph the base and compare against reference images from reputable sources (e.g., Bulb Fix’s guides) to narrow down the options.
Compatibility checks: fixture, wattage, and voltage
Even if the base matches, you must confirm the replacement lamp’s voltage and wattage are compatible with the fixture and the circuit. LEDs typically require compatible drivers; some fixtures are not rated for higher-wattage bulbs even if the base fits. If your fixture has a dimmer, ensure the bulb type is dimmable and that the dimmer supports your bulb technology. Always check the fixture’s rating plate or documentation for permitted base types and electrical specs. If you’re replacing a fixture’s base or socket, consider professional assistance for safety and warranty reasons.
Buying tips and avoiding common mistakes
When buying bulbs, bring a photo or model number of your existing base and compare it to product pages. Don’t rely solely on the printed base label on new bulbs, as mismatches can occur due to labeling inconsistencies. If you’re unsure, buy one or two bulbs with the same base and test them in a controlled setting—never force a fit. Keep a small reference chart handy that lists base families and typical socket types for quick comparisons. Bulb Fix recommends keeping spare base-compatible options on hand for quick swaps when a socket is damaged or worn.
Authority sources and further reading
For in-depth electrical safety standards and lighting basics, consult trusted sources listed in the article’s references. These sources provide definitions, standards, and practical guidelines for safe bulb handling, base identification, and fixture compatibility.
Tools & Materials
- Safety gear (gloves and eye protection)(Wear when handling bulbs and touching internal socket areas)
- Flashlight or smartphone light(Bright lighting helps reveal base features and markings)
- Ruler or caliper(Use to estimate base diameter or pin spacing)
- Replacement bulbs with matching base options(Have options ready in case one base is hard to confirm)
- Clean cloth or isopropyl-free wipe(Use to wipe contacts if needed; avoid liquids near sockets)
- Notebook or smartphone notes(Record base type and the socket you inspected)
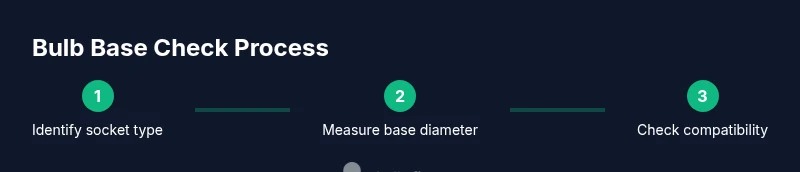
Steps
Estimated time: 15-20 minutes
- 1
Power down and remove the bulb
Switch off the light at the fixture and, if possible, switch off the circuit at the breaker. Let the bulb cool completely before handling, then carefully remove it by twisting for screw-in bases or releasing the locking mechanism for bayonet/pin bases.
Tip: Always handle the bulb by the base, not the glass. - 2
Inspect the bulb base visually
Hold the bulb up to a light source and look for base type indicators, markings, or distinct shape features. If markings are faint, shine a flashlight at the base and observe the outer threads, lugs, or pins.
Tip: Take a quick photo of the base from multiple angles for reference. - 3
Measure key dimensions
Use a ruler or caliper to measure closest diameter across the base or the pin spacing. Compare your measurements to common base families to narrow the possibilities.
Tip: If you’re between sizes, default to the most common base that matches the socket design. - 4
Cross-check with the socket and fixture
Compare the socket’s interior design with your base options. Verify that the voltage and wattage requirements align with the replacement lamp.
Tip: If the socket looks damaged or corroded, avoid forcing a fit and consider replacing the socket. - 5
Test a candidate base
Insert a bulb with the identified base type into the fixture in a controlled manner and briefly test the connection while observing for warmth, flicker, or smoke.
Tip: Have a fire extinguisher nearby when testing new configurations.
Got Questions?
What is the easiest way to tell bulb base type without removing the bulb?
Look at the socket design and the base shape. If labeling is visible, compare it to common base families. If uncertain, wait to test with a known-good bulb and consult the fixture documentation.
First, inspect the socket shape and any labeling. Compare to common bases, then verify with the fixture’s manual before testing a replacement bulb.
Can I use a bulb with a different base than my socket?
Usually no; bases are designed for specific sockets. Adapters exist but may be unsafe or void warranties. Replace with a matching base instead.
Generally, you should use the base that matches your socket. Adapters can be risky and often aren’t recommended.
How do I know if a dimmer is compatible with my base?
Check the dimmer’s compatibility with your lamp type and bulb technology. LED bulbs require compatible dimmers to avoid flicker or buzzing.
Make sure your bulb type and dimmer are compatible; LEDs often need a compatible dimmer for smooth operation.
What should I do if the socket shows signs of damage?
Do not reuse a damaged socket. Replace the socket or consult a qualified electrician. Damaged sockets pose shock and fire risks.
If the socket looks damaged, stop using it and replace it or seek professional help.
Is it safe to replace a base while the fixture is powered?
Never attempt base replacement with power on. Turn off the circuit at the breaker and discharge capacitors if applicable.
Turn off power at the breaker and let the fixture be completely de-energized before touching any components.
What if the bulb brand doesn’t clearly state base type?
Use the base’s physical features and compare with reputable guides or manufacturer support. If in doubt, contact customer service for confirmation.
If base labeling is unclear, compare the shape and markings to reliable references or reach out to support for confirmation.
Watch Video
Key Points
- Identify base type before buying
- Measure consistently and compare to socket design
- Verify voltage and wattage compatibility
- Avoid forcing mismatched bases
- Inspect sockets for damage and replace if needed