Bulb Syringe Ear Wax Removal: Safe Step-by-Step Guide
Learn how to safely remove ear wax using a bulb syringe with a detailed, step-by-step guide, safety tips, and indicators for when to seek professional help.

This guide shows you how to safely remove ear wax using a bulb syringe. You will learn how to soften wax, prepare a gentle rinse, and flush the ear without injuring the eardrum. Use proper hygiene, temperature checks, and stop if you feel pain. If you have a medical condition or current ear symptoms, consult a professional before attempting at home.
Understanding ear wax and the bulb syringe approach
Ear wax is a natural protective substance that helps guard the ear canal from moisture, dust, and microbes. In most healthy ears, small amounts gradually migrate out of the canal and down the outer ear where they can be wiped away. A bulb syringe, when used correctly, provides a gentle rinse that can help loosen soft cerumen and ease its removal. The keyword here is gentle; aggressive flushing can irritate the canal or damage the eardrum. If you notice persistent pain, drainage, or hearing loss, stop and consult a clinician. According to Bulb Fix analyses, the safest at-home approach emphasizes hygiene, proper temperature, and conservative use. In this article we focus on safe techniques, realistic expectations, and when to seek in-person care. As you read, remember that ear health varies by age, anatomy, and medical history. For many readers, a bulb syringe ear wax routine is a practical first step before exploring professional options.
Essential safety mindset for at-home ear care
Before you begin, set up a clean, well-lit workspace and ensure hands are washed. Avoid forcing water into the ear or inserting anything deep into the canal. Keep water warm (body temperature, around 37°C/98.6°F) to prevent dizziness or burns. Do not use a bulb syringe if you have a known ear infection, a perforated eardrum, tubes, or recent ear surgery. If any of these conditions apply, seek guidance from a healthcare professional. The goal is to soften and gently rinse, not to scrub or poke. Proper technique reduces the risk of irritation and makes subsequent visits to a clinician less likely.
How softening wax helps and what to use
Softening agents can make wax easier to remove with a bulb syringe. Common options include mineral oil, olive oil, or glycerin, used sparingly a few drops at a time for 5–10 minutes before flushing. In some cases, plain warm water alone is enough to soften the outer layer of the cerumen. Do not exceed recommendations and avoid mixing products without medical advice. Softening can extend the window of opportunity for safe removal, especially if the wax is stubborn or dry. If you have diabetes, a bleeding disorder, or immune compromise, discuss softening agents with a clinician first to prevent irritation or infection.
How a bulb syringe works: mechanics and best practices
A bulb syringe is a simple device: a squishy bulb connected to a short nozzle. When you squeeze the bulb, you expel warm water into the ear canal and the resulting backflow carries cerumen out. Important best practices include gentle, shallow application toward the outer canal, not deep into the ear. Keep the nozzle slightly angled downward and away from the eardrum. After flushing, tilt the head to drain the water and pat dry with a clean towel. Refrain from aggressive squirts or repeated aiming if you feel resistance or pain.
Common mistakes and how to avoid them
Many at-home attempts fail because of misuse rather than wax hardness. Common mistakes include inserting the nozzle too far, using water that’s too hot or too cold, and attempting to flush ear canal through excessive pressure. Another pitfall is flushing too frequently, which can cause irritation or infection. If you notice ringing, persistent pain, or discharge, stop immediately. Use a towel to catch drips and avoid using cotton swabs or other tools that could push wax deeper. For best results, follow a calm, patient routine rather than rushing through multiple sessions in a single day.
When to seek professional help and alternative options
If you have a history of ear problems, experience significant hearing loss, or the wax remains despite several gentle attempts, consult a clinician. An ear, nose, and throat (ENT) specialist can remove stubborn cerumen safely with specialized tools. If you notice fever, severe pain, or blood in the ear, seek urgent care. For many people, a combination of softening, careful irrigation, and professional evaluation provides the healthiest approach to cerumen management. Bulb Fix emphasizes that not every case requires at-home flushing, and professional assessment improves outcomes when in doubt.
Aftercare and long-term ear health habits
After a flushing session, dry the outer ear thoroughly and avoid inserting objects into the canal. Consider reducing wax buildup by maintaining regular, gentle cleaning on the outer ear, staying hydrated, and using a soft towel to wipe away moisture. If you’re prone to wax buildup, you may benefit from periodic check-ins with a clinician to tailor a plan that suits your anatomy. Keeping environmental factors—like humidity and water exposure—in mind can also help prevent recurrent buildup. Finally, remember that ear health varies by individual; listen to your body and adjust routines accordingly.
Tools & Materials
- Bulb syringe(Clean before use; check for cracks; ensure the nozzle is intact)
- Warm water(Test temperature on inner wrist; aim for body temperature)
- Soft towel or tissue(Place under the ear to catch drips during flushing)
- Optional ear-softening agent (mineral oil, olive oil, glycerin)(Use sparingly; follow product guidelines or clinician advice)
- Small bowl or cup(For warming water and rinsing the syringe between uses)
- Thermometer (optional)(Verify water temperature before use)
Steps
Estimated time: 20-40 minutes
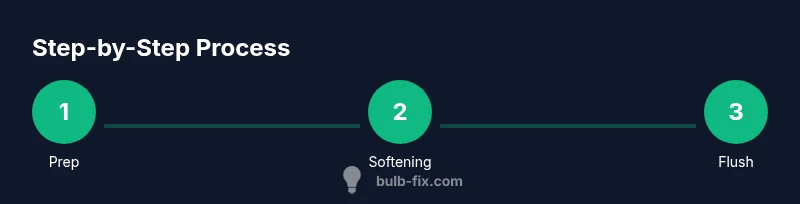
- 1
Prepare workspace and supplies
Set up a clean, well-lit area. Wash hands and place a towel over the counter. Check the bulb syringe for cracks and ensure water is at body temperature. Explain the plan to any caregiver and the person receiving care; stay calm and patient throughout the process.
Tip: Having a helper nearby can help stabilize the head and reduce movement during flushing. - 2
Softening the wax (optional but recommended)
If chosen, place 1–2 drops of an ear-softening agent into the ear canal and wait 5–10 minutes. This step helps thin the cerumen for easier removal. Do not force product into the canal and do not use for sensitive ears without guidance.
Tip: A warm, not hot, towel over the ear can help keep the solution in place during softening. - 3
Fill the bulb syringe with warm water
Squeeze the bulb to expel air, then submerge the nozzle tip in warm water and release to fill. Re-check that the water is at an appropriate temperature before insertion; avoid using cold or hot water as it can cause dizziness or discomfort.
Tip: Prime the bulb a few times until a steady, gentle flow is achieved. - 4
Position the head and flush gently
Have the person tilt their head to the side with the affected ear up. Insert the nozzle barely into the outer ear canal and point slightly downward and away from the eardrum. Gently squeeze the bulb to release a small amount of water; repeat as needed but stop if you experience resistance or pain.
Tip: Limit flushing to 1–2 gentle squirts per attempt to avoid irritation. - 5
Drain and dry the ear
Allow the water to drain by tilting the head to the side over the towel. Gently pat the outer ear with a towel; avoid inserting cotton swabs or any object into the canal. If water remains, you can repeat after a short break if there is no discomfort.
Tip: Keep the head tilted for a minute to maximize drainage. - 6
Evaluate results and repeat cautiously
Assess whether wax removal was successful. If the canal still feels blocked after the first attempt, you may repeat once more after 24 hours, unless symptoms worsen. If there is pain, discharge, or hearing loss, seek professional care rather than continuing at home.
Tip: Document what you did and any reactions to help a clinician tailor next steps.
Got Questions?
Is a bulb syringe safe for ear wax removal in adults?
When used gently and correctly, a bulb syringe can help with ear wax removal in healthy ears. It should be avoided if there is a perforated eardrum, ear infection, or recent ear surgery. Always soften wax first and stop if pain occurs.
Yes, it can be safe for healthy ears when used gently and with softening. Stop if you feel pain and seek clinician guidance for ear issues.
How often can I use a bulb syringe for ear wax?
Use at most as needed with rest days between attempts. Do not attempt multiple flushes in a single day, and avoid overuse which can irritate the ear canal.
Use it only as needed and avoid daily use; give your ears time between attempts.
What should I do if wax does not come out after flushing?
If wax remains after a couple of gentle attempts, stop and schedule a clinician visit. Persistent blockage or discomfort may require professional removal.
If it doesn’t come out after a couple of gentle tries, see a clinician for safe removal.
Can children use a bulb syringe for ear wax at home?
Pediatric ears require extra care; consult a pediatrician before attempting at home. Some children may tolerate gentle flushing, but others may need clinic-based removal.
Consult a pediatrician before using a bulb syringe on a child; some kids need professional help.
What are signs I should stop and seek care immediately?
Stop if you experience severe pain, dizziness, fever, discharge, or any hearing loss. These could indicate a perforation or infection requiring medical attention.
Stop and seek care if you have severe pain, dizziness, fever, discharge, or hearing loss.
Are there safer alternatives to a bulb syringe?
A clinician can offer cerumen-softening drops, microsuction, or irrigation under controlled conditions. For chronic buildup, professional evaluation is the safest route.
There are professional options like microsuction or irrigation under supervision if home methods fail.
Watch Video
Key Points
- Prepare a clean workspace and know when to pause.
- Softening wax and gentle rinsing reduce risk of injury.
- Observe safety signals and seek care if symptoms persist.
- Avoid inserting objects into the ear canal.