Bulb Without Light: Urgent Troubleshooting Guide
If your bulb won't light, use this urgent, practical troubleshooting guide to diagnose and fix common issues—from burnt-out filaments to faulty sockets and power problems.

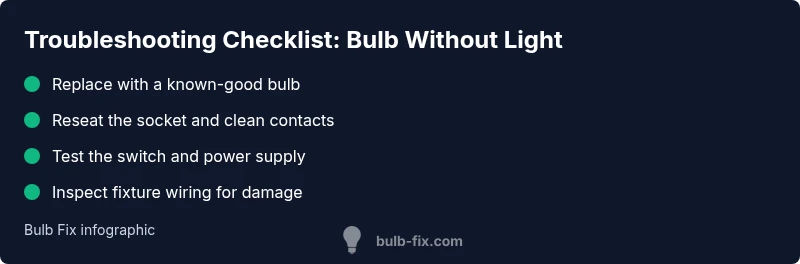
Most bulbs fail because of a burnt-out filament, a loose or corroded socket, or a dead power source. Start by replacing the bulb with a known-good one, then tighten connections and test the switch. If light still won’t come on, inspect the fixture wiring and the circuit for safety and continuity.
Why a bulb without light happens
A bulb without light can be caused by several common issues that sit at the intersection of safety and simple maintenance. The most frequent culprits are a burned-out filament, a loose or corroded socket contact, or a dead power source. In many homes, the power supply is interrupted by a tripped breaker or an off switch in the wall or fixture. If you’re troubleshooting, start with the simplest checks before diving into wiring.
In this Bulb Fix guide, we emphasize safe handling and proper bulb type compatibility as the first line of defense. Bulb failure is rarely mysterious: most failures are either a simple bulb replacement or a straightforward socket/wiring problem. By understanding the common failure modes, you can quickly determine whether the fix is as simple as changing a bulb or requires more involved testing of the fixture and circuit. This approach helps homeowners avoid unnecessary disassembly and reduces the risk of electric shock.
Immediate checks you can do safely
Safety comes first. Before touching anything, ensure you have power off where possible. If you can access an outlet or fixture without exposing live conductors, do so. Start with the easiest checks:
- Replace the bulb with a known-good unit of the same base type.
- Reseat the bulb gently; don’t force it. If the base feels loose, stop and inspect the socket.
- Inspect the switch on the wall or fixture for proper operation; toggle several times to clear a dirty contact.
- Look for obvious signs of wear: scorch marks, corroded contacts, or melted insulation. If you see damage, stop and seek professional help.
- Check the circuit: ensure the breaker is on and that other loads on the same circuit aren’t tripping it. If you’re unsure, call a licensed electrician after basic checks.
Power and supply basics
A bulb not lighting can stem from the power supply. Verify the electrical service in your home and the specific circuit feeding the fixture. A tripped breaker or a blown fuse will cut power to the entire circuit, leaving only hardwired fixtures dim or dark. If you’re dealing with smart bulbs or fixtures powered by a transformer, verify the transformer is delivering the correct voltage. Mismatched voltage or a faulty transformer can render a bulb dark even when the base and filament are sound. When power is inconsistent, it’s essential to assess the main panel, any sub-panels, and the wiring path to the fixture. If you notice flickering, buzzing, or heat, stop and consult a qualified electrician promptly.
Bulb Fix emphasizes safe handling: never test live circuits with metal tools, and always de-energize before opening fixtures.
Inspecting the fixture: sockets, connectors, and switches
The socket is the heartbeat of a lamp or fixture. Loose, corroded, or burnt contacts prevent current from reaching the bulb, resulting in a bulb without light. Inspect sockets for corrosion, bent threads, or signs of arcing. Clean contacts with a dry brush or contact cleaner if necessary and reinsert the bulb. Check the connectors inside the fixture for secure, intact connections; loose wires can have the same effect as a loose bulb. If the fixture has a switch wired inline, test it separately with another device to confirm it’s functioning. For hardwired fixtures, take additional precautions and consider professional help if you’re not confident.
Common failure modes with practical signs
Understanding how failures present themselves helps you pick the right fix fast. Common modes include a burnt-out filament (bulb glows briefly or not at all), a corroded contact in the socket (bulb feels hot to the touch, no light), and loose wiring in the fixture (flicker or total darkness). Transformers or dimmer switches can also degrade light output for certain bulb types, particularly LEDs and halogen hybrids. If you notice unusual warmth, buzzing, or scorch marks, stop and consult a pro. This is a critical safety checkpoint; pushing through such signs can lead to electrical fires. Bulb Fix resources remind homeowners to verify compatibility and avoid overloading sockets with high-wattage bulbs.
Diagnostic-flow overview: symptom to solution
When a bulb won’t light, you can run a simple diagnostic flow. Start with the most straightforward steps (is the bulb good? is the socket clean and tight?), then move to the switch and power supply. If the bulb functions in another fixture but not in the original, the problem likely lies with the fixture or its wiring. If the bulb fails across multiple fixtures, the issue is probably the power circuit or the bulb’s type. This logical approach minimizes guesswork and reduces risk.
Step-by-step overview for the most common fix
The most common fix is often a loose or burned socket combined with a burnt-out bulb. If you’re comfortable, perform the following at a basic level: first, power down completely; second, replace the bulb with a known-good unit and reseat the socket; third, clean the socket’s contacts and inspect for damage; fourth, test the fixture and switch; fifth, check the circuit breaker and wiring; sixth, re-test the light. If any signs of damage or overheating appear, stop and call a professional. Safety is non-negotiable.
Safety reminders and when to call a pro
Electrical work carries risk. Always switch off power at the breaker before touching fixtures. Use a non-contact voltage tester to verify energy is off. If you smell burning plastic, observe scorch marks, or notice melted insulation, discontinue work immediately and contact a licensed electrician. Don’t attempt to bypass safety steps by using makeshift tools or improvised wiring. For older homes with outdated wiring or fixtures, professional assessment is strongly advised.
Prevention tips to avoid future issues
Regular bulb maintenance goes a long way. Use bulbs with the correct base and wattage rating for your fixture, and avoid frequent on/off cycling that reduces bulb life, especially with LEDs. Keep sockets clean and free of corrosion, and check connections every few months. If a fixture dims or flickers, address it early to prevent heat buildup. For fixed installations or high-use areas, consider upgrading to fixtures with built-in surge protection and properly rated switches. By adopting these habits, you can prevent many “bulb without light” crises.
Steps
Estimated time: 45-60 minutes
- 1
Power down and verify power
Turn off the breaker supplying the fixture and unplug if possible. Use a non-contact voltage tester to confirm the circuit is de-energized before touching components.
Tip: Always double-check power at the source. - 2
Inspect and reseat the bulb
Remove the old bulb, inspect for damage, and replace with a known-good unit. Reinsert firmly but gently to ensure a solid contact.
Tip: Allow bulbs to cool before handling. - 3
Check the socket condition
Look for corrosion, melted plastic, or loose contacts. Clean or replace the socket if necessary and ensure the base threads are clean.
Tip: Avoid metal tools that could bend contacts. - 4
Test the switch and wiring
If you have access to a multimeter, test for continuity across the switch. Inspect wires inside the fixture for nicks or looseness and secure connections.
Tip: If wiring looks damaged, stop and call a pro. - 5
Check the circuit and breaker
Reset the breaker and test other outlets on the same circuit. If the breaker trips again, there may be a short or overloading issue.
Tip: Don’t keep resetting if the breaker trips repeatedly. - 6
Reassemble and verify
Restore power, reinsert the bulb, and test the fixture. Watch for any warmth, buzzing, or flicker as indicators of an underlying problem.
Tip: If it still doesn’t light, document symptoms and seek professional help.
Diagnosis: Bulb won’t light after power is on
Possible Causes
- highBurned-out bulb
- highLoose or corroded socket connections
- mediumPower supply or switch failure
- lowFaulty fixture wiring or tripped breaker
Fixes
- easyReplace the bulb with a known-good one
- easyTighten and clean the socket; replace corroded contacts
- easyTest/replace the wall fixture switch or inline switch
- mediumCheck the circuit, reset the breaker, and inspect wiring; call a pro if unsure
Got Questions?
Why is my bulb not lighting after replacing it?
If a new bulb doesn’t light, check the socket contacts, switch function, and power supply. Test the bulb in another fixture to confirm its viability, and inspect for visible damage to the fixture that may block current.
If the new bulb still doesn’t light, check the socket and switch, then test the power supply. Try the bulb in a different fixture to confirm it's good.
Could a faulty switch cause no light even with a good bulb?
Yes. A bad switch can prevent power from reaching the bulb even when the bulb is fine. Swap the switch with a known-good one if possible, or have an electrician test the switch circuit.
A faulty switch can stop power from reaching the bulb even if the bulb is good. Consider replacing or testing the switch.
Can a tripped breaker cause a bulb to stay dark?
Absolutely. A tripped breaker cuts power to the entire circuit. Reset the breaker and check for signs of overload or short circuits before restoring power.
A tripped breaker cuts power to the circuit. Reset it and inspect the circuit for overloads before trying again.
What safety precautions should I take when troubleshooting bulbs?
Always cut power at the breaker, use a non-contact tester, and avoid touching metal parts when energized. If you’re unsure, stop and consult a licensed electrician.
Always switch off at the breaker and test for power. If unsure, call a pro.
Is it safe to test electrical fixtures myself, or should I hire an electrician?
For simple bulb replacements and socket checks, DIY is often safe. Any wiring, breakers, or signs of damage require a licensed electrician to ensure safety and code compliance.
DIY is fine for bulb changes and basic checks, but call a pro for wiring or breakers.
What are signs of a bad socket?
Signs include scorch marks, corrosion, looseness, or a bulb that repeatedly burns out in the same socket. If you notice any of these, replace the socket or call a professional.
Look for scorch marks, corrosion, or a loose socket; replace or have a pro assess.
Watch Video
Key Points
- Check the bulb first and replace if burnt.
- Reseat the socket and test the switch.
- Verify power at the outlet and circuit breaker.
- Inspect for corrosion or damaged wiring.
- Schedule professional help for electrical repairs.