How to Troubleshoot a Bulb That Won’t Light
Learn fast, safe fixes for a bulb that won't light. This guide covers quick checks, a clear diagnostic flow, and practical maintenance to restore illumination safely.

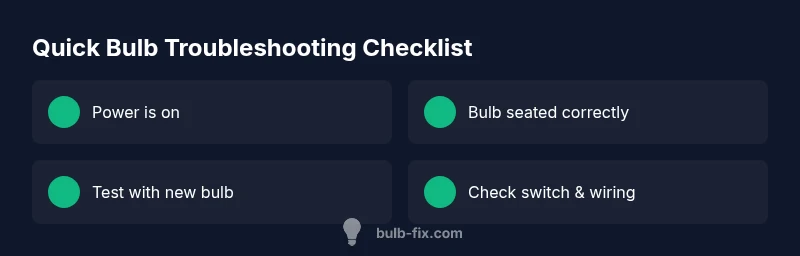
Most bulb failures are caused by loose seating, a dead bulb, or a blown fuse. Start by turning off power, unplugging the lamp or shutting off the circuit, then reseat the bulb and inspect the socket. If the problem persists, test with a new bulb and check the circuit or fuse box.
Why the bulb is not working in everyday homes
When a lamp or ceiling light suddenly goes dark, the first question is why the bulb is not working. The Bulb Fix team knows that many outages are caused by simple, fixable issues rather than a mysterious fault in the fixture. According to Bulb Fix, a common culprit is a loose or improper bulb seating in the socket, which prevents proper contact and stops current from flowing. Another frequent cause is a dead bulb or one with an incompatible wattage, which can trip circuits or burn out quickly. In most households, these problems arise from normal wear, routine handling, or small mistakes like not fully twisting the bulb to the stop. Before you panic, run through a quick checklist of the basics—power, seating, and the right bulb type. This approach saves time, reduces the risk of electric shock, and helps you decide if you can safely fix it yourself or if professional help is needed.
Quick checks you can do in 5 minutes
$nbsp;$- Power at the switch or outlet is off, then switch it on to see if the light returns. If it’s a ceiling fixture, verify the wall switch actually operates the light. Check the circuit breaker or fuse box for trips and reset if safe. Ensure the lamp is plugged in (if required) and that any dimmer or smart switch is set correctly. Reseat the bulb firmly, then test with a known-good bulb. Inspect the socket for corrosion or bent contacts and look for signs of water exposure in damp locations. If a new bulb works, you have identified a seating or bulb compatibility issue. If not, proceed to step by step testing and consider replacing the fixture or wiring if needed.
Common causes by fixture type
Different fixtures have different failure modes. Table lamps often fail from loose seating or worn sockets. Ceiling fixtures can be affected by switch issues, bad wiring, or dimmer incompatibilities. Floodlights or outdoor fixtures may suffer from moisture ingress or corrosion in the socket. Fluorescent tubes introduce a separate set of common faults like ballast failure. Each scenario demands a slightly different approach, but the core principle remains the same: verify power, seating, and correct bulb type before moving to harder checks.
Diagnostic flow: from symptom to solution
A logical diagnostic flow helps you go from symptom to solution without guessing. Start with power verification, then seating and bulb type. If the bulb still won’t light, test another bulb in the same socket to rule out a socket issue. If the second bulb works, the original bulb is defective. If neither bulb works, investigate the switch, wiring, or fixture. In damp locations, treat moisture as a potential culprit and avoid touching metal components with wet hands. If you reach a point where wiring or live components are involved, stop and call a professional. Safety always comes first.
Step-by-step repair for the most common cause
The most common cause is a loose or improper seating. Follow these steps to fix it safely and effectively:
- Power down and unplug or switch off the circuit. Wait a moment for any residual charge to dissipate.
- Remove the bulb, inspect the socket contacts for corrosion or burn marks, and gently clean with a dry cloth if needed.
- Reinsert the bulb firmly, twisting to ensure full contact. Do not over-tighten.
- If possible, test with a new, compatible bulb to confirm seating and bulb health.
- If the fixture still won t light, inspect the switch and wiring or replace the switch if it looks worn.
- When all else fails, contact a licensed electrician to evaluate the circuit or replace the faulty component.
Safety tips and common mistakes
- Always power down before touching any bulb or socket. Never work on live wiring.
- Use a clean cloth or gloves to handle bulbs to avoid transferring oils that shorten bulb life.
- Never exceed the bulb wattage rating of the fixture.
- Do not force sockets or bulbs; if something feels stuck, stop and seek help.
- In damp areas, ensure bulbs are rated for moist or outdoor use and dry hands before handling.
Prevention and maintenance to avoid future bulb failures
Keep a small stock of the same bulb type and wattage for quick replacements. Regularly inspect sockets for corrosion and change bulbs on a predictable schedule to avoid unexpected outages. If you have a dimmer, confirm compatibility with the bulb type and update to labeled dimmable bulbs when required. Finally, consider upgrading to LED bulbs for longer life and lower heat, reducing the chance of socket damage over time.
Steps
Estimated time: 60-90 minutes
- 1
Power down and prep safely
Turn off power at the switch, unplug the lamp, or switch off the circuit breaker. Wait for a moment to ensure there is no residual charge before handling the fixture.
Tip: Use dry hands and stand on a dry surface to reduce shock risk. - 2
Inspect bulb seating and socket
Remove the bulb and visually inspect the socket contacts for corrosion or burns. Clean gently with a dry cloth if necessary and check for any bent contacts.
Tip: Do not use metal tools to probe the socket. - 3
Test with a known-good bulb
Insert a bulb of the same type and a similar wattage that you know works. If the light comes on, the original bulb is likely defective or incompatible.
Tip: Keep the original bulb away from moisture while testing. - 4
Check fixture and switch wiring
If the bulb still won t light, inspect the wall switch or fixture switch for looseness or damage. Try bypassing with another control if available to isolate the fault.
Tip: Only perform wiring checks if you are comfortable; otherwise stop and call a professional. - 5
Inspect for moisture or corrosion
Examine outdoor or damp-location fixtures for moisture intrusion. Dry and reseat bulbs after ensuring the environment is safe.
Tip: Water exposure can cause short circuits or corrosion. - 6
Call a professional if needed
If basic checks fail, do not attempt complex electrical work. A licensed electrician can diagnose and repair wiring, sockets, or circuits safely.
Tip: Professional help is essential for live wiring and high-risk situations.
Diagnosis: Bulb is not working
Possible Causes
- highLoose or improper bulb seating in the socket
- highDead bulb or incompatible wattage
- mediumBlown fuse or tripped breaker
- mediumFaulty lamp switch or dimmer
- lowWiring issue or damaged socket
Fixes
- easyReseat the bulb firmly and twist to the stop
- easyReplace with a known-good bulb of the correct type and wattage
- easyReset the circuit breaker or replace the fuse
- mediumTest or replace the lamp switch/dimmer
- hardConsult a licensed electrician for wiring or socket replacement
Got Questions?
What is the first thing I should check when a bulb is not working?
Start by ensuring power to the fixture is on. Verify the switch, unplug or reset the breaker if needed, then reseat the bulb before testing with a new bulb.
First, make sure the power is on and the bulb is seated correctly, then test with a new bulb.
Why does a bulb flicker or glow dimly before going out?
Flickering or dim lighting often indicates loose seating, a failing bulb, or a poor connection in the socket. Re-seat or replace the bulb and check the socket integrity.
Flickering usually means a loose connection or bad bulb—re-seat or replace and inspect the socket.
Can a faulty switch cause a bulb not to light at all?
Yes. A worn or loose switch can prevent current from reaching the bulb. Test with another switch or have the switch inspected.
A bad switch can stop current from reaching the bulb; test or replace it if needed.
Is it safe to replace a bulb in a fixture that’s still hot or live?
No. Wait for the fixture to cool and ensure power is off before removing or replacing the bulb to avoid burns or shock.
Never replace a bulb while the fixture is hot or live. Let it cool first.
When should I call a professional?
If basic checks fail or you suspect wiring or socket damage, stop DIY attempts and contact a licensed electrician for safe repair.
If basic steps don t fix it or you suspect wiring, call a professional.
Watch Video
Key Points
- Check power and seating first.
- Test with a known-good bulb to rule out bulb faults.
- Inspect socket and switch if it still won’t light.
- When in doubt, call a licensed electrician.