Why Do Some Light Bulbs Not Work? A Homeowner's Troubleshooting Guide
A practical, safety-forward guide to diagnosing why some light bulbs fail and fixing common issues at home with step-by-step guidance from Bulb Fix.

The most common causes are a burnt-out bulb, a loose seating, or a poor contact in the socket. To fix quickly, ensure the bulb is fully seated, try a different bulb in the same fixture, and test the fixture on a known-good socket. If the issue persists, test in a different outlet and check the circuit breaker.
Why do some light bulbs not work? A practical starting point
If you’re asking why do some light bulbs not work, the answer is usually rooted in three broad areas: the bulb itself, the connection at the socket, or the electrical supply. In this Bulb Fix guide, we emphasize quick wins you can try safely, then move to deeper checks only if the quick fixes fail. The goal is to restore light quickly while avoiding dangerous mistakes. In 2026, most residential bulbs are designed to be user-serviceable, but always treat any fixture as a potential electrical hazard and proceed with caution.
Start with the simplest checks that you can do in minutes
Begin with three fast tests: (1) power—confirm the switch is ON and the circuit is energized; (2) seating—remove and reinsert the bulb firmly; rotate slightly to engage the contacts; (3) bulb swap—try a new or known-good bulb in the same socket to see if the issue follows the bulb or stays with the fixture. These steps address the majority of failures and require no tools. If the bulb works in another lamp but not in your fixture, the problem likely lies with the socket or wiring in the fixture.
Understanding the most common failure modes
A bulb can fail due to a burnt-out filament or LED driver, which is common and inexpensive to fix. A loose or dirty contact at the base can prevent current from reaching the filament, especially in fixtures that vibrate or have frequent on/off cycles. In some cases, the fixture’s switch, dimmer, or ballast (in older fluorescents) is incompatible with the bulb type. Recognizing these patterns helps you choose the right fix without unnecessary part replacements.
Safe testing practices to verify bulbs and sockets
Safety is non-negotiable. Always power down at the switch and, if possible, at the breaker before handling bulbs. Inspect the socket’s contacts for corrosion or bent prongs; a dirty, oxidized, or deformed contact can cause intermittent light or no light at all. When handling bulbs, wear gloves to avoid oil from your skin shortening bulb life. If you’re uncertain about wiring or the fixture itself, stop and consult a professional.
A practical diagnostic workflow you can follow at home
Follow a logical sequence: (1) verify power and switch function; (2) reseat the bulb and test with a new bulb; (3) test the same bulb in another fixture; (4) inspect socket contacts and tighten if needed; (5) test the fixture with a different known-good bulb; (6) if no bulb lights, check the circuit, breaker, and wiring. This flow minimizes guesswork and reduces risk, helping you identify whether you simply need a bulb, a socket replacement, or a licensed electrician.
Step-by-step fixes for the most frequent causes (summary you can apply now)
- If the bulb is loose or dirty: unplug, reseat, clean contacts with a dry cloth, and reinsert firmly. If the problem recurs, replace the socket or fixture.
- If the bulb is burnt out: replace with a new bulb of the correct type and wattage; if it blows again quickly, check for overload or a faulty circuit.
- If the socket contacts are corroded: replace the socket or seek professional repairs; do not bypass safety features.
- If the fixture has a dimmer or ballast: ensure bulb compatibility; consider upgrading to LED bulbs rated for the dimmer or ballast.
Prevention and maintenance: keep bulbs working longer
Regularly dust and inspect fixtures, replace bulbs in matched sets to maintain consistent brightness, and use bulbs at their rated wattage to prevent overheating. For fixtures in damp or outdoor spaces, choose bulbs rated for the environment and seal connections if needed. Keeping a small toolkit and spare bulbs handy helps you act quickly when a bulb fails, rather than postponing the lighting you rely on.
Steps
Estimated time: 45-60 minutes
- 1
Power down and prep
Turn off the light switch and, if possible, shut off power at the breaker. Gather a clean cloth, spare bulbs, and a known-good socket for testing. This keeps you safe and prevents accidental shocks.
Tip: Never work on live circuits; verify power with a tester if available. - 2
Remove and reseat the bulb
Carefully remove the bulb by rotating counterclockwise. Wipe the contacts and reinsert firmly, ensuring full engagement with the socket. If it’s a screw-in bulb, tighten gently—don’t overtighten.
Tip: If the bulb is hot, wait a few minutes before touching it. - 3
Test with a known-good bulb
Place a new or known-good bulb in the same socket. If it lights, the original bulb was likely dead or damaged. If not, the issue may lie with the socket or wiring.
Tip: Label the tested bulb so you don’t reuse a potentially defective one. - 4
Inspect the socket contacts
Look for corrosion or bent contacts inside the socket. Clean gently with a dry cloth or contact cleaner if available and reseat. Replace the socket if contacts are severely damaged.
Tip: If you see arcing or burnt smell, stop immediately and call a licensed electrician. - 5
Check the fixture’s wiring and switch
If another bulb also fails in the same fixture, the problem could be in the switch or wiring. Test the switch with a multimeter if you have one, or replace the switch to rule it out.
Tip: Avoid attempting rewiring unless you’re qualified. - 6
Decide on the next step
If tests point to the fixture or wiring, consider professional help. For intermittent lighting or heat at the socket, stop and call an electrician.
Tip: Document the symptoms and tests to speed up repairs.
Diagnosis: Bulb won't light in a fixture
Possible Causes
- highBurnt-out bulb
- highLoose or dirty socket contact
- mediumFaulty fixture switch or wiring
- lowIncompatible dimmer or ballast
Fixes
- easyPower off, reseat bulb firmly, and test with a new bulb in the same socket
- easyTest the bulb in a known-good socket to confirm if the bulb or fixture is at fault
- mediumInspect socket contacts for corrosion or bending; clean or replace the socket if needed
- mediumIf the fixture uses a dimmer/ballast, verify compatibility with the bulb type or consult a professional
Got Questions?
What is the most common cause of a bulb not lighting?
The most common causes are a burnt-out bulb or a loose seating. Always start with power off and reseat the bulb. If it still won’t light, test in another socket to determine if the issue is the bulb or the fixture.
Most bulbs fail due to a burnt-out filament or a loose seating. Start by turning off power, reseating the bulb, and testing in another socket.
Can a dimmer or ballast cause bulbs not to work?
Yes. Some bulbs aren’t compatible with certain dimmers or ballast circuits. Check the bulb’s compatibility rating and replace with a matched bulb if needed.
Yes. Dimmer and ballast incompatibility can prevent bulbs from lighting; check compatibility before replacing.
Is it safe to replace a ceiling fixture's ballast myself?
Ballasts are part of the fixture’s electrical system. If you’re not experienced, consult a licensed electrician. Do not attempt to replace ballast in exposed or damp locations.
Ballasts are part of the fixture’s electrical system; consult a professional if you’re unsure.
Why does a bulb flicker intermittently?
Flicker can indicate a loose connection, a failing ballast or driver, or a dimmer mismatch. Start by reseating the bulb and testing in a different fixture.
Flicker usually means a loose connection or a faulty ballast; reseat and test in another fixture.
When should I replace a socket or wiring?
If contacts are corroded, bent, or the fixture shows signs of wear, replace the socket or have wiring inspected by a professional.
Replace the socket if contacts are damaged or corroded; for worn wiring, call a pro.
Watch Video
Key Points
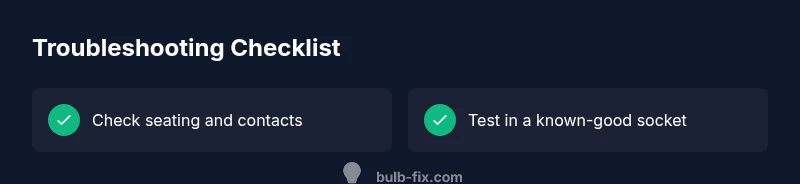
- Test bulbs in a known-good socket first
- Ensure bulbs are fully seated and contacts clean
- Inspect sockets for corrosion or damage
- Check switches and dimmers for compatibility
- Call a professional for wiring or dangerous issues