How to Check If Bulb Is Working: A Practical Guide
Learn safe, step-by-step methods to verify whether a light bulb is functioning, troubleshoot sockets and switches, and know when to replace. Bulb Fix provides practical, DIY-friendly guidance for homeowners and enthusiasts.

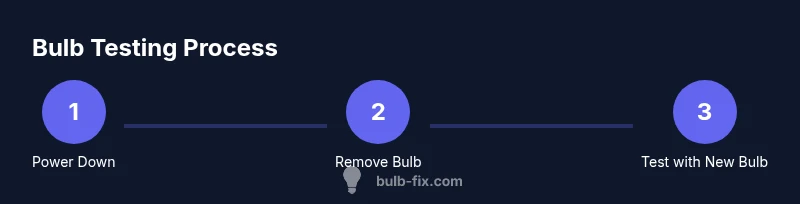
You can confirm whether a bulb is working by safely testing it in the correct fixture. Start by powering off, removing the bulb, and inspecting for cracks or dark spots. Then test with a known-good replacement. If it still won't light, check the socket and switch, and troubleshoot the wiring or seek professional help.
Why checking bulb status matters
Knowing how to check if a bulb is working is a practical, time-saving skill for any homeowner. When a light won't come on, the first instinct is often to assume the bulb is dead. But a systematic check helps you distinguish between a burned-out bulb, a faulty socket, a loose connection, or a switch problem. The exact steps below show you how to confirm the bulb status safely and efficiently. According to Bulb Fix, approaching the task with a clear method reduces guesswork and lowers the risk of shocks or broken glass. By testing in the right order, you’ll quickly identify whether you need a replacement, a simple tightening, or further wiring checks. This knowledge applies across common scenarios—from a table lamp to a ceiling fixture—so you can stay confident with every room in the house.
With practice, you’ll develop a quick instinct for when the issue is a straightforward bulb swap and when it’s a sign that something larger in the circuit needs attention. This guide emphasizes a calm, safety-first approach that serves beginners and seasoned DIYers alike. The Bulb Fix team has designed this workflow to minimize risk while maximizing the chance you’ll get your light back on promptly.
Safety first: power, tools, and precautions
Before you touch any bulb, make safety your first priority. Always turn off the power at the switch, and if possible unplug the lamp or fixture from the outlet. If you’re working on ceiling fixtures or hard-wired lights, switch off the corresponding circuit at the breaker to eliminate any risk of shock. Use a flashlight to illuminate dark areas and wear safety glasses. Keep children and pets away from the work area. Clear the area of fragile objects in case the bulb breaks during removal. Handling the bulb gently minimizes the chance of drops or glass shards.
Having the right tools close at hand reduces the need to shift position or re-supply mid-task. A stable ladder or step stool, a dry towel to grip slippery bulbs, and a few spare bulbs of the correct type are all wise prep steps. Remember: never force a bulb out of a stubborn socket; if resistance is unexpected, stop and reassess with a brighter light and, if needed, a replacement socket check by a professional.
Understanding common bulb types and indicators
Different bulb technologies have different indicators of life and failure. Incandescent bulbs often burn out with a clear, noticeable darkness or a broken filament. LEDs and CFLs may fail gradually, flicker, or simply stop lighting even when power is present. Always verify the base type (E26/E27, candelabra, GU10, etc.) and wattage rating printed on the bulb or in the fixture documentation before testing. When testing, avoid using a higher wattage bulb in a fixture rated for lower wattage; this can cause overheating or damage. If you see signs like flickering, buzzing, or dimming, the issue may lie with the fixture, switch, or wiring rather than the bulb itself. Bulb Fix Analysis, 2026 notes that many lighting problems stem from sockets or switches rather than dead bulbs, so consider these components during diagnosis. Use a known-good replacement to validate the bulb’s condition.
Keeping notes about bulb models, socket types, and observed symptoms helps you build a quick reference for future problems and prevents repeating the same checks.
Step-by-step testing scenarios: lamps, fixtures, and sockets
Testing a bulb’s functionality varies slightly by fixture type, but the core steps remain consistent. In lamps and table fixtures, start by powering off, removing the bulb, and inspecting the base and glass for cracks. If the socket appears intact, insert a replacement bulb of the same type and base. If the new bulb fails to light, examine the switch and power cord for damage. For ceiling fixtures and recessed lights, the same safety first approach applies, but you may need a ladder and a helper to stabilize the fixture while you swap bulbs. If multiple bulbs fail in the same fixture, it’s a strong indicator the problem lies with the wiring, switch, or transformer rather than individual bulbs. Maintain a calm, methodical pace to prevent further frustration and ensure correct handling of hot components.
Troubleshooting beyond the bulb: switches, fixtures, and circuits
If the bulb is not the root cause, you’ll need to broaden the scope of your checks. First, test the fixture switch by swapping it with a known-good unit if you can access it safely. Next, inspect the outlet or junction box for loose wires or signs of overheating. A non-contact voltage tester can help confirm whether power is reaching the socket. If you still can’t get light, you may be dealing with a faulty fixture or an issue in the circuit—seek professional help rather than attempting risky electrical work. Bulb Fix recommends documenting all observations so a technician can diagnose quickly.
Maintenance, replacement timing, and energy considerations
Regular maintenance keeps lighting reliable and energy-efficient. Replace bulbs at the manufacturer’s recommended lifespan, especially for LED units that gradually lose brightness rather than fail abruptly. When choosing replacements, match the bulb type and base, and respect the fixture’s wattage rating to avoid overheating. Consider upgrading to energy-efficient LED bulbs if you’re not already using them; they last longer and use less power. If a fixture repeatedly errors despite correct bulbs, check for loose connections, corrosion inside the socket, or improper installation. Taking notes and maintaining a small stock of spare bulbs can save time during future checks.
Tools & Materials
- Replacement bulb (correct type and wattage)(Choose same base type (E26/E27, GU10, etc.) and wattage as original; avoid exceeding fixture rating.)
- Non-contact voltage tester(Useful for verifying power at sockets without opening wiring.)
- Safety glasses(Protect eyes from glass shards if a bulb breaks.)
- Flashlight(Illuminate fixtures and sockets in dim areas.)
- Rigid grip gloves or a dry towel(Handle bulbs by the base to avoid fingerprints on the glass and reduce drop risk.)
- Sturdy step ladder or stable stool(Needed for ceiling fixtures or high fixtures; ensure it’s on a flat surface.)
- Screwdriver set (if needed for socket access)(Only use if you need to open a fixture cover; proceed with caution.)
Steps
Estimated time: 15-25 minutes
- 1
Power down and prepare
Turn off the fixture switch and unplug the lamp if possible. Gather your tools and ensure the area is well-lit so you can see the socket clearly.
Tip: If the bulb is in a ceiling fixture, use a stable stool and have a helper hold the cover if needed. - 2
Remove the bulb safely
Grasp the bulb by the base and rotate counterclockwise to loosen it. Do not twist or yank; if it doesn’t budge, stop to avoid breaking the glass.
Tip: If the bulb is hot, allow it to cool for several minutes before handling. - 3
Inspect the bulb and socket
Check the bulb for cracks or darkened spots. Look at the socket for signs of wear, corrosion, or loose connections.
Tip: Use a flashlight to get a clear view inside the socket. - 4
Test with a known-good bulb
Insert a replacement bulb of the same type and base. Power the fixture back on to see if the new bulb lights up.
Tip: If the new bulb works, the original bulb was likely faulty. - 5
Re-test the fixture with the original bulb
Reinstall the original bulb (if you want to confirm it’s dead) and test again. If it still won’t light, focus on the socket or switch.
Tip: If both bulbs fail, the issue is probably the fixture or wiring. - 6
Broaden the check to non-bulb causes
Inspect the wall switch, power supply, and any fuses or breakers related to the circuit. Use a voltage tester if available.
Tip: Document symptoms and steps you’ve taken so a technician can diagnose faster.
Got Questions?
How can I tell if the problem is the bulb or the fixture?
Test with a known-good bulb in the same fixture. If the replacement works, the original bulb was faulty. If it still won’t light, the issue is likely the fixture, switch, or wiring.
Test with a new bulb in the same fixture; if it lights, the old bulb is bad. If not, the problem is likely the fixture or wiring.
What safety steps should I take before handling a bulb?
Always power down, unplug if possible, wear safety glasses, and handle bulbs by the base. If the bulb is hot, wait for it to cool before touching.
Power down and wear safety glasses. Hold the bulb by the base and let it cool before handling.
Can LED bulbs be tested the same way as incandescent bulbs?
Yes, the same testing process applies: power down, remove, inspect, and test with a known-good LED of the same base. Differences lie in brightness and warm-up behavior, not the basic check.
The steps are the same for LEDs; just verify the LED type and base before testing.
What should I do if the fixture keeps dimming with all bulbs?
Dimming across bulbs typically points to a switch, dimmer, or wiring issue. Test the fixture with a plain switch and a known-good bulb, then inspect the dimmer circuit if present.
If everything dims, the problem is probably the switch or wiring rather than the bulb.
Is it safe to test a bulb with the power on?
No. Always power down before removing or inserting bulbs to avoid shock or glass breakage.
Never test while power is on; you should turn off the power first.
What tools are most helpful for bulb testing?
A spare bulb of the correct type, a sturdy ladder, safety glasses, a flashlight, and (optional) a non-contact voltage tester for sockets.
Keep a spare bulb and a flashlight handy, plus safety gear.
Watch Video
Key Points
- Power off before handling any bulb.
- Test with a known-good replacement to confirm the bulb’s status.
- Check non-bulb causes like sockets and switches before replacing fixtures.
- Match bulb type and wattage to fixture ratings for safe operation.