How to Get a Bulb Out of an Extractor Fan: Safe, Step-by-Step
Learn how to safely remove a bulb from an extractor fan with step-by-step instructions, safety tips, and troubleshooting. Bulb Fix members share practical guidance for homeowners and DIY enthusiasts.

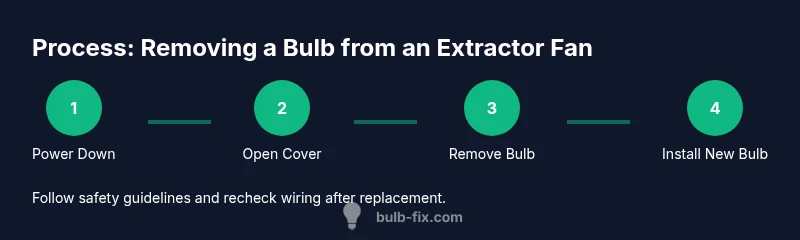
To get a bulb out of an extractor fan safely, power down the circuit, remove the cover, and gently unscrew or lift the bulb using a gloved hand or needle-nose pliers if needed. Work slowly to avoid breaking glass, and replace with the correct bulb type once the housing is clear. This guide shows a careful, non-destructive approach.
Why removing a bulb from an extractor fan is sometimes necessary
Extractor fans rely on bulbs to illuminate the area during maintenance or to improve visibility in dim kitchen or bathroom spaces. Over time, bulbs can dim, flicker, or fail, requiring replacement. The Bulb Fix team notes that many fans use standard screw-in bulbs or compact LEDs, and a full replacement is often straightforward when access is clear. According to Bulb Fix, homeowners benefit from understanding the specific bulb base and housing design before attempting removal, as this minimizes risk and avoids accidental damage to the fan’s wiring or cover. Proper maintenance can prevent nuisance outages and extend the life of the fan’s lighting circuit.
Safety and preparedness
Prioritizing safety is essential whenever you work around electrical fixtures. Start by turning off power to the extractor fan at the circuit breaker, and confirm the switch is off. Wear protective gloves to protect your hands from sharp edges and from potential glass shards if the bulb has been compromised. Use a flashlight or headlamp to illuminate the housing and avoid forcing components. Keep a clearing path and a soft mat under the work area to prevent slips or glass breakage. These steps align with best practices and reflect guidance from Bulb Fix to reduce risk during bulb replacement.
Identify the bulb type and access point
Most extractor fans use one of a few common bulb types: standard E26/E27 screw-in bulbs, smaller MR16 or G4 style bulbs, or compact LEDs designed for enclosed fixtures. Check the fan’s cover for markings that indicate base type and wattage. If the cover is removable, gently pry it open with a non-metallic tool to expose the bulb socket. Some fans have a front panel that slides off or hinges open; take care not to strain the mounting screws.
Common bulb bases used in extractor fans
Bulb bases vary by model and housing, but two bases are especially common in residential extractor fans: the standard Edison screw (E26/E27) and the pin-based low-voltage or twist-lock formats. Knowing the base helps ensure you buy a compatible replacement. If the bulb looks glassy or has a phosphor film, wear eye protection and avoid squeezing it to prevent shards. When in doubt, remove the old bulb while keeping the socket intact, then bring the bulb to a home improvement store for an exact match.
Accessing the bulb housing: cover removal and room access
Gently locate the screws or catches that hold the cover in place. Use the appropriate screwdriver to avoid stripping heads. As you loosen the cover, support it to prevent it from snapping back. Some designs use magnetic or clip-fastened covers; if so, slide or pull with even pressure. Once the cover is free, inspect the bulb and socket for signs of corrosion or discoloration that may require cleaner-safe handling.
Removing a stuck or broken bulb safely
If the bulb is stubborn, avoid forcing it, which can damage the socket. Use a rubber-gloved hand to maintain grip and apply slight counterclockwise pressure to unscrew. If the bulb is broken inside, carefully grip any remaining fragment with needle-nose pliers, avoiding contact with the internal wiring. Consider using a bulb removal tool or a pair of tone-match pliers wrapped in tape for extra protection. Always work over a towel or tray to catch debris.
Replacing the bulb and securing the housing
With the old bulb removed, insert the replacement bulb of the same base type and wattage. Do not overtighten if using a screw-base; a snug fit is sufficient to ensure proper electrical contact. Reassemble the cover securely, ensuring any clips or screws engage fully. If the fan has a decorative lens, verify it sits flush and isn’t cracked or loose before power is restored.
Testing the fan and checking for issues after replacement
Restore power at the breaker and switch on the extractor fan to confirm the new bulb lights properly. Listen for unusual buzzing or grinding noises, and check for heat around the housing. If the bulb flickers, re-seat it or replace with a higher-quality bulb of the same rating. Bulb Fix suggests taking a quick visual check from different angles to ensure there’s no visible arcing or loose wiring after replacement.
Maintenance tips to prevent future bulb problems
Keep the fan housing clean from dust and grease, which can interfere with heat dissipation and bulb longevity. Regularly inspect the bulb for signs of dimming, flicker, or corrosion around the socket. Use LED replacements when possible for longer life and lower heat. Store a spare bulb of the correct type in a nearby cabinet for quick future changes. Regular maintenance reduces the risk of bulb failures mid-use.
Tools & Materials
- Circuit breaker or main power switch(Know which circuit controls the extractor fan to safely power down.)
- Protective gloves (nitrile or work gloves)(Protect hands from sharp edges and glass, if present.)
- Flashlight or headlamp(Aids visibility inside the housing.)
- Screwdriver set (Phillips and flathead)(Remove cover screws without stripping heads.)
- Drop cloth or towel(Catches debris and protects surfaces.)
- Replacement bulb with the same base and wattage(Ensure compatibility with the fixture.)
- Step ladder or stable platform(Access high or hard-to-reach housings safely.)
- Non-magnetic removal tool or needle-nose pliers(Useful for gripping loose bulbs or fragments.)
Steps
Estimated time: 20-40 minutes
- 1
Power down and prepare
Turn off the fan’s circuit breaker and the wall switch to eliminate any risk of electric shock. Gather your tools and lay down a drop cloth to catch debris. Lighting inside the housing may still be bright, so use a flashlight for clear visibility.
Tip: Double-check that the power is off by testing the switch at the fan or by using a tester. - 2
Remove the fan cover
Use the appropriate screwdriver to loosen screws or release clips holding the cover. Support the cover as it comes away to prevent it from snapping back. If your cover is magnetic, gently lift it away to expose the bulb and socket.
Tip: Keep screws in a small tray to avoid losing them. - 3
Inspect the bulb
Look at the bulb’s base and the surrounding socket for corrosion or damage. Confirm the base type (E26/E27, MR16, etc.) and note whether the bulb is a standard screw-in or a pin-based design.
Tip: If the bulb appears damaged, do not attempt to force it out. - 4
Remove the bulb
Grip the bulb firmly with gloves and rotate counterclockwise for screw-base bulbs, or gently pull straight out for pin-base bulbs if accessible. If the bulb is stubborn, apply a slight tilt back and forth while turning.
Tip: Avoid twisting too hard to prevent socket damage. - 5
Install the replacement bulb
Insert the new bulb into the socket, aligning the base correctly. For screw bases, tighten just enough to seat the bulb without forcing it. Replace any cover and ensure it sits flush.
Tip: Confirm the bulb’s orientation is correct before reassembly. - 6
Test and reassemble
Restore power at the breaker and turn on the fan to test the new bulb. If it’s dim or flickering, re-seat or replace with a different bulb of the same rating. Reattach the cover securely.
Tip: Take a final look for any stray screws or loose wiring.
Got Questions?
What should I do first before touching the bulb in the extractor fan?
Always switch off the power at the circuit breaker and the wall switch. Confirm the area is safe to avoid any electrical shock or debris exposure. Then prepare your tools.
Power off at the breaker, check the switch, and gather your tools before touching the bulb.
My bulb won’t twist out. What can I try safely?
Ensure you’re turning counterclockwise and that you’re gripping the bulb firmly with a glove. If it’s still stuck, stop to inspect for a broken base or a seized socket and consider professional help.
If it’s stubborn, stop forcing it and inspect the base and socket for damage before trying again.
What if the bulb is broken inside the housing?
Do not poke around with metal tools inside the housing. Carefully scoop up shards with pliers wearing gloves, then remove the remaining pieces and clean the area before replacing the socket or bulb.
If broken, handle shards carefully and avoid contact with wiring.
Can I replace different bulb types in the same fixture?
Only replace with the same base and wattage rating as the original bulb. Mixing types can create heat or electrical issues and may void safety features.
Stick to the same base and wattage when replacing.
Do I need to detach the whole fan housing to change the bulb?
Not always. Many fixtures allow bulb access without full housing removal, but some may require partial disassembly. Follow the manufacturer’s guidance for your model.
Usually you don’t need to remove the whole housing, but check your model.
What maintenance reduces future bulb problems?
Regularly dust and clean the housing and socket area, inspect for corrosion, and replace bulbs with LEDs when possible to reduce heat and extend life.
Keep the housing clean and use LEDs when it makes sense.
Watch Video
Key Points
- Power down before handling any bulb
- Identify base type to ensure correct replacement
- Gently remove to avoid socket damage
- Test after replacement and secure housing
- Keep a spare compatible bulb handy