How to Change Bulb on a Ceiling Fan
A practical, safety-first guide to changing a ceiling fan bulb, covering bulb types, tools, removal, installation, testing, and disposal. From choosing the right base to avoiding common mistakes, Bulb Fix provides clear instructions for homeowners and DIY enthusiasts.

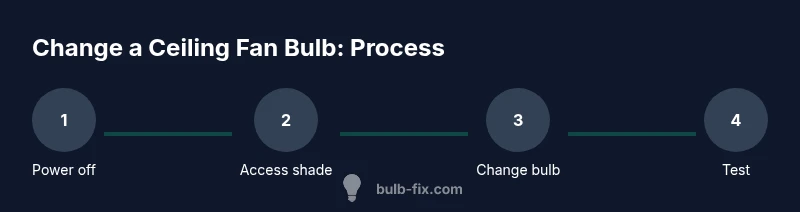
In this guide, you will learn how to safely change a bulb on a ceiling fan. You’ll identify the bulb type, prepare the right tools, access the light kit, install a new bulb, and test the fixture. The steps cover common configurations, dimmer compatibility, and disposal tips, with safety reminders at every stage.
Understanding why you might need to change ceiling fan bulbs\n\
Types of bulbs used in ceiling fans\n\
Safety considerations and preparation\n\
Tools, bulbs, and prep steps\n\
Removing shade/cover and accessing the socket\n\
Inserting the new bulb and reassembling\n\
Testing the installation and choosing options for future use\n\
Common mistakes and how to avoid them\n\
Tools & Materials
- Stable ladder or step stool(Reach the fan safely; ensure non-slip feet)
- Replacement bulb with matching base and wattage(Check base size and wattage rating on the old bulb)
- Soft cloth or gloves(Protect bulb and shade; prevent fingerprints)
- Screwdriver (Phillips or flathead)(Only if shade is held by screws)
- Microfiber cloth(Wipe shade and socket area)
- Flashlight(For dim fixtures or recessed lighting)
Steps
Estimated time: 15-25 minutes
- 1
Power off and secure the area
Turn off the wall switch and, if available, switch off the circuit breaker. Verify the power is fully off before touching the fixture. If the fan has a pull chain, wait for the light kit to stop moving before proceeding.
Tip: If you feel any heat near the shade, wait longer for it to cool. - 2
Remove the light shade or globe
Support the shade with one hand and gently loosen any screws or clips with the appropriate screwdriver. Lower the shade slowly to avoid dropping glass or cracking plastic.
Tip: Keep screws in a small container to avoid misplacing them. - 3
Remove the old bulb from the socket
Grasp the bulb by its base with gloved hands and twist counterclockwise to release. If it's stubborn, avoid applying excessive force to prevent damaging the socket.
Tip: If the bulb is hot, wait for it to cool before handling. - 4
Check the base type and wattage rating
Read the base on the old bulb or consult the fixture manual to confirm the base type (e.g., E26) and the maximum wattage. Do not exceed the recommended wattage.
Tip: If uncertain, take the old bulb to a hardware store to match the base. - 5
Install the new bulb
Grip the new bulb with a cloth or gloves and insert into the socket. Turn clockwise until snug but not over-tight. Ensure the bulb sits firmly without wobble.
Tip: Double-check the bulb label indicates compatibility with dimmers if your fixture uses one. - 6
Reattach shade and secure hardware
Lift the shade back into place and re-secure screws or clips. Ensure the shade sits evenly and is not touching the bulb.
Tip: Wipe fingerprints from the shade after reinstalling. - 7
Restore power and test the light
Turn the circuit breaker back on or flip the wall switch. Switch on the light to confirm the bulb illuminates evenly. If the light flickers, reseat the bulb and verify compatibility with the dimmer if used.
Tip: If it still fails, consult an electrician to inspect the socket.
Got Questions?
Is it safe to change a ceiling fan bulb while the fan is mounted and powered?
Only after you have turned off power at the switch and, if possible, at the circuit breaker. Do not attempt replacement while the circuit is live, and ensure the shade is supported to prevent drops during replacement.
Always power off at the breaker before starting, and support the shade to prevent it from dropping during replacement.
What if the fixture uses a non-standard base?
Identify the base type by removing a quick look at the old bulb or checking the fixture manual. If needed, take the old bulb to a hardware store to match the base. Do not force a bulb into a socket with a different base.
Check the base type before buying a bulb; don't force an incompatible base.
Can I use a dimmable LED in a ceiling fan that has a dimmer?
Yes, but only if the LED is explicitly rated as dimmable and within the fixture’s wattage limit. If flickering occurs, reseat the bulb or try a different dimmable model.
Use a dimmable LED and ensure it matches the fixture’s wattage.
What should I do with a stubborn bulb that won’t unscrew?
Turn off power before applying extra force, try a gentle counterclockwise twist, and use a cloth for grip. If it still won’t budge, consult an electrician to avoid socket damage.
If it won’t unscrew, stop and get help to avoid damage.
How should I dispose of burned-out bulbs?
Follow local guidelines for recycling, especially for LEDs and CFLs which may contain hazardous materials. Place used bulbs in a sturdy container and take them to a recycling center or hazardous waste facility.
Dispose bulbs according to local rules; many LEDs and CFLs are recyclable.
Why does my new bulb flicker or burn out quickly?
Flicker can indicate an incompatible dimmer or a loose connection. Ensure the bulb is properly seated and that the dimmer matches the bulb. If issues persist, consult an electrician.
Check seating and compatibility; seek professional help if needed.
Watch Video
Key Points
- Power off before starting any swap
- Match base type and wattage to the fixture
- Handle bulbs with care to avoid oils or fingerprints
- Test after installation and note dimmer compatibility