How to Bulb: Step-by-Step Bulb Replacement Guide
Learn how to bulb safely with Bulb Fix's comprehensive guide. Discover bulb types, base compatibility, safety tips, and disposal best practices for DIY homeowners and enthusiasts.

By following this step-by-step guide, you will learn how to bulb safely, choose the right bulb type, and avoid common mistakes. The guide covers base compatibility, basic safety checks, and proper disposal, so DIY homeowners can confidently replace bulbs in lamps, ceiling fixtures, and outdoor lighting without risking shocks or damage. Bulb Fix provides practical, safety‑focused guidance.
Understanding the scope of 'how to bulb'
According to Bulb Fix, the phrase how to bulb covers more than simply swapping glass. It includes selecting the right bulb type for each fixture, understanding base sizes, practicing safe handling, and disposing of used bulbs responsibly. For homeowners and DIY enthusiasts, mastering bulb changes improves energy efficiency, reduces maintenance, and keeps rooms well-lit. This section defines key terms such as base, wattage, lumens, and color temperature, and explains which tasks this guide will cover across indoor lamps, ceiling fixtures, and outdoor lighting. We emphasize practical, problem‑solving approaches rather than vague instructions. The goal is to empower you to troubleshoot flicker, dimming, or mismatch and to know when a professional should be consulted. By laying a solid foundation, you can approach every bulb change with confidence and ensure correct fit and safe handling every time.
Choosing the right bulb for your fixture
Selecting the correct bulb requires matching base type, wattage rating, and brightness needs. The most common bases are Edison screw (E26/E27) and bayonet or pin-based fittings (GU10, G4, B22, etc.). LED bulbs offer energy efficiency and long life, but some fixtures or dimmers require a specific type. Incandescent bulbs deliver warm light but use more energy and have shorter lifespans; CFLs remain in some older fixtures. For color, look at the Kelvin rating; lower values yield warm light, higher values yield cooler daylight. For brightness, check lumens rather than watts. Always verify the fixture’s rated wattage and whether it supports dimming or smart control. This decision affects energy costs, bulb longevity, and user comfort.
Safety first: power, heat, and handling
Before touching any bulb, turn off the power at the switch or circuit breaker and allow fixtures to cool. Wear gloves to avoid transferring oils from your skin to the bulb, which can shorten its life or cause hotspots. Use a dry cloth for extra grip on smooth bulbs. Keep the work area dry and well-lit; if you must use a ladder, ensure it is stable and on a flat surface. Never work on ceiling fixtures while standing on wet floors. If you’re unsure about exposed wiring or fixtures, stop and consult a licensed electrician.
Understanding bulb bases and fittings
Bulbs come in a variety of bases: screw-in (E26/E27, E12/candelabra), bayonet (BA22d), and pin-based (GU10, GU5.3, G4). The socket in your fixture determines what base fits. Always match the base geometry to the socket and verify the recommended wattage in the fixture’s label or manual. If you have a fixture with a dimmer, confirm compatibility with the bulb type you choose. When in doubt, bring the old bulb to the hardware store to compare base type and size.
Step-by-step overview for screw-in bulbs (high-level)
Most household bulbs use a screw-in base (E26/E27). The general process is: identify the base, purchase a compatible bulb, power down, remove the old bulb by twisting counterclockwise, install the new bulb by twisting clockwise until snug (no over-tightening), and test the light. In this guide, you’ll find a detailed, step-by-step list below that covers variations for other bases and fixtures. Always double-check the fixture rating before replacement to avoid overloads and potential hazards.
Replacing specialty bulbs and dimmable fixtures
Halogen, CFL, and some LED bulbs require different handling or compatibility checks. If your fixture uses a dimmer, ensure the bulb is labeled dimmable and compatible with the dimmer type (leading-edge vs trailing-edge). For smart bulbs, pair with the correct hub or app as directed by the manufacturer. In outdoor fixtures, select bulbs rated for outdoor use and weather resistance. When replacing specialty bulbs, keep a note of the base type, voltage, and any fixture-specific restrictions to avoid failures or safety risks.
Energy efficiency, brightness, and color quality
Energy efficiency is often expressed via the bulb’s efficiency and life expectancy, rather than wattage alone. LED bulbs consume less energy and last longer than incandescent or CFL bulbs in most situations. Color quality depends on the temperature scale (Kelvin): warm light for cozy spaces, cool light for task areas. When shopping, prioritize brightness (lumens) over wattage and choose a color temperature that suits the room. This approach helps reduce energy bills, lowers replacement frequency, and improves overall comfort.
Fixtures and outdoor lighting considerations
Indoor fixtures often have different requirements than outdoor fixtures. Outdoor bulbs should be weatherproof and rated for moisture exposure and temperature changes. For enclosed fixtures, make sure the bulb’s heat dissipation is compatible with the fixture. In ceiling fans or enclosed spaces, consider bulb shape and size to avoid contact with blades or housing. If your fixture uses a recessed housing or a fixture with a glass globe, handle bulbs carefully to prevent shattering and glass injuries. Bulb Fix emphasizes choosing a bulb that matches both base and application to ensure safe operation and long life.
Disposal and long-term care
Used bulbs should be disposed of according to local guidelines, with recycling prioritized for mercury-containing bulbs (like CFLs). Check your city’s waste management program for special drop-off sites or household hazardous waste days. Store spare bulbs in a safe, dry place away from direct sunlight or heat sources. Regularly check fixtures for signs of wear, corrosion, or loose connections, and replace components like switches or sockets as needed. Keeping a small stock of correctly rated bulbs on hand can reduce last-minute trips to the store and prevent outages.
Troubleshooting common issues after replacement
If a new bulb doesn’t light, re-check the base alignment and ensure the bulb is fully seated. Inspect the socket for corrosion, bent contacts, or looseness. If flickering occurs, verify the fixture is on a proper circuit and the bulb is compatible with any dimmer or smart controls. For outdoor fixtures exposed to the elements, inspect seals and weatherproof gaskets. If issues persist, consult a professional to avoid electrical hazards and ensure safe operation.
Tools & Materials
- Replacement bulb (correct base and wattage)(Bring a spare of the same base and rated wattage; avoid overloading the fixture.)
- Gloves(Protect bulb surface from oils; maintain secure grip.)
- Soft cloth or microfiber cloth(Optional for handling very smooth bulbs.)
- Ladder or stable step stool(Use only if the fixture is out of reach; ensure stability.)
- Screwdriver (as needed)(Only if the fixture uses screws to access the bulb.)
- Dry, lint-free towel(Keep nearby for quick cleanups and to prevent contamination.)
- Old bulb container or bag(Safely store removed bulb to avoid breakage.)
Steps
Estimated time: 20-40 minutes
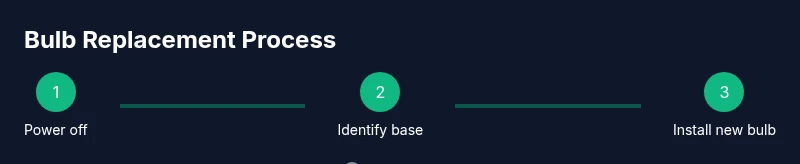
- 1
Power off and cool
Switch off the fixture at the switch and, if necessary, at the circuit breaker. Allow the bulb and fixture to cool completely before touching. This prevents burns and accidental shocks.
Tip: If replacing outdoors, ensure wet hands don’t contact metal parts. - 2
Identify bulb type and base
Carefully inspect the old bulb or the fixture label to determine the base type (e.g., screw-in, bayonet, or pin-based) and the rated wattage. This ensures you choose a compatible replacement.
Tip: Take the old bulb to the store to compare bases directly. - 3
Check fixture compatibility
Verify whether the fixture supports dimming, smart control, or outdoor use. This helps avoid incompatible replacements that could damage the fixture or create hazards.
Tip: When in doubt, consult the fixture’s manual or label. - 4
Remove the old bulb
Gently grasp the bulb by the base and rotate counterclockwise to loosen. For pin-based bulbs, pull straight out with even tension. Do not apply excessive force.
Tip: If the bulb is hard to remove, wiggle slightly but avoid forcing it. - 5
Inspect the socket
Look for corrosion, bent contacts, or cracks in the socket. If you see damage, stop and replace the socket or call a professional.
Tip: Do not use a damaged socket or exposed wiring. - 6
Install the new bulb
Align the base with the socket and rotate clockwise to secure for screw-in bases, or insert firmly for pin-based types. Do not overtighten. Ensure the bulb sits evenly.
Tip: Use a cloth to gain a better grip on smooth surfaces. - 7
Restore power and test
Turn the power back on and test the light by switching it on. If it doesn’t light, recheck seating and compatibility first.
Tip: If there’s no light, try a different bulb to rule out a fixture issue. - 8
Troubleshoot common issues
If flickering or buzzing occurs, verify the dimmer compatibility or wall switch condition and confirm wiring is secure. Faulty wiring or an incompatible dimmer is a common cause.
Tip: Document symptoms to help a professional diagnose quickly. - 9
Clean up and store
Wipe any fingerprints from the bulb with a cloth; store spare bulbs in a cool, dry place.
Tip: Keep bulbs organized by base type for faster future replacements. - 10
Dispose of old bulbs properly
Disposal methods vary by bulb type (mercury-containing CFLs require recycling). Check local guidelines and use designated recycling centers.
Tip: Never throw mercury-containing bulbs into regular trash.
Got Questions?
How do I know which bulb base my fixture uses?
Check the fixture label or the old bulb for base type. If in doubt, bring the existing bulb to a hardware store to compare bases.
Look at the base on the old bulb or on the fixture label to identify the type, then choose a matching replacement.
Can I mix LED and incandescent bulbs in the same fixture?
Mixing bulb types can cause uneven light and affect dimmers or fixtures. Use bulbs of the same type where feasible.
It's best to keep the same bulb type in a fixture to avoid performance issues.
Is it safe to change bulbs in a ceiling fixture?
Yes, with proper power shutoff and caution. If the fixture is hard to reach or involves exposed wiring, consider professional help.
Turn off power and be careful with reach and wiring; call a pro if you’re unsure.
What should I do if the bulb flickers after replacement?
Check the dimmer compatibility, wiring, and seating of the bulb. If flickering persists, try a different bulb or consult an electrician.
If it flickers, verify compatibility and seating, then try another bulb if needed.
How do I dispose of burnt-out bulbs?
Most bulbs are recyclable; CFLs require special recycling due to mercury. Check local guidelines for disposal sites.
Recycle bulbs when possible and follow local disposal rules.
Do I need to turn off power at the breaker for every bulb change?
At minimum, switch off the light at the wall. For high-risk fixtures or if you’re probing wiring, shut off power at the breaker.
Turn off power at the switch, and use the breaker if you’re working with wiring.
Watch Video
Key Points
- Choose the correct bulb base and wattage for every fixture.
- Prioritize safety: power off, cool bulbs, and dry hands.
- Match brightness via lumens, not watts, and consider color temperature.
- Dispose of used bulbs responsibly and recycle when possible.