How to Fix Bulb: A Practical Homeowner’s Guide
Learn how to diagnose and safely fix common bulb problems at home with practical steps, essential tools, and safety guidance from Bulb Fix. This guide covers bulbs, bases, fixtures, and when to seek professional help for reliable lighting.

In this guide you’ll learn how to diagnose and safely fix common bulb problems at home. You’ll cover bulb types, fixture checks, electrical safety, and a practical, step-by-step process that uses common tools. By following these actions, you’ll restore bright light quickly and reduce the risk of damage to fixtures or yourself. Whether you’re replacing a dead bulb, addressing flicker, or inspecting sockets, this plan keeps you safe and efficient, with clear whys and when to stop and call a professional.
What typically goes wrong with household bulbs
Bulbs fail or underperform for several reasons, including age, excessive heat, improper wattage, loose connections, and damaged sockets. A dead bulb is the most obvious symptom, but flickering, dimming, or buzzing can indicate a broader electrical issue. In this section we explore the common failure modes, so you can quickly decide whether to replace, inspect, or escalate. The phrase to remember is that not all bulb problems stem from the bulb itself; sometimes the fixture or wiring is at fault. According to Bulb Fix, starting with a simple, safe check helps prevent unnecessary parts replacement and keeps your lighting system stable. If you’re tackling a fixture in a high ceiling or outdoor outlet, exercise additional caution and follow safety guidelines to avoid shock or fire hazards.
Why this matters for homeowners
Understanding the root cause of bulb problems saves time and money. Replacing a bulb without verifying the socket or fixture compatibility can lead to repeated failures or electrical faults. By learning to differentiate between a bulb issue and a fixture problem, you build confidence for future maintenance. This knowledge also supports choosing the right bulb type for energy efficiency and longevity, such as opting for LED equivalents when appropriate. The goal is reliable light and safer, easier maintenance over the long term.
Safety first: essential precautions before you touch a bulb
Always set power to off at the switch, and ideally switch off the circuit at the breaker when you're dealing with hard-to-reach fixtures. Wear safety glasses to protect eyes from glass shards if a bulb shatters. Use a sturdy ladder or stepping stool for ceiling fixtures, and keep electrical contacts dry. Use insulated tools and avoid forcing a bulb loose if it resists. These precautions reduce the risk of electric shock, cuts, or heat burns, and they set you up for a safer repair.
Diagnosing the issue: bulb versus fixture
Start by confirming the simplest culprits: is the bulb truly dead, or is the filament broken? Check if the bulb is the wrong type or base for the fixture. Inspect the socket for corrosion, looseness, or signs of heat damage. For fixtures with multiple bulbs, test each socket to identify whether the failure is isolated to one position or across the fixture. A quick, non-contact voltage tester can help verify whether power is reaching the socket before removing parts, reducing guesswork and risk.
Replacing a faulty bulb: a careful swap
If the bulb is dead and the fixture and socket appear intact, replace with a compatible bulb of the correct base and wattage. Gently twist the bulb until it seats snugly without forcing. After installation, restore power and test the light. If the new bulb fails to light, recheck the fixture connections and consider testing with a known-good bulb to confirm the issue is with the socket or wiring rather than the bulb itself. This sequence minimizes wasted replacements and ensures proper seating.
Inspecting sockets and connections
A worn or corroded socket can prevent a good electrical contact, causing flicker or failure. Look for discoloration, melted plastic, or loose terminals. If you see corrosion, use a contact cleaner or a small amount of dielectric lubricant suitable for electrical connections, and then re-tighten screws. Do not apply lubricants to the contact surfaces that touch the bulb’s base, as that can create new resistance and heat. If damage is evident, replace the socket or call a qualified electrician.
When to call a professional and what to expect
If you’ve replaced the bulb and checked the socket but the light still won’t work, or you notice burning smells, warm fixtures, or buzzing, stop and seek professional help. An electrician can diagnose wiring faults, breaker issues, or outlet problems that are beyond a DIY fix. Early intervention can prevent further damage and improve overall electrical safety in your home. The Bulb Fix team recommends erring on the side of caution when dealing with fixtures in damp areas or high ceilings.
Energy efficiency and long-term bulb care
Choosing the right bulb type matters for energy use and longevity. LED bulbs provide longer life and lower energy consumption than incandescent or halogen bulbs in most fixtures. When replacing, consider dimmer compatibility, color temperature, and heat tolerance of enclosed fixtures. Regularly cleaning fixtures and replacing aging bulbs before they fail completely reduces outages and maintains consistent light quality over time. How to fix bulb problems becomes easier when you pair smart maintenance with the right technology.
Tools & Materials
- Replacement bulb of correct type/base(Check base (E26/E27/GU10) and wattage rating)
- Non-contact voltage tester(Verify power at the socket without contact)
- Screwdriver set (flat and Phillips)(Loose screws in fixtures or sockets)
- Safety glasses(Protect eyes from shards if bulb breaks)
- Step ladder or sturdy stool(Reach ceiling fixtures safely)
- Electrical contact cleaner(Clean dirty sockets; avoid contact with bulb surfaces)
- Dielectric lubricant (optional)(Use only on exposed metal contacts)
- Gloves (cushioned)(Handle bulbs carefully to avoid fingerprints on the glass)
- Multimeter (optional)(For advanced voltage and continuity checks)
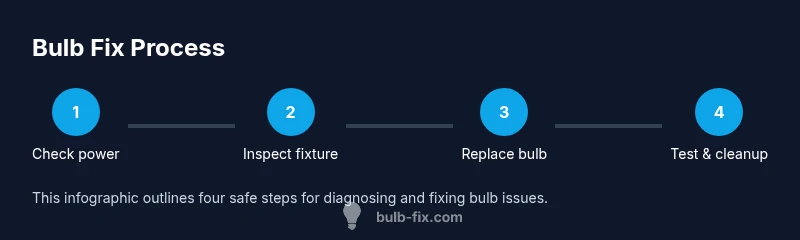
Steps
Estimated time: 20-40 minutes
- 1
Power down and prep safety gear
Turn off the light switch and, if possible, switch off the circuit at the breaker. Put on safety glasses and place your ladder securely. Clear the area of objects that could snag you while climbing. Why: prevents shocks and falls while handling hot bulbs or live sockets.
Tip: Always test the socket with a non-contact tester before touching wires. - 2
Identify bulb type and fixture compatibility
Check the bulb base type (e.g., E26, E27, GU10) and wattage stamped on the fixture or bulb. Ensure the replacement matches the base size and lamp rating. If you’re unsure, consult the fixture label or manufacturer specs. Why: wrong base or wattage can cause immediate failure or safety issues.
Tip: If the fixture is inside a dimmer, verify dimmer compatibility with the new bulb. - 3
Remove the old bulb safely
Gently grasp the bulb, rotate counterclockwise to loosen, and avoid applying force if it doesn’t budge. If the bulb is hot, wait 5–10 minutes for it to cool. For enclosed fixtures, use a bulb removal tool or a cloth to hold the base while turning. Why: prevents glass breakage and skin burns.
Tip: Do not twist beyond the base; over-tightening can damage the socket. - 4
Inspect the socket and fixture
Look for corrosion, melted plastic, or loose connections. If you see corrosion, lightly clean with contact cleaner and re-tighten. If the wiring looks damaged or discolored, stop and call a qualified electrician. Why: degraded sockets can cause arcing or inconsistent lighting.
Tip: Never force a socket or wires back into place; damaged components require replacement. - 5
Install the new bulb
Insert the new bulb straight into the socket and gently twist until snug without forcing. Recheck that the bulb sits evenly. Restore power and test the light. Why: correct seating prevents flicker and ensures proper electrical contact.
Tip: If using LED bulbs, ensure the fixture is compatible with LED types to avoid dimming or buzzing. - 6
Test, observe, and tidy up
Turn the power back on and observe the bulb for stability over several seconds. If it flickers, re-seat or try a different bulb if you have one. Clean the area and store tools. Why: provides immediate confirmation and prevents leftover clutter.
Tip: Keep spare bulbs in a labeled container for quick future fixes.
Got Questions?
What is the most common bulb problem?
The most common issue is a bulb that won’t light due to a faulty connection or a burned-out filment. Always start by replacing the bulb with a known-good one and verify the socket is clean and intact. If it still fails, inspect the fixture for loose wiring or corrosion.
Most bulbs fail because of a bad connection or a burned-out filament. Start by trying a new bulb, then check the socket for dirt or corrosion if it won’t light.
Why does a bulb flicker or buzz when I turn it on?
Flicker or buzzing often indicates loose connections, incompatible bulbs with the fixture, or a failing socket. Check the bulb seating, replace with a compatible bulb, and inspect the socket for wear. If the issue persists, consider the electrical circuit or dimmer compatibility.
Flicker usually means a loose connection or an incompatible fixture. Check seating and socket, then try a compatible bulb and test again.
Is it safe to replace bulbs in ceiling fixtures?
Yes, with precautions: power off, use a sturdy ladder, wear safety glasses, and avoid contact with hot bulbs. If the fixture is recessed or enclosed, inspect heat sinks and ensure the bulb can fit without touching surfaces that could cause overheating.
Yes, if you turn off power and use a ladder and safety glasses. Be careful with recessed fixtures.
What bulb types are easiest to install?
Standard screw-in bulbs with a compatible base (like E26 or E27) are typically easiest. LED variants are common for longevity and efficiency, but always check fixture compatibility and dimmer rating before choosing.
Screw-in bulbs with matching bases are easiest. LEDs save energy, but check compatibility first.
What should I do if the new bulb still won’t light?
If a new bulb doesn’t light, recheck the socket, wiring, and switches. Try a different bulb in the same socket to confirm the issue. If nothing works, the problem is likely the fixture or electrical supply and a professional evaluation is advised.
If the new bulb still won’t light, test the socket and wiring again. If it still fails, call a professional.
Can a faulty socket cause repeated bulb failures?
Yes, a damaged or corroded socket can cause repeated failures. Replacing the socket or repairing wiring is often necessary. If you’re unsure, a licensed electrician can safely handle the replacement.
A bad socket can cause repeated failures. It often needs replacement by a pro.
Watch Video
Key Points
- Power off before handling any bulb.
- Use the correct bulb type and base for the fixture.
- Inspect sockets for wear or damage and replace if needed.
- Test after replacement to verify full brightness.