How to Change a Light Bulb Step by Step
Learn how to change a light bulb step by step with practical safety tips, proper tool use, and disposal guidance. Bulb Fix provides a clear, beginner-friendly method to keep your home well-lit and safer.

You will learn how to safely replace a light bulb from a powered-off lamp or fixture, including choosing the right bulb, turning off power, handling different fixtures, and disposing of old bulbs. This quick guide sets you up with a safe, repeatable method you can apply to most rooms in your home.
Why Changing a Light Bulb Safely Matters
Lighting plays a crucial role in safety, comfort, and energy use around the home. When a bulb burns out, it’s tempting to grab a replacement and go on with your day. However, working with electrical fixtures carries risk—from electric shock to broken glass and fire hazards if a bulb is installed incorrectly. At Bulb Fix we emphasize a simple, repeatable safety routine: power down, confirm the fixture is cool, and handle bulbs gently. This approach reduces the chance of accidents and makes the job quicker in the long run. Practicing safety also protects the fixture’s wiring and socket, which can save you from costly repairs later.
This section will walk you through a clear, step‑by‑step process you can apply to most household bulbs, from table lamps to ceiling fixtures. By following the guidance below, you’ll improve reliability, reduce waste, and create a safer environment for everyone in your home. The goal is not to rush a replacement but to do it confidently, so every room stays lit when you need it most. According to Bulb Fix, a calm, methodical approach yields the best outcomes and minimizes the risk of damage to your fixture or injury to you.
Understanding Bulb Types and Fixtures
The first decision in bulb replacement is choosing the right bulb for the fixture. Most homes use LED bulbs today, but you’ll still encounter incandescent and CFL bulbs in older lamps. Each type has a different base, wattage rating, and heat profile. The base is the threaded metal part that screws into the socket (common bases are E26/E27 for many residential fixtures, with smaller candelabra bases like E12 in some lamps). Dimmable bulbs require compatible dimmers, and some fixtures are enclosed and must use bulbs rated for enclosed use to prevent overheating. If you’re unsure, check the fixture label or its instruction manual.
Bulbs life and efficiency matter too. LED bulbs last much longer and use far less energy than incandescent bulbs, while CFLs use more energy than LEDs and contain a small amount of mercury. For frequently used lights, LEDs are often the best choice; for decorative fixtures with small form factors, ensure the bulb’s shape matches the socket and the lamp’s shade doesn’t overheat. Bulb Fix analysis shows that mismatched bulbs—using a higher-wattage bulb or an incompatible base—can shorten lamp life or damage the socket. When in doubt, bring the old bulb to the store or consult the fixture’s label to confirm the correct type and base. If you’re replacing a dimmable LED, verify the dimmer is compatible with LED loads to avoid flicker.
Tools and Materials You’ll Need
Having the right tools and a spare bulb ready makes the job faster and safer. The essentials are simple and commonly found around the house. Before you start, gather the following items:
- Replacement bulb with the same base type and appropriate wattage or brightness (measured in lumens for LEDs)
- Your lamp or fixture (the object you’ll be working on)
- A clean, dry cloth or microfiber to wipe the bulb and socket
- A pair of clean cotton gloves or disposable gloves (optional but helpful to avoid transferring skin oils)
- A dry, stable stepping stool or small ladder for fixtures that are out of reach
- A flashlight or phone light if the area is dim
- If you’re changing a recessed or high‑mounted bulb, a non-conductive tool or bulb changer for safety (optional)
Notes:
- Do not use a bulb with a wattage rating higher than the fixture’s rating.
- Keep bulbs in their packaging until you’re ready to install to avoid fingerprints.
Safety First: Power Off and Prep
Safety starts before you touch anything. Turn off the power to the fixture at the wall switch; if the fixture is wired to a wall switch, you can also switch off the nearby breaker to cut power completely. If the room remains dim, use a flash light to inspect the area without touching the hot fixtures. Allow the bulb and glass to cool for several minutes after switching off the power; hot bulbs can burn skin and cause glass breakage when handled. If the fixture is controlled by a dimmer or smart switch, ensure it’s set to off. Finally, clear the area from obstacles and set your stool or ladder on a flat, stable surface. This preparation reduces the risk of slips or accidents while you work.
Replacing the Bulb: A Detailed Walkthrough
The core replacement steps are straightforward when you’re methodical. Start by grasping the base of the bulb (the metal portion near the glass) and gently turn counterclockwise until the bulb loosens. If the bulb resists, do not apply force; check that you are turning the correct direction and that you have a good grip with gloves or a clean cloth. Once the bulb spins free, pull straight out and inspect the socket for signs of damage, corrosion, or oil residue from your fingers; clean with a dry cloth if needed.
Next, pick up the replacement bulb and align it with the socket. A straight, axial line between bulb and socket reduces cross‑threading and glass breakage. Gently thread the bulb in by tightening it a little at a time; do not overtighten, which can crack the glass or strip the socket. While you turn, feel for any resistance that indicates the base isn’t aligned with the threads. After the bulb is snug, pause for a moment and visually confirm there’s no tilt or gap between the bulb and the fixture.
If you’re replacing a bulb in a fixture that uses multiple bulbs or a ceiling fan, repeat the same steps for each socket. When finished, turn the power back on at the switch or breaker and test the light. If the light does not turn on, recheck the bulb alignment, verify the fixture rating, and consider testing with a known-good replacement. Store the old bulb safely in its packaging to minimize breakage, and dispose of it according to local recycling rules.
Aftercare, Testing, and Disposal
With the bulb installed and power restored, give the bulb a moment to reach full brightness; LEDs typically arrive instantly, while incandescent bulbs can take a few seconds. If the light flickers or hums, double‑check that the bulb is the correct type for the fixture and that the socket is clean and free of oil or dirt. Consider keeping a small stock of spare bulbs of the same type for quick replacements. When disposing of old bulbs, follow local guidelines: CFLs and other fluorescent bulbs often require recycling due to trace amounts of mercury, while LEDs and incandescent bulbs can usually be recycled where available. If you’re unsure about disposal options, your local waste authority or hardware store can point you to a drop‑off site.
Tools & Materials
- Replacement bulb (correct base and wattage/brightness)(Match base type (e.g., E26/E27) and ensure wattage is within fixture rating; consider LED for longevity.)
- Lamp or fixture being worked on(Ensure you know the exact location and model if needed for base compatibility.)
- Clean cloth or microfiber(Wipe the bulb and socket to remove oils that can shorten bulb life.)
- Gloves (optional)(Wear cotton or nitrile gloves to avoid skin oils on the bulb.)
- Dry stepping stool or ladder(Use only on stable surfaces; never stand on furniture.)
- Flashlight or phone light(Helpful for dark or recessed fixtures.)
- Non-conductive tool (optional)(For high fixtures or recessed cans if needed.)
Steps
Estimated time: 10-15 minutes
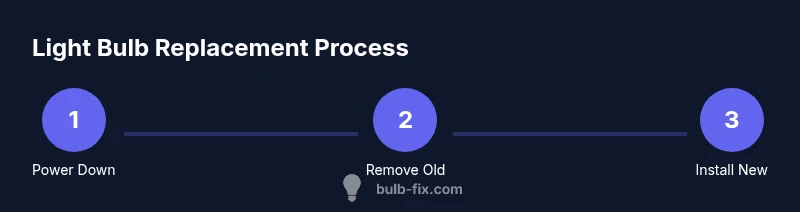
- 1
Power down and prep area
Turn off the fixture at the wall switch and, if possible, at the circuit breaker. Verify the area is dry and clear of obstacles. If you’re using a ladder, place it on a flat surface and have someone hold it for stability. Allow any hot bulbs to cool for several minutes before touching the glass.
Tip: Always ensure power is off and test the switch before touching the bulb. - 2
Let the bulb cool and inspect
Give the bulb a few minutes to cool down so it won’t crack when you handle it. Look for signs of moisture, cracks, or a damaged socket around the base. If the socket looks damaged, stop and consider replacing the fixture or consulting a professional.
Tip: A dry cloth helps you grip without slipping and prevents finger oils on the glass. - 3
Remove the old bulb
Grasp the bulb by its base (not the glass) and turn counterclockwise to loosen. If the bulb is stubborn, pause and check for cross‑threading or a misaligned socket. Remove the bulb straight out and set it aside in its packaging to avoid breakage.
Tip: Do not twist the glass; always turn by the base for safety. - 4
Check socket and base
Inspect the socket for any signs of wear, corrosion, or burns. Confirm the base type matches your replacement bulb (e.g., E26/E27). If the socket is damaged, replace the fixture or seek professional help before installing a new bulb.
Tip: A damaged socket can cause arcing or fire risk if used. - 5
Install the new bulb
Align the bulb’s base with the socket and thread it in gently, increasing by small turns until snug. Avoid over‑tightening which can crack the bulb or strip the socket threads. Make sure the bulb sits evenly and is not tilted.
Tip: Use gloves or a cloth to prevent oils from your skin transferring to the bulb. - 6
Test and tidy up
Restore power at the switch or breaker and test the light. If it doesn’t work, recheck alignment or try a known-good bulb. Clean up the area and store the old bulb safely for recycling.
Tip: If you hear buzzing or see flicker, you may have a mismatch with the dimmer or fixture.
Got Questions?
Is it safe to change a light bulb with the power on?
No. Always switch off power and allow the bulb to cool before handling. If the fixture is on a dimmer or smart switch, turn those off too.
No, you should always turn the power off and let the bulb cool before touching it.
What base types are most common in homes?
Most residential fixtures use E26/E27 screw bases. Small decorative lamps may use candelabra bases like E12. Check the fixture label or the bulb packaging to confirm.
Most homes use E26 or E27 screws; check the label to be sure.
What should I do if the bulb is stuck and won’t loosen?
Power off entirely, use a dry cloth or gloves for grip, and try turning counterclockwise with steady, even pressure. If it still won’t loosen, avoid forcing and seek professional help.
If it’s stuck, power off and try gently turning with a cloth. Don’t force it.
Can I mix LED and incandescent bulbs in the same fixture?
Mixing different bulb types can lead to flicker or uneven brightness, especially with dimmers. Use bulbs of the same type and rating for best results.
It’s best to use bulbs of the same type in a fixture to avoid flicker.
How should I dispose of old bulbs?
Recycle CFLs and other fluorescent bulbs at local recycling programs or hardware stores that accept them. LEDs and incandescent bulbs are generally recycled where available; check local guidelines.
Recycle CFLs where possible; check local guidelines for LED and incandescent disposal.
Watch Video
Key Points
- Power off before handling bulbs
- Match base type and wattage to fixture
- Use LEDs for longevity and efficiency
- Handle bulbs with care to avoid breakage
- Recycle or dispose of bulbs properly