How to Install Bulb Light: A Safe DIY Guide
A comprehensive, step-by-step guide for homeowners on safely installing a bulb light, with tools, safety checks, troubleshooting tips, and expert references.

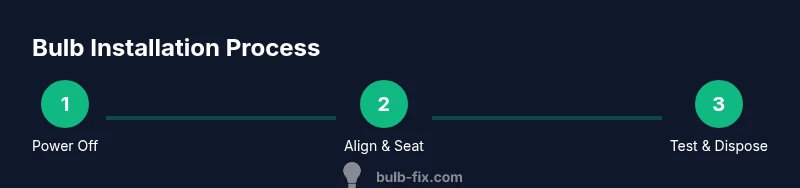
By following these steps, you can install a bulb light safely and efficiently. Always start by turning off power at the switch and breaker, then choose a compatible bulb, handle it with clean gloves, and ensure the fixture is cool before installation. Finish by testing the light and disposing of old bulbs properly.
Understanding bulb types and bases
Bulb technology has evolved, and knowing the right type for your fixture helps you save energy and reduce heat. According to Bulb Fix, most common household sockets are designed for standard screw-in bulbs with an E26/E27 base in North America and Europe, while many recessed or track fixtures use pin-based or dedicated bases such as GU10, MR16, or B22. The choice of bulb affects brightness, color temperature, and longevity. For simple ceiling fixtures, LED bulbs with a compatible base are the easiest to maintain and produce less heat than traditional incandescent bulbs. When planning an upgrade, look at the fixture label or owner's manual to confirm base type and maximum wattage. If you’re unsure, use a safe, dimmable LED bulb within the fixture’s rated range. Avoid mixing bulb types on circuits that include dimmers, as incompatible LEDs can flicker or fail early. This is especially important in living areas where lighting quality matters. By understanding these fundamentals, you’ll select a bulb that fits physically and performs as expected, reducing the chance of overheating or arcing.
Safety prerequisites and common hazards
Electrical work carries real risks, even in familiar spaces. The first and most important rule is to turn off power to the fixture before touching any bulb or socket. If you’re unsure which switch controls the fixture, switch off the corresponding circuit at the breaker panel. Use dry hands and keep your feet on a dry floor; never operate near water. Wear protective gloves to reduce the risk of cuts from broken glass and to avoid fingerprint stains on glass bulbs. Keep a flashlight handy in case the room is poorly lit. If you notice scorch marks on the ceiling, a buzzing ballast, or a warm-to-the-touch fixture, stop and seek professional service. For outdoor fixtures or bathroom lights, ensure the fixture is rated for damp or wet locations and that any protective covers are securely in place. Finally, never force a bulb into a socket; if it doesn’t fit with a gentle twist, re-check the base type and alignment. Following these precautions reduces the risk of electric shock, short circuits, and fire.
Tools and materials you’ll need
Before you begin, gather the essentials to keep the job safe and smooth. The right tools reduce the chance of slips or accidents and help you reach fixtures without straining. A clean, well-lit space makes it easier to see the socket alignment and base type. Keep a non-slip ladder, dry cloths, gloves, and a voltage tester handy. If your fixture is outdoors or high, consider a helper for stabilization. Having a dedicated replacement bulb of the correct base and wattage ready ensures you don’t have to scramble mid-task. This section also covers why each item matters and how to use it correctly.
Preparing the fixture and power
With power confirmed off, inspect the fixture for any signs of damage, corrosion, or overheating. Check that the socket threads are clean and free of debris; a dusty base can cause improper seating or poor contact. If replacing an older bulb, examine the old bulb’s base to verify compatibility with the new bulb. Wipe the socket and the surrounding area with a dry cloth to remove dust. If you notice any cracks in the housing or a loose mount, pause and address those issues before proceeding. Ensure you have stable footing and a clear working radius, especially in ceiling fixtures. This preparation minimizes the risk of shock and ensures reliable contact between bulb and socket.
Step-by-step installation considerations and best practices
Installing a bulb is straightforward when you follow the correct sequence and handle the bulb with care. Start by turning off all power to the fixture; use a voltage tester if you’re uncertain. Align the bulb’s base with the socket, insert gently, and twist until you feel a snug seat. Do not over-tighten, as this can strip the socket or break the bulb. If the fixture has a dimmer, ensure the bulb is dimmable and compatible with the dimmer type. Wait a moment after seating the bulb to allow any heat or cold contraction to settle. After you restore power, test the switch and observe the light for a minute to confirm stable operation. If you replaced an incandescent with an LED, give the electronics time to adjust and avoid rapid on/off cycling.
Troubleshooting and aftercare
If the bulb flickers after installation, switch off power and re-seat the bulb. Verify that you used a bulb with the correct base and wattage; dimmers and compatibility issues are common culprits. For non-dimming fixtures, LED bulbs with excessive wattage or incompatible drivers can flicker or buzz. If the bulb feels warm to the touch, stop and check the fixture’s rating against the bulb’s wattage. When finished, clean up the area and store any spare bulbs in a cool, dry place. Recycle old bulbs according to local guidelines, and keep a small stock of the same bulb type for future replacements. If you encounter persistent problems, consult the fixture manual or contact a licensed electrician for a safe, professional assessment.
Tools & Materials
- Non-contact voltage tester(Verify the circuit is de-energized before touching the socket)
- Dry cloths or lint-free wipes(Clean the socket and bulb base without leaving fibers)
- Gloves (electrical-grade preferred)(Protect hands and prevent fingerprints on bulbs)
- Sturdy ladder or step stool(Must be stable and tall enough to reach the fixture with comfortable footing)
- Replacement bulb with compatible base(Check base type (e.g., E26/E27, GU10) and wattage rating)
- Screwdrivers (flathead and Phillips)(For fixtures that require removing a cover or trim)
- Flashlight(Extra light for ceiling fixtures or dark spaces)
- Owner's manual or fixture label(Confirm base type, wattage, and any special instructions)
Steps
Estimated time: 15-40 minutes
- 1
Turn off power to the fixture
Switch off the light at the wall and, for extra safety, switch off the corresponding circuit breaker. Use a voltage tester to confirm there’s no live current in the socket before touching any components.
Tip: If you’re unsure which breaker controls the fixture, switch off the main power to be safe. - 2
Inspect the fixture and bulb base
Look for corrosion, scorch marks, or loose parts. Identify the bulb base type (E26, E27, GU10, etc.) and verify the fixture’s maximum wattage. This prevents incorrect bulbs from causing heat or failure.
Tip: Check for a label on the fixture or inside the access panel for base and wattage info. - 3
Remove the old bulb if present
Gently twist or pull the old bulb (depending on base type) until it releases. If it’s tight, wait for the fixture to cool completely before attempting removal. Avoid pulling on the wires.
Tip: Always hold the bulb by the base, not the glass, to prevent cracking. - 4
Clean the socket and inspect contacts
Wipe the socket threads and contact area with a dry cloth to remove dust. Check the metal contact inside the socket for corrosion; if corroded, don’t install a bulb and seek professional service.
Tip: Do not use liquids or solvents on electrical contacts. - 5
Install the new bulb
Align the bulb base with the socket and insert gently. For screw-type bases, twist until snug; for pin-based bases, push and twist if required by the design. Avoid forcing the bulb.
Tip: If using LED, ensure the bulb is labeled as dimmable if the fixture has a dimmer. - 6
Restore power and test
Turn the breaker back on or the wall switch. Allow a moment for the bulb to illuminate fully and observe for stable operation without flicker or buzzing.
Tip: If the light doesn’t come on, re-check seating and base type before seeking help. - 7
Observe heat and performance
Feel the fixture after a few minutes to ensure it’s not overheating. A hot-to-the-touch base can indicate an over-wattage bulb or poor contact.
Tip: If you notice excessive heat, power down and verify wattage compatibility immediately. - 8
Disposal and cleanup
Dispose of old bulbs according to local guidelines; some bulbs (especially CFLs) require recycling. Wipe your hands and store any spare bulbs in a cool, dry place.
Tip: Keep a dedicated bulb recycling bag for safe transport to disposal sites.
Got Questions?
Do I need to turn off the circuit breaker or can I just switch off the wall switch?
Yes; to ensure complete de-energization, turn off the circuit breaker and test with a voltage tester. Relying on the wall switch alone may leave the circuit live.
Yes, turn off the breaker and test to be safe.
Can I use any bulb in every fixture?
No. Always check the base type and the fixture’s wattage rating. Some fixtures require pin-based bases or special ballast compatibility.
Not all bulbs fit all fixtures; verify base and wattage.
What should I do with a broken bulb?
Allow the bulb to cool, wear gloves, and carefully collect shards with a stiff card. Place glass in a sturdy container and inspect the socket before replacing.
Let it cool, wear gloves, and clean up shards carefully.
How do I dispose of LED bulbs?
Recycle LED bulbs via local e-waste programs or designated recycling centers. Do not throw LEDs in regular trash where permitted by local rules.
Recycle LED bulbs at designated drop-offs.
What if the bulb flickers after installation?
Check that the bulb is dimmable if the fixture uses a dimmer, and verify compatibility with the dimmer type. If it still flickers, try a different bulb or consult a professional.
Flicker can mean dimmer or compatibility issue; swap or check compatibility.
Is it safe to install bulbs outdoors?
Only use bulbs rated for outdoor or damp locations in exterior fixtures, and ensure weatherproof seals are intact.
Outdoor use requires the right rating and seals.
Watch Video
Key Points
- Always disconnect power before touching the fixture.
- Verify bulb base and wattage compatibility.
- Seat the bulb firmly but do not overtighten.
- Test the fixture after installation and recycle old bulbs properly.