Is Your Light Bulb Compatible? A Practical Guide
Learn how to verify bulb base, wattage, voltage, dimmer/ballast compatibility, and fixture labeling to ensure safe, effective lighting. A Bulb Fix step-by-step guide for homeowners and DIY enthusiasts.

According to Bulb Fix, you know a bulb is compatible when the base matches, the fixture’s max wattage is not exceeded, and the voltage, dimmer, and ballast considerations align. Verify lumen output and color temperature, and ensure your replacement bulb is rated for the fixture type and switch. Always check the label on the fixture.
What compatibility means for residential lighting
Compatibility in home lighting covers three core areas: physical fit, electrical suitability, and operating safety. The bulb must physically fit the socket and space, draw the correct current without overheating, and work with the switch or dimmer in your room. Beyond these basics, you’ll want to match the intended purpose of the fixture (task, ambient, or accent), ensure the light quality aligns with your needs, and verify that the bulb type is supported by the fixture’s design. Bulb Fix emphasizes that a careful, label-driven approach reduces flicker, waste, and risk. By understanding these dimensions—base type, wattage, and electrical compatibility—you can avoid common mistakes and keep your lighting both effective and safe.
Key terms to know before you shop
- Base type: The electrical contact and screw/socket shape that accepts the bulb. Common examples include screw bases (such as E27, E26) and pin-based bases (like GU10).
- Wattage rating: The maximum power the fixture is designed to safely handle. Exceeding this rating can overheat components.
- Voltage: The electrical pressure the bulb is built to handle, typically 120V in North America or 230V in many other regions. Using the wrong voltage can damage the bulb or fixture.
- Dimmability: Whether a bulb can operate on a dimmer switch, and whether the fixture’s dimmer is compatible with that bulb type.
- Ballast compatibility: For some fixtures, especially fluorescent ones, the ballast determines which bulbs can run reliably.
By using these terms during inspection and shopping, you’ll make smarter, safer choices. Bulb Fix’s guidance centers on matching base, rating, and control compatibility first, then fine-tuning for color and brightness to suit the room.
How to approach a fixture label and packaging
Most reliable compatibility checks start with the fixture label. Look for a list that includes:
- Base type or socket description
- Maximum wattage rating and voltage
- Any dimmer or ballast requirements
- Recommended bulb types (LED, CFL, incandescent, halogen)
- If there is a smart-control system involved, confirm hub or protocol compatibility
Also inspect the bulb packaging to confirm base, wattage, voltage, dimmability, and lumen output. When in doubt, cross-check both sources. Bulb Fix notes that aligning these specs is the fastest way to avoid errors before you purchase or install.
Base types and sockets you’ll encounter (quick reference)
Different regions use different standards, but the most common for households are screw bases (Edison-style) and bayonet or pin bases. In the United States, E26/E27 bases are widespread; in Europe, you’ll see E27 and B22. Specialty fixtures may use GU bases or pin-based sockets. The rule of thumb is simple: the bulb’s base must physically fit the socket, and the bulb’s base designation should be compatible with any adapters or fixtures. Always verify the exact base type on the fixture label and on the bulb packaging. Bulb Fix stresses that base compatibility is the foundation of a safe, functional lighting setup.
Electrical compatibility: wattage and voltage, in plain language
Every fixture is engineered to handle a specific electrical load. The maximum wattage rating appears on the fixture or its manual. Choose a bulb whose wattage is at or below that rating. Voltage is equally important: in the US, most residential circuits are 120V, while many other regions operate at higher voltages. Using a bulb rated for a different voltage can shorten bulb life or pose safety risks. If you’re unsure about your home voltage, consult a licensed electrician. The bottom line: match voltage and stay within the wattage limits to keep lamps safe and reliable.
Dimmer and ballast considerations: not all bulbs play nice
If your fixture includes a dimmer switch, you must use a bulb labeled as dimmable and confirm it’s compatible with your dimmer type (leading-edge vs trailing-edge). Fluorescent fixtures rely on ballasts; not all LED or CFL bulbs work with every ballast, which can cause flicker or failure. When in doubt, replace existing bulbs with clearly labeled dimmable options and verify with the fixture’s documentation. Bulb Fix highlights that mismatch between dimmer/ballast and bulb type is a common source of early failures and poor performance.
LEDs, CFLs, and incandescents: matching brightness and warmth without guessing
Wattage is not the sole indicator of brightness; lumens do the heavy lifting there. LEDs often provide more light per watt and can run cooler, but their performance depends on quality and compatibility with the fixture. Color temperature, measured in Kelvin, determines whether light appears warm or cool. For living spaces, many people prefer warm whites; for task lighting, cooler whites can improve clarity. When selecting bulbs, consider the fixture’s size, the room function, and the desired mood. Bulb Fix advises aligning lumen output and color temperature with the room’s purpose and the fixture’s design to avoid under- or over-lighting.
Smart bulbs and mixed-control systems: plan before you buy
Smart bulbs add features like scheduling and remote control, but some fixtures aren’t designed to supply a consistent neutral or may be incompatible with certain hubs. Check the fixture’s compatibility notes for any smart-control requirements, including necessary dimming compatibility and the existence of a neutral line in the circuit. If you’re upgrading to smart bulbs, ensure your home network supports the chosen protocol and that the fixture’s rating can handle the smart bulb’s energy draw. Bulb Fix reminds readers to plan the control system and base type together to prevent surprises after installation.
Safe testing and a methodical approach to verification
After confirming base, wattage, voltage, dimmer/ballast compatibility, and lighting characteristics, perform a careful test. Power down, install the bulb snugly, restore power, and observe for stability, flicker, or heat. If anything behaves oddly, discontinue use and review the label and packaging again. A methodical approach reduces risk and helps you confidently verify compatibility before investing time or money. The Bulb Fix team emphasizes safety and accuracy in every compatibility check.
Tools & Materials
- Replacement bulbs with matching base(Choose bulbs that match the fixture’s base and rated type (LED/CFL/incandescent) and confirm dimmable status if needed.)
- Fixture manual or label(Contains base type, max wattage, voltage, and any ballast/dimmer notes.)
- Non-contact voltage tester(Useful for quick safety checks when you’re unsure about live wiring.)
- Gloves or clean cloth(Protect hands and keep the bulb clean during installation.)
- Step ladder or stable stool(Needed for ceiling fixtures or high mounts.)
- Marker or label tape(Label tested bulbs or keep notes for future reference.)
Steps
Estimated time: 20-40 minutes
- 1
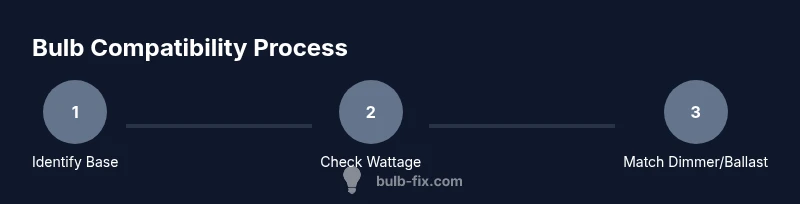
Identify the base type
Remove the old bulb and inspect the base and socket shape. Compare with the fixture label or manual, and confirm whether the base is screw, bayonet, pin-based, or another design. This is the foundation of compatibility.
Tip: Take a quick photo of the base and label to compare later if you’re unsure. - 2
Check maximum wattage and voltage
Read the fixture’s label or manual for its max wattage and operating voltage. Select a bulb with wattage at or below the rating and a voltage that matches your region. This prevents overheating and electrical stress.
Tip: If you have a mix of bulbs in the house, test one fixture at a time to avoid accidental overloads. - 3
Assess dimmer and ballast needs
If there is a dimmer switch or a fluorescent ballast in the circuit, verify that the bulb is rated for dimming or ballast compatibility. Mismatches here commonly cause flicker, buzzing, or premature failure.
Tip: Prefer bulbs explicitly labeled for your dimmer type and ballast in use. - 4
Match lumen output and color temperature
Choose a bulb with a lumen range suitable for the fixture’s purpose and room. Align the color temperature with the space’s mood: warmer tones for living areas, cooler tones for task lighting. This helps achieve the desired ambience.
Tip: If replacing multiple bulbs in a room, keep consistent color temperature for uniform lighting. - 5
Consider LED vs other technologies
LEDs typically offer greater efficiency and longer life. Ensure your fixture supports LED performance, and check for any compatibility notes with the fixture or control system.
Tip: When in doubt, start with a known LED option labeled as compatible with your base and dimmer. - 6
Test fit and safety check
Power off the circuit, install the bulb snugly, restore power, and observe for stability. If there’s heat, flicker, or noise, stop using the bulb and re-check the label and base. Always handle bulbs with care and wait for any warm bulbs to cool before touching.
Tip: Keep a spare bulb in case the first test reveals an incompatibility. - 7
Single-bulb vs multi-bulb fixtures
For fixtures with multiple bulbs, ensure all bulbs have the same base, wattage, and dimming capability to prevent uneven brightness and load imbalance.
Tip: If you replace one bulb in a multi-bulb fixture, consider replacing all bulbs to maintain consistency. - 8
Dispose and store recommendations
Dispose old bulbs according to local regulations, especially for CFLs or LEDs with special disposal needs. Store any spare bulbs in their original packaging until needed.
Tip: Label a small stock of spare bulbs by base type and wattage for future fixes.
Got Questions?
What does 'base type' mean in bulb compatibility?
The base type describes the bulb's metal base and socket interface. It determines whether the bulb physically fits the fixture. Always match the fixture’s socket type with the bulb’s base designation.
Base type is how the bulb connects to the socket; make sure the bulb and fixture have matching base types.
Can I use a higher wattage bulb in a fixture?
No. Fixtures are rated for a maximum wattage to prevent overheating. Use a bulb with wattage at or below the fixture rating, and confirm with the label.
Always go no higher than the fixture’s wattage rating.
What if my fixture has a dimmer switch?
If there’s a dimmer, select a bulb labeled as dimmable and compatible with your dimmer type. Incompatible combinations can cause flicker or bulb failure.
Get a dimmable bulb that matches your dimmer type.
Are LED bulbs always compatible with existing fixtures?
LED bulbs are compatible with many fixtures, but you must verify base, wattage, dimmer/ballast compatibility, and whether the fixture’s electronics support LED. Some older fixtures may need adapters or specific LED ratings.
Check base, wattage, and dimmer compatibility for LEDs.
How do I know a bulb is 'dimmable'?
Look for the word 'dimmable' on the bulb packaging. Also confirm that your dimmer system supports the bulb type you choose to avoid issues.
Look for 'dimmable' on the packaging and confirm your dimmer supports it.
Watch Video
Key Points
- Identify base type first to ensure fit.
- Never exceed the fixture's wattage rating.
- Check dimmer/ballast compatibility before buying.
- Match lumen output and color temperature to the space.
- Test safely with power off before finalizing.