How to Protect Bulbs from Rodents: A Practical DIY Guide
Learn practical, safe steps to protect bulbs from rodents with sealing, storage, and maintenance strategies from Bulb Fix. A complete DIY guide for homeowners looking to secure lighting and prevent damage.

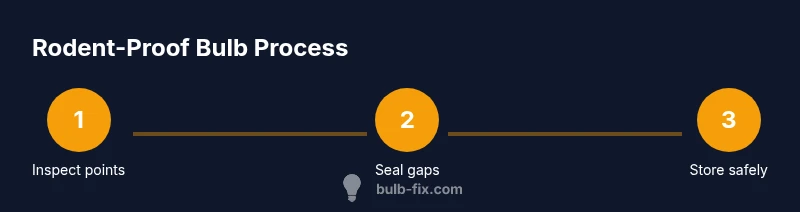
In 2–3 steps you’ll learn how to protect bulbs from rodents by sealing gaps, using rodent‑proof storage, and installing sealed fixtures. This how-to covers inspection, sealing, storage, and ongoing maintenance to prevent damage, keep wiring safe, and reduce infestation risk in homes and sheds.
Why Rodents Target Bulbs and How to Protect Them
Rodents are attracted to dark, sheltered spaces where bulbs and their wiring are stored or used, especially in basements, sheds, and garages. They seek food sources, nesting material, and warmth, and bulbs can inadvertently provide both shelter and fuel for their nests. According to Bulb Fix, proactive rodent-proofing reduces entry points and lowers the likelihood of damage to fixtures and wiring. The core idea behind how to protect bulbs from rodents is simple: make the space less inviting and harder to access while keeping bulks of bulbs stored in sealed, pest‑proof containers. This section outlines the reasoning and sets the stage for effective, DIY-friendly steps you can perform this weekend.
In practice, homeowners who address both the external environment (entry points) and internal organization (storage and placement) see significantly fewer pest-related interruptions. A well-managed bulb storage area minimizes gnawed cords, misplaced bulbs, and compromised safety that can lead to fire hazards. The Bulb Fix team emphasizes that small, deliberate changes—such as sealing a single gap or upgrading to a sealed bulb housing—can have outsized benefits over time.
Core Principles of Rodent-Proofing Lighting
Successful rodent-proofing rests on three pillars: removing attractants, blocking access, and securing storage. First, reduce food sources and clutter near bulb areas by sweeping, vacuuming, and disposing of packaging and scraps. Second, physically block entry points with steel wool in gaps, sealants for seams, and door/gate upgrades. Third, protect bulbs and spare parts with rodent‑proof containers and sealed housings. This approach aligns with Bulb Fix’s analysis, which highlights the value of layered defenses rather than single fixes. When applied together, these principles create a robust barrier against intruders and make routine maintenance easier.
Practical outcomes include fewer chewed cords, less insulation damage, and clearer visibility for inspections. In addition, placing storage away from pet foods, birdseed, and other attractants reduces the chance that rodents will linger near your lighting hardware. By combining environmental controls with sturdy storage, you create a resilient system that’s easier to monitor and audit over time.
Inspect and Seal: Entry Points Around Fixtures
The most common rodent entry points are gaps around electrical conduits, vents, and imperfect seals where walls meet ceilings. Start by performing a visual inspection with a flashlight, then physically seal any gaps using steel wool (to deter chewing) and a durable silicone sealant. Don’t forget to check behind fixtures, outlets, and light boxes where small openings often go unnoticed. For larger penetrations, consider expanding the protective barrier with hardware cloth and weatherstripping. Sealing these points is a foundational action that directly reduces the chances of rodents gaining access to bulbs and wiring.
Pro tip: Always turn off power at the breaker before handling any electrical areas. After sealing, test for drafts and recheck after 24–48 hours to confirm a tight seal.
Storage Solutions: Rodent-Proof Containers and Organization
Spare bulbs and components should live in metal or BPA-free sealed containers with tight lids. Avoid cardboard boxes near bulb storage, as they’re easy for rodents to chew. Label containers and store in a dry, elevated location away from potential food sources. Consider stacking sealed bins in a cabinet with a gasketed door to minimize access points. If you have ventilation openings in shelves or cupboards, cover them with welded wire mesh to prevent entry while preserving airflow. The goal is a tidy, accessible system that makes regular checks quick and painless.
In addition to container choice, keep a simple maintenance log documenting when containers were last inspected or resealed. This practice, recommended by the Bulb Fix team, helps you stay ahead of wear and tear and ensures long-term protection.
Deterrents and Maintenance: Safer Practices
Deterrents can play a supporting role when used correctly. Consider placing non-toxic, plant-based deterrents near entry points as a supplementary measure—avoid strong scents near living spaces and electrical fixtures. Regular cleaning reduces attractants, as dust and crumbs can lure pests into storage areas. Create a routine: monthly quick checks, quarterly deep inspections, and annual reassessment of all seals and storage methods. Small reminders like marking a calendar or setting a phone alert keep you consistent and proactive.
Safety note: Do not place any chemical repellents or traps inside living areas or near exposed bulbs. Use deterrents that are appropriate for indoor use and keep items out of reach of children and pets. The aim is to create an environment that is inhospitable to rodents while remaining safe for households.
Upgrading Fixtures and Practices for Long-Term Protection
Where possible, upgrade to sealed fixtures or enclosures that prevent rodent intrusion. Choose fixtures with gaskets, tight screws, and weatherproof housings. If wiring runs through concealed spaces, consider installing conduit or protected channels to reduce exposure of bare wiring. Alongside hardware upgrades, implement a simple hygiene protocol: vacuum regularly, wipe down shelves, and promptly remove spills or seeds that may attract pests. A combination of improved hardware and disciplined maintenance yields durable, long-term protection for bulbs and their circuits.
Remember that upgrading is not a one-off event. Schedule periodic checks and keep a running plan for future improvements as you notice wear or new entry points.
Troubleshooting and When to Escalate
If you notice signs of rodent activity despite your best efforts—chewed cords, droppings in bulb storage, or squeaking near fixtures—escalate promptly. Start with a comprehensive re-inspection of entry points and confirm that all gaps are sealed, including less obvious spots behind appliances or in crawl spaces. Consider consulting a professional pest control service if the problem persists for more than a few weeks or if you observe extensive damage. Early escalation prevents larger issues, such as compromised safety and broader infestations that could affect lighting and electrical systems.
Quick Troubleshooting Checklist for Bulbs and Mounts
- Inspect around every fixture for new gaps or wear in seals.
- Verify all storage containers are still sealed and dry.
- Confirm no new food sources are within 6–8 feet of bulb storage.
- Recheck wiring and replace worn components promptly.
- Schedule regular 3–6 month audits to catch issues early.
This block expands on practical actions you can take in a structured, DIY-friendly way to keep bulbs safe and rodents at bay.
Tools & Materials
- Steel wool (16-20 gauge)(Fill gaps; compress to block entry points)
- Silicone sealant or caulk(Seal seams and cracks around fixtures)
- Metal storage bins or sealed containers(Store spare bulbs securely)
- Weatherstripping or door sweeps(Improve enclosure seals on access points)
- Hardware cloth or welded mesh(Cover vents and attic openings)
- Bulb housings or sleeves (sealed)(Optional extra protection for fixtures)
- Pest-proof labels or markers(Track inspections and maintenance)
Steps
Estimated time: 2-4 hours
- 1
Inspect for entry points
Perform a thorough walk-through of bulb areas using a bright light. Look for gaps around conduits, vents, shelves, and baseboards where rodents could enter. Document findings with notes or photos to guide sealing.
Tip: Bring a smartphone flashlight and a notepad to capture every potential gap. - 2
Seal gaps with steel wool and sealant
Stuff steel wool into holes, then apply silicone sealant over the top to create a durable barrier. Focus on gaps larger than 1/4 inch and around plumbing, wires, and vents.
Tip: Avoid plastic foam alone; rodents can chew through it. Use steel wool plus sealant for best results. - 3
Upgrade fixtures to sealed housings
Replace open-bulb fixtures with sealed enclosures or add gaskets to existing fixtures. Ensure screws and joints are tight and that there is no exposed wiring.
Tip: Power off at the breaker before handling electrical components. - 4
Store spare bulbs in rodent-proof containers
Place spare bulbs in metal or sealed plastic containers with tight lids and store them away from food sources. Label locations for easy audits and rotate stock to avoid outdated bulbs.
Tip: Keep containers elevated and in a dry area. - 5
Remove attractants and clean regularly
Declutter and vacuum storage areas; remove seeds, crumbs, and packaging that may entice pests. Schedule monthly cleaning to maintain a pest-unfriendly environment.
Tip: Implement a simple cleaning routine you can perform in 15 minutes. - 6
Set deterrents and monitoring
Use non-toxic deterrents near entry points and maintain a simple log of checks. Avoid strong chemical exposures near living spaces.
Tip: Place deterrents where rodents typically enter but keep them out of reach of children and pets. - 7
Upgrade and re-inspect quarterly
Plan regular checks every 3 months to re-seal, re-containerize, and re-evaluate vulnerabilities.
Tip: Create a calendar reminder to stay on schedule. - 8
Troubleshoot and escalate if needed
If signs of activity persist, re-inspect thoroughly and consider professional pest control for persistent infestations.
Tip: Early escalation saves time, money, and keeps bulbs safe.
Got Questions?
Do rodents chew through bulb cords?
Yes, rodents can chew exposed cords and may damage insulation. Protecting wiring with sealed fixtures and shielded conduits minimizes this risk. Regular inspections help catch damage early.
Rodents can chew cords, so protect wires with sealed fixtures. Regular checks help catch any damage early.
What is the best sealant for gaps around bulbs?
A durable silicone sealant paired with steel wool provides a strong, chew-resistant barrier. Avoid relying on foam alone, as rodents can chew through it.
Use silicone sealant with steel wool for chew-resistant gaps. Foam alone isn’t enough.
Are natural deterrents effective for indoor bulb areas?
Natural deterrents can supplement protection but are not a stand-alone solution. Use them near entry points while relying on physical barriers for long-term protection.
Natural deterrents help, but they aren’t enough by themselves. Combine with seals and proper storage.
How often should I inspect for rodent damage?
Aim for a quick monthly check and a thorough quarterly inspection of bulb areas and storage. Adjust based on your local rodent activity and seasonality.
Check monthly and do a thorough inspection every quarter. Adjust with local conditions.
Can I retrofit existing fixtures to be rodent-proof?
Yes, you can retrofit with sealed housings and add gaskets to existing fixtures. If wiring is damaged or access is complicated, consider professional installation.
Yes, retrofit with sealed housings and gaskets. If unsure, hire a pro.
What should I do with damaged bulbs or wiring?
Discontinue use of damaged bulbs and unplug affected fixtures. If wiring shows wear or bite marks, have a licensed electrician inspect before powering the circuit again.
Don’t use damaged bulbs. If wires are damaged, call an electrician before reusing the circuit.
Watch Video
Key Points
- Seal gaps around fixtures to block entry points.
- Store spare bulbs in rodent-proof containers.
- Regular maintenance reduces pest risk.
- Upgrade to sealed fixtures where feasible.
- Perform periodic inspections to catch issues early.