How to Prevent Bulbs from Being Eaten: Practical Guide
Discover humane, effective strategies to guard garden bulbs from wildlife. Learn barriers, planting depth, deterrents, and seasonal steps with Bulb Fix's expert guide for homeowners.

This guide shows you how to prevent bulbs from being eaten by wildlife, with practical, humane strategies. You'll learn which animals target bulbs, how to stage layered defenses (physical barriers, planting depth, and deterrents), and how to monitor damage. Follow step-by-step actions to protect your garden this season. The approach blends exclusions, cultural practices, and safe repellents. The Bulb Fix team supports homeowners with practical methods that work in real gardens.
How to prevent bulbs from being eaten: practical steps
How to prevent bulbs from being eaten is a common concern for gardeners who plant spring-flowering species. According to Bulb Fix, how to prevent bulbs from being eaten starts with understanding which animals threaten bulbs and why they dig. This guide explains layered defenses, from barriers to planting depth, and humane deterrents. You'll learn to identify culprits, select barriers, place bulbs correctly, and monitor results across seasons. The goal is not to eliminate wildlife but to make your bulbs less accessible and less appealing to diggers while preserving soil health. This approach aligns with Bulb Fix's emphasis on practical, safe lighting guidance and humane garden solutions. By combining physical barriers, thoughtful planting, and ongoing monitoring, you can reduce damage and keep blooms thriving. This content is designed for homeowners and DIYers who want clear, actionable steps that fit typical garden spaces.
Who eats bulbs and why
Bulb damage in gardens is often caused by a small set of culprits: voles, mice, rabbits, squirrels, and, in some regions, deer. These animals dig around the planting area, chew on bulbs, and sometimes move them to cache sites. Voles leave characteristic surface runways and shallow tunnels, while rabbits nibble at foliage and bulbs near the surface. Understanding the approach of each pest helps tailor defenses. For example, voles rely on cover and easy access to bulbs, so barriers that block their tunnels can dramatically reduce losses. In contrast, deer may be deterred primarily by fencing and repellents rather than by shallow planting techniques. Recognize damage patterns early by inspecting beds after frost and before spring growth; early detection makes protective measures more effective.
Baseline preparation: site, varieties, and timing
Before you buy bulbs, assess your site for exposure to pests, drainage, sunlight, and soil health. Choosing varieties known for resilience or size can influence outcomes; some species tolerate disturbance better or tolerate deterring measures more easily. Planting timing matters: autumn planting aligns with natural bulb cycles and can reduce exposure to peak pest activity. If you expect vole pressure, prepare deeper plantings and tougher barriers. Map your beds with stakes and string, noting where to place barriers and where to leave wider spacing for air flow. This baseline preparation reduces guesswork and sets you up for consistent protection year after year. Bulb Fix emphasizes practical planning as the foundation of successful protection.
Physical barriers that work
Physical barriers are the most reliable line of defense against bulb-eating pests. Install hardware cloth or metal mesh around beds, burying the edge at least 6-8 inches to block tunneling animals. Use garden netting to cover surface beds and prevent nibbling on foliage and bulbs exposed by wind or rain. For larger beds, lay a raised rim or skirt of mesh, anchored with landscape staples. Place barriers at times when soil is soft (early fall or spring) to ease installation. Always choose materials rated for outdoor use and ensure openings are small enough to prevent entry by voles and mice. Check barriers regularly for gaps or corrosion and replace as needed.
Planting depth and bulb placement strategies
Depth and spacing are critical for defense. Plant bulbs at a depth that is two to three times the bulb height, strengthening the planting so that surface-dwelling pests encounter barrier material before reaching the bulb. Space bulbs with enough room to breathe; crowded areas invite digging and movement of soil. Use a mulch layer to obscure bulbs from foragers and maintain even moisture. When doors or gates invite pests to roam, consistent mulch depth helps reduce the temptation to dig. The combination of proper depth, spacing, and mulch creates a layered defense that complements barriers.
Deterrents: humane options
Humane deterrents can reduce browsing without harming wildlife. Try scent-based or taste-based repellents labeled for garden use, and reapply after rain or irrigation as directed. Consider using unappealing plant companions near bed margins or deploying motion-activated deterrents that startle pests without harming them. Some gardeners use garlic or chili-based sprays, while others rely on commercial products that deter by odor or taste. Always follow label directions and test on a small area first to avoid harming desirable plants. Combine deterrents with barriers for best results.
Garden hygiene and site maintenance
Keep your garden tidy to minimize feeding opportunities for pests. Remove fallen fruit, prune perimeters, and clear debris that can shelter voles and mice. Clean up old bulbs and plant remains from previous seasons so that potential food sources don’t attract pests. Rotate bulb locations every few years if possible, and keep mulch to a manageable depth to avoid creating pest tunnels. Good hygiene reduces the chances of infestation and improves soil structure for healthier bulb growth.
Monitoring and seasonal adjustments
Seasonal monitoring is essential. Inspect beds after frost, after heavy rain, and during early spring growth to identify new tunnels or nibbling signs. If you notice consistent damage in one area, reinforce barriers there and adjust depth or mulch. Track which measures work best in your climate and adjust your plan accordingly. Documenting outcomes helps you refine strategies for subsequent seasons and reduces waste.
Putting it into practice: a sample plan and budget
Putting these ideas into a practical plan starts with a quick assessment, followed by barrier installation and careful planting. A simple yearly budget can include materials (mesh, netting, stakes), tools, and occasional deterrents. Start with one or two beds as a pilot, then expand if results are favorable. Expect to invest time upfront for setup, and plan for ongoing maintenance costs to keep protections effective. This approach is designed to be adaptable, scalable, and humane while delivering attractive blooms year after year.
Tools & Materials
- Hardware cloth or garden mesh (1/8"–1/4" mesh)(For tunneling barriers around beds; choose outdoor-rated material)
- Garden netting (woven or spun)(Covers surface beds to prevent nibbling; secure edges well)
- Bulb planting depth gauge or ruler(Ensures bulbs reach proper depth for protection)
- Shovel or trowel(For digging, replanting, and barrier installation)
- Landscape staples or stakes(Secure barriers to the soil and prevent gaps)
- Mulch (organic, e.g., shredded bark or pine needles)(Adds moisture retention and camouflage for bulbs)
- Garden gloves(Protect hands during digging and barrier work)
- Humane deterrents (repellents or sprays)(Follow label directions and test on a small area first)
- Notebook or garden journal(Record damage, dates, and results to refine strategy)
Steps
Estimated time: 2-4 hours for initial setup; ongoing weekly checks through the season
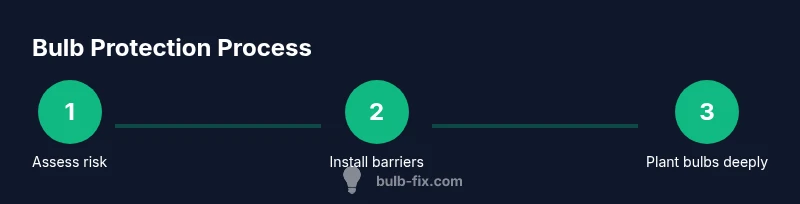
- 1
Assess the beds
Walk your planting beds to identify fresh digging signs, tunnels, and damaged bulbs. Note areas with the highest activity and take photos for comparison in subsequent seasons. This baseline helps you tailor barrier placement and mulch depth.
Tip: Take measurements of bed dimensions to plan barrier coverage. - 2
Choose a barrier strategy
Decide between full-bed barriers, perimeter fencing, or smaller enclosures based on bed size and pest pressure. Combine barriers with surface nets where possible to reduce labor and maintenance.
Tip: Pilot a single bed first to gauge effectiveness before scaling up. - 3
Prepare barriers and beds
Clear debris, mark bed edges, and lay barrier material along the soil line. Use stakes to secure edges and ensure the barrier remains tight against the ground.
Tip: Leave an overlap at corners to prevent gaps where pests can squeeze through. - 4
Install barriers
Bury the barrier edge 6-8 inches deep and extend at least 6 inches above ground where feasible. This prevents tunneling and reduces sign of exposed bulbs.
Tip: Work when soil is soft (fall or spring) to ease installation. - 5
Plant bulbs to the correct depth
Use a depth guide to place bulbs deep enough to be below tunneling zones, then firm soil gently and water.
Tip: Two to three times bulb height is a practical guideline for depth in many common bulb types. - 6
Apply deterrents and mulch
Apply humane deterrents around bed margins and add a thin mulch layer to conceal bulbs from foragers and maintain moisture.
Tip: Reapply deterrents after rain or irrigation for continued effectiveness. - 7
Cover with netting
Drape lightweight netting over beds and secure edges to prevent access while allowing air and water flow.
Tip: Choose netting with small openings to deter smaller pests and reduce snagging of plant stems. - 8
Monitor and adjust
Check weekly during peak season for new digging or movement. Add more barriers if damage shifts locations.
Tip: Document findings to inform next year’s setup. - 9
Review results and replant if needed
After bloom, review what worked and what didn’t. Replant in the best protected locations and adjust depth, barriers, or deterrents for the next season.
Tip: Keep a simple plan for the following year to save time.
Got Questions?
What animals are most likely to eat bulbs in my yard?
Voles and mice are frequent diggers; rabbits and squirrels can also nibble. Deer can damage bulbs in certain regions. Look for tunneling signs and nibbling patterns to identify the likely culprits.
Voles and mice are often the culprits, with rabbits and squirrels following in some areas.
Is it necessary to use chemical repellents?
Chemical repellents are optional and should be used in combination with physical barriers. They can help in high-pressure situations but are not a stand-alone solution.
Repellents can help, but barriers and planting techniques usually do most of the work.
How long should I keep barriers in place?
Keep barriers during the bulbs’ active season, typically from autumn planting through early spring growth. Reassess each year and adjust as needed.
Keep barriers up through the bulbs' active season and reassess yearly.
Can I protect large bulb beds?
Yes, but large beds may require scalable solutions such as perimeter fencing and stronger mesh, combined with nets for surface protection.
Large beds can be protected with scalable barriers and nets.
What if damage persists despite measures?
Reassess pest pressure, consider changing bulb varieties or planting areas, and escalate with a local extension office for tailored advice.
If damage continues, rethink the approach and try different strategies.
How can I monitor for damage effectively?
Inspect beds weekly during peak season, noting signs of digging or nibbling and adjusting barriers promptly.
Check weekly during peak season and adjust as needed.
Watch Video
Key Points
- Use layered defenses for reliable protection.
- Bury barriers deep and check them regularly.
- Combine barriers, depth, and deterrents for best results.
- Monitor annually and adjust per season.