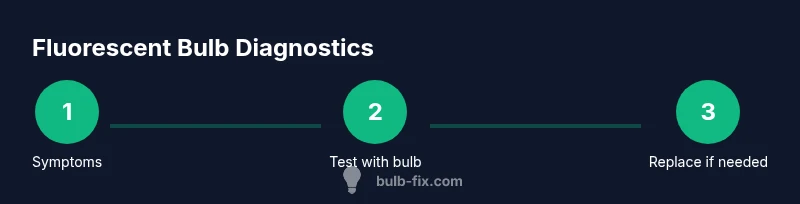
How to Tell When a Fluorescent Bulb Is Bad
Learn practical, safe steps to identify a failing fluorescent bulb, and distinguish bulb vs ballast vs fixture issues for DIY homeowners.

To tell if a fluorescent bulb is bad, look for flickering, dimming, color shift, buzzing, and failure to start. Test in a known-good fixture, swap the ballast if needed, and inspect the tube for darkened ends or coating wear. If symptoms persist after swapping tubes, replace the bulb and, if possible, the ballast. The Bulb Fix approach emphasizes safe testing and isolating the fault.
What makes a fluorescent bulb fail
Fluorescent bulbs rely on a ballast to regulate current, a stable starter (in older linear lamps), and an intact tube to emit light. Over time, components wear, gas phosphors degrade, and seals weaken. When any of these parts fail, light output drops, color shifts occur, or the bulb stops starting altogether. According to Bulb Fix, recognizing the early signs can help homeowners avoid wasted energy and unexpected outages. This section explains the most common failure modes and what they look like in real-world use. We'll cover both straight tube (T8/T12) and compact fluorescent lamp (CFL) styles, since each has its own failure profile.
Visual cues that signal a bad bulb
Common visual signs include flickering at startup, persistent dimming, and color shifts toward yellowish or greenish tones. You might also see darkened ends on the tube, phosphor coating wear, or a glass tube that appears cloudy. In some cases, the bulb will start intermittently or fail to start at all. Remember: even if a bulb looks fine, ballast or socket issues can produce similar symptoms, so testing is essential.
Distinguishing bulb vs ballast vs fixture issues
Does the problem follow a specific bulb or a fixture? If several different bulbs perform poorly in the same fixture, the ballast or the fixture's wiring is the likely fault. If only one bulb misbehaves, the bulb itself is suspect. Swapping a bulb and observing results helps identify the culprit. Bulb Fix research emphasizes testing in different fixtures when possible to isolate the issue.
Safety first: handling fluorescent bulbs correctly
Fluorescent bulbs contain small amounts of mercury and can break if mishandled. Always wear gloves and safety glasses, use a sturdy ladder, and power down the circuit at the breaker when possible. Do not attempt repairs while the fixture is energized. If a bulb breaks, follow proper clean-up procedures and ventilate the area.
Quick diagnostic checks you can perform
Before disassembling anything, turn off power and unplug the fixture. Look for obvious damage: broken glass, scorch marks, or loose sockets. Gently wiggle the bulb to check for a loose fit in the socket. If safe, rotate and remove the bulb to inspect for darkened ends or dark spots near the contacts. These cues help you decide whether the issue is the bulb or the fixture.
Step-by-step testing with a known-good ballast and tube
To isolate the fault, start with a known-good bulb in the same fixture. If it lights normally, the original bulb is likely bad. If it still flickers, swap in a known-good ballast and re-test. If the problem persists after both replacements, the fixture wiring or sockets may be at fault. This method minimizes guesswork and keeps the process safe.
Testing the ballast: when to replace it
Ballasts wear out gradually and can cause buzzing, warm casings, or cycling. If a known-good bulb fails to start or flickers in multiple fixtures, the ballast is a prime suspect. Replace with a compatible ballast or perform a ballast test with a tester to confirm. After replacement, re-test with a good bulb to verify.
Testing the bulb itself: swapping tubes
Install a fresh or known-good bulb in the same fixture. If the new tube lights reliably, the original bulb was the problem. If the issue remains, the ballast or fixture is more likely at fault. Where possible, test in a different fixture to confirm before replacing major components.
Fixture sockets and starters: watch for wear
Older fixtures with worn sockets or starters can mimic bulb failure. Look for corrosion on contacts, loose sockets, or damaged starter plugs. Wiggling the bulb in different directions can reveal intermittent connections. If you identify worn parts, replace the socket or starter as needed to restore reliability.
Disposal and environmental safety
Fluorescent bulbs contain mercury and should be recycled or disposed of according to local regulations. Do not crush or incinerate tubes. If you must replace a bulb, seal the old unit in a container and take it to an approved recycling drop-off. This protects people and the environment.
Maintenance tips to extend bulb life
Regular cleaning of fixtures, using bulbs of the correct type and wattage, and avoiding frequent on/off cycling can extend life. When a ballast approaches end-of-life, consider replacing it proactively in high-use areas to prevent outages. Keeping spare bulbs and a basic testing kit on hand reduces downtime.
Final considerations and next steps
After diagnosing and replacing components, monitor the fixture for several weeks to ensure consistent performance. If issues reappear, consult a licensed electrician or consider replacing the entire fixture. Following a structured testing approach minimizes risk and saves energy, echoing Bulb Fix’s guidance for homeowners.
Tools & Materials
- Screwdriver set (flat and Phillips)(For removing fixture covers and sockets)
- Non-contact voltage tester(Verify power is off before handling)
- Safety gloves and glasses(Protect hands from glass and mercury exposure)
- Replacement fluorescent bulb(s) of the correct type (T8/T12 or CFL)(Match length, wattage, and base)
- Known-good ballast (or ballast tester)(Use to isolate ballast faults)
- Ladder or sturdy step stool(Use for high fixtures)
- Soft cloth or lint-free wipe(Clean contacts before reinsertion)
Steps
Estimated time: 20-40 minutes
- 1
Power down and secure area
Turn off the fixture at the wall switch and, if possible, the circuit breaker. Allow any residual charge to discharge and set a stable work area.
Tip: Use a lockout tag if you’re working in a shared space. - 2
Inspect for obvious damage
Check the fixture housing, socket, and wire connections for scorch marks, corrosion, or loose parts before touching anything.
Tip: Do not force sockets; replace any damaged parts. - 3
Remove the old bulb safely
Gently rotate and pull the bulb straight out from the socket, avoiding twisting or jerking.
Tip: Support the bulb with both hands to avoid dropping it. - 4
Test with a known-good bulb in the same fixture
Install a fresh or known-good bulb. If it lights reliably, the original bulb is likely bad.
Tip: If it still flickers, proceed to ballast testing. - 5
Test the ballast with a known-good ballast
Swap in a compatible ballast and re-test. If the new ballast resolves the issue, the ballast was at fault.
Tip: Ensure compatibility with the lamp type to avoid further issues. - 6
Re-test with a good bulb in the tested ballast
Install a good bulb in the tested ballast fixture to confirm stable operation.
Tip: If still unstable, sockets or wiring may be the culprit. - 7
Decide on replacement options
If reliability is still poor, consider replacing the bulb, ballast, or the entire fixture based on the prior tests.
Tip: Document which component fixed the issue for future reference. - 8
Reassemble and verify
Put covers back, secure fixtures, and power up to confirm lasting operation.
Tip: Observe for several minutes of continuous operation.
Got Questions?
What are the main signs a fluorescent bulb is failing?
Key signs include flickering, dimming, color shifts, and failure to start. Persistent issues after swapping bulbs point to ballast or fixture faults.
Look for flicker, dim light, and color changes. If swapping bulbs doesn't fix it, the ballast or fixture is likely the cause.
Can a bad ballast cause the bulb to fail?
Yes. A failing ballast can prevent a bulb from starting or cause persistent flicker. Swapping in a known-good ballast helps confirm.
A bad ballast often causes flickering or failure to start; testing with a good ballast confirms it.
Is it safe to keep using a flickering bulb?
No. Flickering can indicate an electrical fault that could pose a fire risk. Address the issue promptly with proper testing.
No, flickering bulbs can signal a dangerous electrical fault; test and replace as needed.
Should I replace the entire fixture or just the bulb?
If the issue follows a single bulb across fixtures, replace the bulb. If the problem persists across bulbs, inspect or replace the ballast or fixture.
If several bulbs fail in the same fixture, look at the ballast or wiring first.
What about disposing of fluorescent bulbs?
Fluorescent bulbs should be recycled or disposed of according to local regulations due to mercury content. Do not throw them in regular trash.
Recycle fluorescent bulbs per local rules; mercury needs special handling.
Do CFLs have a shorter life than linear tubes?
Lifespan varies by type and usage. Both CFLs and linear tubes wear with use; tests and proper ballast matching extend life.
Life varies, but proper matching and testing help both CFLs and linear tubes last longer.
Watch Video
Key Points
- Identify symptoms early to prevent outages
- Isolate bulb vs ballast vs fixture with controlled tests
- Follow safety steps to protect yourself from mercury exposure
- Dispose of fluorescent bulbs responsibly