How to Turn Off a Bulb Warning Light: A Practical Guide
Learn how to safely turn off a bulb warning light for cars and home lighting. This step-by-step guide covers identification, replacement, reset procedures, safety tips, and verification to prevent future issues.

Learn how to safely turn off a bulb warning light by diagnosing the cause, replacing a faulty bulb, and performing the device’s reset procedure. This guide covers automotive dashboard indicators and common home lighting warnings. You’ll need basic tools, a manual, and caution to avoid shocks or short circuits. In most cases, the light will reset after the issue is resolved.
What the bulb warning light means
A bulb warning light is a safety signal that appears when a bulb in a system is out of service or not communicating properly. In cars, it typically points to tail lights, brake lights, or turn signals. In home lighting, some smart fixtures or fixtures with integrated indicators may use a warning light to signal a bulb nearing failure or a circuit issue. According to Bulb Fix, understanding which bulb is involved is essential before attempting a reset. Misinterpreting the icon can lead to unnecessary replacement or overlooked electrical faults. Start by consulting the owner’s manual and using a bulbs checklist to map each indicator to its location. This prevents guesswork and reduces the risk of installing the wrong bulb, which can trigger new faults or damage.
In addition to identifying the faulty bulb, recognize that a warning light may indicate a failing socket, corroded connection, or a wiring issue. Documenting symptoms (flicker, dimming, buzzing) helps you decide whether you need simple replacement or more thorough electrical inspection. By keeping a log of bulbs inspected and replaced, you build a reference for future maintenance and avoid repetitive resets that mask underlying problems.
Common causes of bulb warning lights
Bulb warning lights can be triggered by several causes. The most common is a burnt-out bulb, but poor connections at the base, corroded contacts, or a damaged socket can also prompt a warning. In vehicles, moisture intrusion in headlamp or taillight housings may fool sensors or wiring harnesses, creating false positives. In home lighting, a dimmable LED paired with an incompatible driver can flash or trigger a warning circuit. It’s important to differentiate between a simple bulb failure and a systemic issue in the circuit. The Bulb Fix team notes that diagnosing the root cause is the keystone of a lasting fix, not just masking the symbol.
When the warning arises again after a bulb is replaced, check for a loose connector, a wrong bulb specification, or a damaged socket. A visual inspection under good lighting often reveals hairline cracks in lenses, bent pins, or discoloration that indicates arcing. Keeping spare bulbs of the right type on hand helps you verify that the replacement resolves the issue rather than replacing mismatched parts.
Before you reset: safety first
Safety should come first whenever you handle electrical components. Power off the system before touching any wiring or bulbs. Wear safety glasses and gloves to protect your eyes and hands from shards or hot surfaces. If you’re working on a vehicle, engage parking brakes and ensure the engine is off before you begin; if you’re working on home lighting, switch off the main circuit or unplug the fixture. Avoid working on live circuits because even small contact can cause shocks or short circuits. Keep a clean workspace and avoid moisture near electrical connections. If you’re uncertain about the reset method, consult the device’s manual or a professional. The goal is a safe reset that reflects a resolved issue rather than a temporary disablement.
Tools and materials you’ll need
- Owner's manual
- Replacement bulbs matched to the exact type and base
- Safety glasses and gloves
- Screwdrivers set (flathead and Phillips)
- Multimeter (optional, for diagnosing electrical continuity)
- Cleaning supplies for contacts (electrical contact cleaner, optional)
- A small container to store removed screws and bulbs
Having the right tools reduces the risk of damaging the fixture or lamp during replacement and helps you perform a clean, secure reassembly. Bulb types vary by base (e.g., P21W, BA15s) and wattage; using the wrong bulb can cause heat buildup or ignition of the warning system.
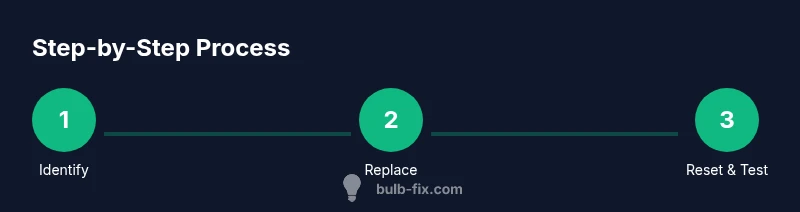
Step-by-step overview for cars and home lighting
-
Identify the exact bulb and its location. Look for the corresponding symbol or consult the manual. Why: precise identification prevents unnecessary replacements.
-
Power down safely. Turn off the vehicle or switch off the fixture; disconnect the battery if required by the manual. Why: reduces shock risk and protects sensitive electronics.
-
Replace the faulty bulb. Use the correct bulb type and verify proper seating in the socket. Why: a loose or mismatched bulb can trigger the warning again.
-
Reset the warning light according to manufacturer guidance. This may involve a specific sequence or a simple power cycle. Why: the reset informs the system that the fault has been addressed.
-
Reconnect power and test the system. Turn the device back on and verify that the warning light remains off during operation. Why: confirms the fix and prevents a false positive.
-
If the light persists, inspect wiring and seek professional help. Why: persistent signals can indicate deeper electrical or sensor problems that require expertise.
How to verify the fix and test the system
After performing the replacement and reset, perform a thorough test to ensure normal operation. In cars, test each affected light (headlights, taillights, brake lights) by turning on the ignition and using a helper to check illumination. In home lighting, observe the fixture for steady operation and verify the warning indicator does not reappear after cycling power. Documentation helps you track replacements and resets for future maintenance. If the warning reappears, retrace your steps, check for wiring damage, and consider professional diagnostic tools or service.
Maintenance tips to prevent future bulb warnings
- Replace bulbs in pairs when upgrading to LED or higher-intensity options to avoid mismatched indicators.
- Use bulbs with the exact base and wattage specified by the manufacturer.
- Regularly inspect sockets and connectors for corrosion or loose fittings.
- Keep a small stock of spare bulbs and a basic toolkit handy in the vehicle or near fixtures.
- Create a simple maintenance log with dates and bulb types to track wear and anticipate replacements before warnings occur.
Proactive checks reduce the frequency of warning lights and extend the life of your lighting system.
Tools & Materials
- Owner's manual(Specifies reset procedures for your vehicle or fixture)
- Replacement bulbs(Match exact bulb type (base, wattage, size))
- Safety glasses(Protect eyes from shards or debris)
- Gloves(Keep fingers away from hot surfaces; prevents oils on bulbs)
- Screwdrivers (set)(Phillips and flat-head for access panels)
- Multimeter (optional)(Diagnose wiring continuity if issues persist)
- Electrical contact cleaner (optional)(Clean corrosion from contacts)
Steps
Estimated time: 30-60 minutes
- 1
Identify the bulb and location
Examine the dashboard indicator or fixture to locate the exact bulb. Use the owner’s manual or a labeling diagram to map the symbol to the bulb’s position. This prevents unnecessary replacements and misdiagnosis.
Tip: Take a quick photo of the bulb area before removing any parts. - 2
Power down safely
Turn off the power to the system and, if required, disconnect the battery or switch off the circuit. This reduces the risk of electric shock or short circuits while you work.
Tip: If you’re unsure about the vehicle procedure, consult the manual or dealer before disconnecting power. - 3
Replace the faulty bulb
Carefully remove the old bulb, insert a new one that matches the exact type and base, and reseat it firmly. Ensure contacts are clean and dry to prevent poor connection.
Tip: Handle bulbs by the housing, not the glass, to avoid getting oils on the bulb surface. - 4
Reset the warning light
Follow the manufacturer’s reset method—this may be a specific sequence or a power cycle. If the manual provides a reset tool or procedure, use it exactly as described.
Tip: If there’s no explicit reset method, perform a safe power cycle: turn off, wait 60 seconds, then power on. - 5
Test the system
Turn the device back on and test each related light or circuit to confirm normal operation. Look for any flicker, dimming, or unexpected behavior.
Tip: Ask a helper to verify all lights illuminate correctly during a functional test. - 6
Document and monitor
Record what you replaced, the reset method used, and the test results. If the warning returns, recheck connections or seek professional help.
Tip: Keep spare bulbs and a simple log in your toolbox for quick reference.
Got Questions?
What does a bulb warning light typically indicate?
It usually signals a bulb is burnt out or not communicating properly. Always verify the bulb and related wiring before resetting.
It usually means a bulb is burnt out or not communicating properly. Verify the bulb and wiring before resetting.
Can I disable the warning light permanently?
Permanently disabling a warning light is not recommended. The signal is there to alert you to a potential safety issue; fix the bulb and reset according to the manual.
Permanently disabling a warning light isn't recommended. Fix the bulb and reset following the manual.
How long should a reset take after bulb replacement?
Reset usually happens immediately or within a few minutes after replacement, depending on the system. If it doesn't reset, recheck connections or consult a professional.
Reset usually happens right away or within a few minutes after replacement. If it doesn't, check connections or seek a professional.
What safety steps should I follow?
Power off the system, wear safety glasses and gloves, and avoid touching glass with bare hands. Follow the manual for any vehicle-specific precautions.
Power off the system, wear safety glasses and gloves, and follow the manual for precautions.
What if the warning light comes back after replacement?
The issue may lie with wiring, socket, or incorrect bulb type. Recheck all connections, inspect sockets for damage, and consider professional diagnostics if it persists.
If it returns, recheck wiring and sockets; consider a professional diagnostic if it keeps coming back.
Are DIY bulb replacements safe for cars?
DIY replacements are common, but follow the vehicle’s manual and safety steps. If you’re unsure, seek help from a qualified technician to avoid triggering alarms or damaging electronics.
DIY car bulb replacements are common, but follow the manual. If unsure, seek a technician's help.
Watch Video
Key Points
- Identify the exact bulb responsible for the warning.
- Replace with the correct bulb type and ensure clean connections.
- Use the manufacturer’s reset procedure for the warning light.
- Test all relevant lights to confirm a successful reset.
- Maintain a simple bulb replacement log to prevent future warnings.