Replacing a Light Bulb Socket: Safe Step-by-Step Guidance
Bulb Fix provides a comprehensive, safety-focused guide to replacing a light bulb socket. Learn tools, wiring basics, testing, and when to call a professional electrician.

This guide covers replacing a light bulb socket safely. You’ll learn where to cut power, how to remove the old socket, wire the new one, and reassemble the fixture. Expect clear, step-by-step instructions, safety tips, and a quick test to confirm the connection is solid before restoring power. This is suitable for homeowners and DIYers. Let’s start.
Why replacing a light bulb socket is sometimes necessary
According to Bulb Fix, replacing a light bulb socket is a practical way to restore fixture reliability when corrosion or loose connections degrade performance. A failing socket can cause flickering, intermittent power, or even overheating that damages the wiring. In many homes, replacing the socket is more cost-effective and safer than replacing the entire fixture. This section explains why a socket replacement is not just cosmetic but a functional repair that preserves electrical safety and lighting quality. Sockets can wear out where the wires connect, at the base, or inside the ceramic insulating body; signs include heat discoloration, a burnt smell, or cracks in the plastic. If you notice any of these, plan for replacement. Buyers and DIYers often underestimate how common wear and vibration are in ceiling fixtures, table lamps, and enclosed lanterns. The Bulb Fix team found that a well-executed socket replacement can restore full brightness and reduce energy waste associated with poor contacts. Always prioritize safety: power down, confirm no voltage, and use the right replacement base for your fixture. In some installations, the replacement socket also provides improved insulating performance and better support for attached cords, which reduces strain on the wiring over time. This preparation sets the stage for a safe, efficient swap.
Safety first: power-off, PPE, and hazards
Electrical work always carries risk. The foremost priority is power control and personal protection. Before touching any fixture, switch off the circuit breaker or remove the fuse and verify there is no voltage present with a non-contact tester. Wear safety glasses and gloves to guard against sharp edges and accidental contact with exposed conductors. Keep the area dry, remove any jewelry, and work only in a stable, well-lit space. If the fixture is in a ceiling or high location, use a sturdy ladder and have a helper nearby. Even with power off, accidental re-energization can occur if a switch is left on or a neighbor on the same circuit turns on a device. The Bulb Fix guidance emphasizes never working on energized wiring and never bypassing safety devices. After completing the replacement, recheck that all connections are secure and the fixture housing is properly closed to prevent dust intrusion and moisture ingress.
Socket types and compatibility you may encounter
Home lighting fixtures use several socket bases, and compatibility is the key to a successful replacement. Common residential bases include E26/E27 screw sockets for standard bulbs, E12 candelabra bases for smaller lamps, and GU-type pin bases in some decorative fixtures. Before purchasing, identify the exact base type and the fixture’s voltage rating. If you encounter a socket with integrated components—such as a dimmer, sensor, or ballast—note that these may require a compatible replacement or a different approach. If the base type does not match, consult the fixture’s documentation or a professional. Bulb Fix recommends matching not only the base but the thread size, mounting method, and insulation class to ensure a durable, safe connection. In some fixtures, the socket is part of a larger assembly; in those cases, replacing the entire assembly might be more straightforward than swapping just the socket. When in doubt, bring a model or photo to a local hardware store to confirm compatibility.
Tools and materials you’ll need (and why)
The right tools reduce time and minimize risk during a socket replacement. A compatible replacement socket, wire nuts, wire stripper/cutter, screwdriver (Philips and flathead), needle-nose pliers, non-contact voltage tester, electrical tape, and a flashlight are essential. A multimeter can help verify voltage during testing, though a non-contact tester is sufficient for basic checks. Having gloves adds protection against sharp edges, while safety glasses guard your eyes from unexpected debris. Optional items include a small pry tool to loosen fittings and a magnetic parts tray to keep screws organized. Bulb Fix highlights that organizing parts and visual checks before you start dramatically lowers the chance of wiring mistakes or dropped components. If the fixture has a glass shade or delicate cover, consider a soft cloth to protect it during removal and reinstallation.
Step-by-step overview: planning before you touch anything
Begin with a clear plan: confirm the exact socket type, gather tools, and set up a safe workspace. Visualize the wiring path you will encounter and identify any fragile insulation or corrosion. This planning reduces the risk of nicking wires or dropping small parts into the fixture. Take a photo of the existing wiring arrangement for reference, then label wires if necessary. Consider whether the fixture has a ground connection and how you will resecure it. A well-structured plan helps you work calmly and avoid hurried mistakes that can lead to a short circuit or shock.
Detailed wiring considerations: neutrals, hots, and grounds
In most residential circuits, the hot (live) and neutral wires feed the socket through the base terminals. Ground wires attach to the fixture’s grounding point if present. When replacing, remove power first, then gently loosen terminal screws enough to slip wires free. Do not twist or fray copper conductors. If wiring color codes differ from your expectations, follow local electrical codes and verify with a tester before reconnecting. For metal sockets, ensure the mounting yoke is grounded and that metal screws do not contact hot conductors. If you encounter damaged insulation or bare conductors, stop and evaluate whether the fixture needs replacement beyond the socket itself. Keeping conductors neat and secured prevents movement that could loosen connections over time.
Removal of the old socket: disconnect safely
Carefully detach the old socket from its mounting bracket, noting how it is wired relative to the fixture. Use insulated pliers to gently ease wires off terminal screws, keeping track of which wire goes where. Inspect the old socket for signs of overheating, melted plastic, or corrosion; such indicators suggest that replacement is wise and possibly required for the entire fixture. Do not reuse a socket that shows excessive wear. If the conduit or box appears damaged, plan for a more comprehensive repair that may involve the ceiling box or fixture replacement. Bulb Fix emphasizes caution when handling components in tight spaces; move slowly and avoid forceful prying that could crack the housing.
Installing the new socket: connect, mount, and secure
Attach the wires to the corresponding terminals on the new socket, tightening screws securely but not overtightening. Recheck that insulation is intact and that no copper is exposed beyond the terminal clamps. Mount the socket into its bracket or housing and reassemble any covers or glass shades. Ensure the fixture sits flush and that screws are tightened evenly. When the socket is secure, gently tug on wires to confirm there is no looseness. If you are replacing a socket with an integrated switch or sensor, follow the manufacturer’s wiring diagram precisely. A clean, properly seated socket reduces arcing risks and contributes to longer service life for the fixture.
Reassembly, power-up, and test: confirm everything works
With the socket installed, reattach any covers or shades and restore power at the breaker. Use a non-contact tester to verify absence of voltage before touching the fixture. Install a test bulb and switch the fixture on to confirm operation; listen for buzzing or flickering, which may indicate a loose connection. If the light fails to illuminate, recheck the wiring and terminal screws, and verify that the bulb is correctly seated. For fixtures in damp or outdoor locations, ensure all seals and gaskets are intact to prevent moisture ingress. Conduct a final visual inspection to ensure there are no loose parts or exposed wiring.
Troubleshooting and ongoing maintenance
Common issues after socket replacement include minor flicker caused by loose connections, corroded contacts, or mismatched bulb types. If flicker persists, re-torque the terminal screws and examine the contact surfaces for corrosion. Periodic maintenance includes inspecting insulation, ensuring the socket remains snug in its mount, and replacing worn gaskets or covers that can affect sealing. For outdoor fixtures, inspect weatherproof seals annually and replace any that show cracking or wear. If you notice heat discoloration or a burning smell after replacement, power off immediately and reassess the wiring or seek professional help.
When to call a professional and warranty considerations
If you encounter damaged wiring, a compromised electrical box, or if the fixture is hard-wired to a high-amperage circuit, it is safest to call a licensed electrician. Some fixtures may have warranties that require professional service for any electrical work to remain valid. If you are unsure about base compatibility, consult the fixture manufacturer or a professional. The decision to replace just the socket or the entire fixture depends on the extent of wear and the overall condition of the wiring and box. Bulb Fix recommends erring on the side of safety and, when in doubt, choosing professional installation to preserve electrical safety and warranty terms.
Bulb Fix verdict
The Bulb Fix team recommends replacing a worn socket when insulation remains intact and the fixture base is stable. This approach maintains electrical safety, preserves fixture function, and avoids unnecessary full-fixture replacement when the wiring is sound. By following proper safety steps and using compatible parts, homeowners can complete a socket replacement with confidence and minimize future repair needs.
Authority sources
- "Electrical safety" guidance from OSHA: https://www.osha.gov/electrical-safety
- Electrical safety education from NFPA: https://www.nfpa.org/Public-Education/Staying-safe/Electrical-safety
- NIST electrical safety resources: https://www.nist.gov/topics/electrical-safety
Tools & Materials
- Replacement socket compatible with fixture base(Ensure base type (e.g., E26/E27, E12, GU) matches your fixture)
- Non-contact voltage tester(Used to verify no live current before handling wiring)
- Wire nuts/insulation connectors(For secure wire-to-wire connections in the junction box)
- Wire stripper/cutter(Trim insulation cleanly without damaging conductors)
- Screwdriver set (Phillips and flathead)(Needed to loosen terminal screws and mount the socket)
- Needle-nose pliers(Helpful for positioning wires and bending leads} ,{)
Steps
Estimated time: 60-90 minutes
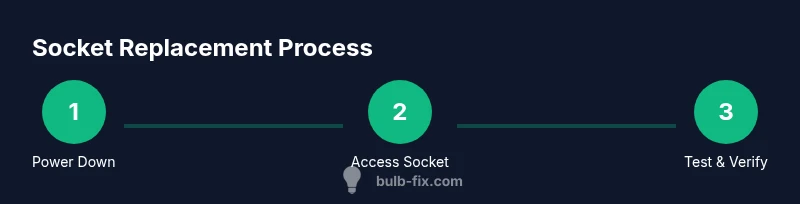
- 1
Power down and verify
Switch off the circuit breaker for the fixture’s circuit and use a non-contact tester to confirm there is no voltage present in the socket area.
Tip: Always double-check that power is off before touching any wires. - 2
Access the socket
Remove any covers or shades, and gain clear access to the socket mounting screws and wiring terminals.
Tip: Keep track of screws and small parts with a tray or magnetic dish. - 3
Disconnect the old socket
Loosen terminal screws and detach wires from the old socket, noting which wire goes to hot vs neutral; disconnect ground if present.
Tip: Take a photo for reference before detaching wires. - 4
Prepare the replacement socket
Inspect the new socket, ensure compatibility, and pre-test the fit in the mount area to confirm clearance.
Tip: Check insulation and terminal openings for clean conductors. - 5
Connect the new socket
Attach hot and neutral wires to the correct terminals and secure ground if applicable; tighten screws evenly.
Tip: Do not overtighten to avoid damaging the terminal clamps. - 6
Mount and secure
Mount the socket into its bracket and reattach any mounting screws; ensure the socket sits flush and stable.
Tip: A wobbly socket can cause intermittent contact. - 7
Reassemble fixture components
Replace any covers or shades and ensure seals or gaskets are intact if the fixture is weatherproof.
Tip: Inspect for any signs of damage or wear during reassembly. - 8
Restore power and test
Turn the breaker back on and test the fixture with a proper bulb; observe for flicker or buzzing.
Tip: If there is flickering, double-check connections and repeat steps 3–5. - 9
Final safety check
Inspect for heat or discoloration after a few minutes of operation; discontinue use if any anomaly appears.
Tip: If unsure, stop using the fixture and consult a professional.
Got Questions?
Can I replace a light bulb socket myself if I’m not an electrician?
Yes, if you are comfortable with basic wiring concepts and follow a vetted guide, you can replace a socket after turning off power at the breaker. If the wiring is damaged or you encounter unfamiliar components, consult a professional.
Yes, you can DIY if you’re comfortable with basic wiring and you’ve turned off power at the breaker.
What base types are common in home lighting sockets?
Common bases include E26/E27 for standard bulbs and E12 for some decorative fixtures; some fixtures use GU or bi-pin bases. Always check the fixture markings and the bulb you plan to use.
Most homes use E26/E27 or E12 bases; check your fixture for the exact base.
What if the wires look damaged or corroded?
If you see melted insulation, corrosion, or exposed copper, stop and consider replacing the entire fixture or consult a professional. Damaged wiring can pose a serious fire risk.
If you see damaged wiring, stop and get professional help if unsure.
Will replacing the socket affect my fixture warranty?
Warranties vary by manufacturer. Some require professional installation for the warranty to remain valid. Check your documentation or contact the maker.
Check the warranty terms; some require professional service for it to stay valid.
How can I verify the replacement socket is safe after installation?
Carefully inspect connections, ensure there’s no exposed copper, test with a non-contact tester before powering on, and observe for any heat or smell once the bulb is installed.
Inspect connections, test with a voltage tester, and watch for heat after testing.
When should I replace the entire fixture instead of just the socket?
If the fixture shows persistent corrosion, damaged wiring in the box, or structural damage, replacing the socket alone may not resolve the issue. Consider replacing the whole unit for safety and reliability.
If wiring or the box is damaged, consider replacing the fixture rather than just the socket.
Watch Video
Key Points
- Power off before inspecting any wiring
- Match socket base to fixture and use proper wiring
- Secure all connections to prevent arcing
- Test the fixture after replacement and monitor for heat