Do You Need to Water Bulbs After Planting: A Practical Guide
Learn when, how, and why to water bulbs after planting. This homeowner-friendly guide covers moisture cues, drainage, and best practices to establish healthy bulb growth.

Do you need to water bulbs after planting? Yes, but the approach matters. After planting, bulbs require a gentle soak to settle into the soil and begin root formation, then periods of drying to prevent rot. Watering should be guided by soil moisture and drainage rather than a fixed schedule. In most climates, light to moderate irrigation after planting supports healthy establishment.
Why water after planting bulbs matters
According to Bulb Fix, do you need to water bulbs after planting is a common question gardeners ask during the planting season. The short answer is yes: water helps bulbs settle into the new soil, establish moisture around the crown, and start the root system without shocking the plant. However, the timing, amount, and method matter just as much as the decision to water. Proper watering reduces transplant stress, supports early root formation, and helps seedlings access nutrients from moist soil. Too little moisture leaves bulbs desiccated and stressed, while overwatering creates soggy conditions that can rot bulbs or invite fungal diseases. By understanding soil texture, drainage, and local climate, homeowners can tailor watering to the bulb's needs. The goal is consistent moisture near the root zone, not a saturated surface layer. In practice, you’ll water enough to moisten the soil to a depth that reaches the developing roots, then allow the surface to dry before the next irrigation. This approach aligns with Bulb Fix’s guidance that healthy establishment comes from moisture balance and attentive observation, not a rigid schedule. With the right cues, you’ll enjoy vibrant flowering the following spring and avoid common pitfalls that plague impatient gardeners.
When to water after planting bulbs
Timing is influenced by climate, soil type, and recent rainfall. After planting, give bulbs a light drink to settle the soil, but avoid creating a soggy bed. In cool, wet regions, you may not water for a week if the soil remains moist, while in hot, dry regions you might water within 1–2 days to prevent desiccation. The best cue is soil moisture at the depth of the root zone, typically 2–4 inches deep. If that layer feels dry and crumbly, it is time to water; if it feels slick, wait. Regular rainfall can replace some irrigation, but in driest periods scheduling based on moisture is essential to avoid stress on emerging roots. Monitor after the initial watering to ensure the soil remains evenly moist but not waterlogged, especially in clayey soils that retain moisture longer.
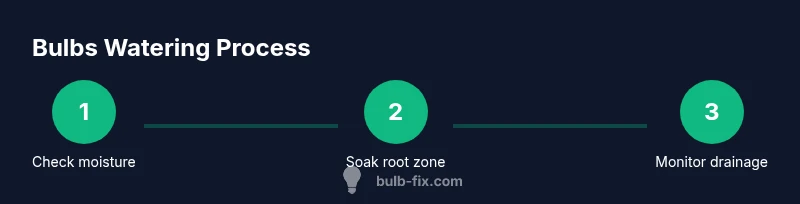
How to water correctly: method and schedule
The preferred method for newly planted bulbs is a light to moderate soak that wets the root zone without saturating the foliage. Use a watering can with a fine spray or a soaker hose to deliver water slowly. Apply enough water to moisten the top 6–8 inches of soil and allow for drainage away from the crown. Avoid applying water directly to leaves or flower stalks, which can promote disease. After watering, wait for the surface to dry before the next session. If your soil drains slowly, water less frequently but deeper, ensuring the root zone reaches moisture without creating ponding. A drip or soaker system can help target the root zone precisely and minimize waste.
Assessing soil moisture and drainage
Soil moisture should be assessed at the root zone depth, not just on the surface. A quick finger test—insert a finger about 2–4 inches deep—can tell you if the soil is dry, moist, or wet. For a more precise approach, use a moisture meter set to an appropriate depth, and compare readings across several bulbs to get a representative picture. Drainage matters: bulbs planted in poorly draining soil will struggle even with frequent light watering. Ensure beds have an overall slope for drainage and consider soil amendments or raised beds if drainage is consistently slow. After heavy rains, wait a day or two before rewatering to avoid saturating the soil newly exposed to rain.
Watering strategies by bulb type and planting depth
Depth and type influence how you water. Deeply planted bulbs (for example, those placed 6–8 inches deep) benefit from longer, slower irrigation intervals that reach the root zone rather than quick surface sprays. Shallower bulbs require more frequent checks but the same principle: keep the root zone evenly moist. In loose, sandy soils, water more frequently but in smaller amounts; in heavy clay soils, water less often but deeply and ensure excellent drainage. Mulching around bulbs can help maintain uniform moisture and reduce evaporation. Adjust schedules after rainfall and as shoots emerge, watching for signs of over or under watering.
Common mistakes and signs of trouble
Common mistakes include overwatering, which causes root rot and fungal issues, and underwatering, which leads to desiccated crowns. Look for drooping or pale leaves, soft or mushy bases, and a musty smell that signals rot. Wilting after rainfall can indicate poor drainage or waterlogged soil. Conversely, leaves that stay dry and brittle suggest insufficient moisture. Remember that foliage health is not the sole indicator early on; the bulb's crown stability and root activity are critical. If you see any signs of stress, adjust watering frequency, intensity, or drainage measures promptly.
Seasonal timing and climate considerations
Seasonal timing matters as bulbs wake up with seasonal moisture patterns. In cool springs, early watering is often less frequent, relying on regular rainfall. In hot, dry climates, bulbs may need deeper irrigation during their active growth phase, while dormancy periods require less water. Temperature and humidity affect evaporation rates, so tailor watering to local conditions. In coastal or humid regions, soil may stay moist longer, reducing irrigation needs, whereas inland arid regions often require more careful monitoring and longer intervals between waterings.
Aftercare: mulch, weeds, and next irrigation
Mulch after watering helps conserve moisture and stabilize soil temperatures, but keep mulch away from the crown to prevent rot. Keep beds free of weeds, which compete for moisture and may harbor pests. Plan the next irrigation by checking soil moisture 1–2 days after the initial watering, then schedule follow-up checks based on rainfall and soil type. A simple rule is to water when the top 2–4 inches of soil feel dry to the touch, and to adjust the rhythm as shoots emerge and greens appear.
Tools & Materials
- Garden trowel(14-18 inch handle; for digging and loosening soil)
- Fine-mist watering can(Capacity around 32 oz; gentle spray nozzle)
- Soaker hose or drip irrigation(Delivers water directly to the root zone)
- Moisture meter (optional)(Balanced readings for 2-4 inch depth)
- Mulch (organic)(2-3 cm layer to conserve moisture)
- Gloves(Protect hands during digging and mulching)
- Garden hose with gentle spray nozzle(Wide spray that reduces leaf wetting)
Steps
Estimated time: 60-90 minutes
- 1
Assess soil moisture
Check the soil at the bulb root depth (about 2–4 inches). If it feels damp and cool, hold off on watering. If it feels dry or crumbly, proceed with a light soak to establish moisture balance.
Tip: Use a moisture meter or the finger test to verify depth readings before watering. - 2
Prepare your watering setup
Assemble your watering tool and place it near the planting bed. Avoid spraying directly onto leaf tissue or flower crowns. Set the flow to a gentle shower to prevent displacement of soil and crown damage.
Tip: A soaker hose or watering can with a fine spray reduces soil disruption. - 3
Water deeply to moisten the root zone
Water slowly so the soil penetrates to the root zone without pooling on the surface. Target a depth of 6–8 inches to support root development. Stop when water drains from the bottom of the bed.
Tip: Use a soak-and-drain method; shallow watering repeatedly can encourage surface evaporation rather than root growth. - 4
Observe drainage after watering
Wait for surface water to disappear and check for ponding in depressions. If water pools, improve soil drainage or reduce watering frequency. If the area dries quickly, you may need deeper or less frequent sessions.
Tip: Consider a drainage improvement plan if puddling persists after heavy rainfall. - 5
Mulch and protect after watering
Apply a light mulch layer to retain moisture and regulate temperature, keeping mulch away from the crown. Mulch reduces evaporation and helps uniform moisture.
Tip: Keep mulch several inches from the bulb crown to prevent rot. - 6
Resume regular moisture checks
Schedule weekly moisture checks during establishment, adjusting for rainfall and temperature. Once shoots appear and roots establish, shift toward a steadier pattern that suits your climate.
Tip: Document rainfall and irrigation so you can refine your routine next year.
Got Questions?
Do I water immediately after planting bulbs?
In most cases, a light initial watering helps settle the soil and start root formation. Avoid soaking if the soil is already moist from recent rain.
Yes, give a light drink right after planting, but avoid overwatering if the soil is already moist.
How often should I water bulbs after planting?
Water based on soil moisture at the root depth, typically when the top 2–4 inches feel dry. Don’t water on a fixed calendar; adjust for rainfall and soil type.
Water when the soil at the root depth is dry, not on a set schedule.
Can overwatering kill bulbs?
Yes. Overwatering leads to soggy soil, rot, and fungal issues. Ensure drainage and avoid continuous wetness.
Overwatering can kill bulbs; always ensure good drainage.
What soil moisture level is ideal for bulbs?
Moist but not soggy. The root zone should feel damp, not muddy, with surface texture slightly springy.
Keep the soil consistently damp, not waterlogged.
Should I water bulbs in winter?
Water sparingly in winter if the ground is not frozen and rainfall is insufficient. Avoid soggy conditions during dormancy.
Water only if the soil is dry and unfrozen during winter.
Watch Video
Key Points
- Water after planting to settle bulbs and begin root development.
- Check soil moisture at depth before each watering.
- Water deeply and infrequently to encourage strong roots.
- Avoid waterlogged soil and ensure good drainage.