Bulb LED Replacement: Safe, Step-by-Step Home Guide
Learn how to safely replace LED bulbs, identify bases, check fixture compatibility, install correctly, and dispose of old bulbs with practical tips from Bulb Fix.

Goal: Learn how to safely replace a burned-out LED bulb with a compatible LED replacement. You’ll identify the right base type, check fixture compatibility, install the new bulb correctly, and test the light. The guide covers common household fixtures, safety steps, and disposal considerations, plus quick tips to maximize bulb life and energy savings.
Why bulb led replacement matters
According to Bulb Fix, upgrading to LED replacements is not just about brightness—it's a practical upgrade for safety, energy efficiency, and long-term savings. For homeowners, LED bulbs reduce heat near fixtures, which lowers burn risk and helps with thermostat load in small rooms. LED lamps also last longer than incandescent and some halogen alternatives, which means fewer bulb changes and less waste. When you plan a bulb led replacement, you should think about base types, fixture compatibility, color temperature, and whether dimmers or smart controls are involved. Each fixture has its own constraints: a desk lamp might accept a compact form factor, while a recessed ceiling fixture may require a different bulb shape. The right LED replacement is often a straightforward swap, but choosing the wrong base or failing to check dimmer compatibility can cause flicker, reduced brightness, or overheating. Bulb Fix's experience indicates that a thoughtful selection reduces maintenance and improves lighting quality over time. Use this section to decide if LED replacement is warranted in your space and how to pick the best product for your fixture.
Understanding LED bases and fixtures
LED bulbs come in several base types, from common screw-in models to pin-based styles. The most familiar for household lamps are E-series screw bases (like E26/E27) and socket variants such as GU10 or B22d. Before buying a replacement, identify the socket, check the old bulb for base markings, and confirm the maximum wattage the fixture can safely handle. The fixture label or user manual is your best guide. In addition to base size, consider form factor and compatibility with existing shades or trims. If you have a smart or retrofit kit, verify that the LED bulb supports your control method. Modern fixtures often list compatible LED specifications on the socket or in the bulb's packaging. By understanding base types and fixture design, you can avoid mismatches that lead to flicker, poor light distribution, or safety concerns.
Compatibility checks and dimmers
Before purchasing a replacement, verify that the LED bulb matches the fixture’s base and socket type. Check color temperature and brightness (measured in lumens) to ensure the light tone and intensity meet your needs. If your fixture includes a dimmer, confirm the LED is dimmable and that the dimmer switch supports LED loads. Incompatible combinations can cause flicker, buzzing, or reduced lifespan. If you’re unsure, test a single bulb in a controlled setting before replacing multiple units. This careful approach saves time and avoids recurring issues across rooms.
Safety and prep steps
Safety comes first when working with household lighting. Begin by turning off the power at the light switch, and for ceiling fixtures or hardwired lamps, switch off the circuit at the breaker panel. If you’re replacing bulbs in a fixture with a glass shade or exposed socket, place a soft mat or towel underneath to catch any accidental drops. Allow bulbs to cool before touching them. Wear gloves or use a cloth to handle bulbs to prevent oils on your skin from affecting the bulb’s heat management. A quick quick-check with a non-contact voltage tester can confirm the circuit is dead before you begin.
Replacement steps overview
LED replacement is typically a straightforward swap, but it benefits from a planned approach. Start by identifying the correct base type, confirm dimmer compatibility if relevant, and inspect the socket for signs of wear or corrosion. Remove the old bulb carefully, avoiding any excessive force. Install the new LED bulb, ensuring it seats fully without overtightening. Restore power and observe the light for flicker or buzzing. If the fixture glows dimly or hums, recheck compatibility and seating. Finally, dispose of the old bulb according to local guidelines and store spare LEDs in a cool, dry place.
Troubleshooting common issues
If the LED replacement flickers or doesn’t turn on, first verify power is fully off and reseat the bulb. Check that the base is compatible with the socket and the bulb is designed for dimming if applicable. Some fixtures require a specific color temperature for certain rooms, so try a different LED with a matching Kelvin rating. If you still experience issues, the problem may be with the fixture itself, such as a worn socket or an incompatible transformer. In that case, consider consulting a licensed electrician or replacing the fixture.
Disposal and environmental considerations
Old bulbs contain materials that should be recycled rather than landfilled. Check local recycling guidelines for LED bulbs—many municipalities accept LEDs for safe disposal. Keeping a dedicated container for used bulbs until you can recycle helps prevent breakage and environmental risk. If a bulb is cracked or damaged, handle it with care and place it in a sturdy container before disposal. Following proper disposal practices reduces waste and protects indoor air quality.
Maintenance tips for longevity
To maximize the life of your bulb led replacement, avoid frequent on/off cycling in fixtures that are used for short periods. Use compatible dimmers and avoid overloading circuits. Clean fixtures and sockets regularly to prevent dust buildup, which can interfere with heat dissipation. When replacing bulbs, choose high-quality LED products from reputable brands and keep a few spare units on hand for quick maintenance. Regular checks on wiring and fixtures will help you catch problems early and extend the life of your lighting system.
Tools & Materials
- LED replacement bulbs(Choose the correct base (e.g., E26/E27, GU10, G9) and color temperature)
- Fixture identification tool(Read socket markings or compare to the old bulb to confirm base type)
- Ladder or stable step stool(Needed for ceiling fixtures or high-mounted lamps)
- Soft cloth or microfiber(Use to handle bulbs and wipe sockets safely)
- Non-contact voltage tester(Optional, for confirming circuit power before handling)
- Safety gloves(Helps grip for fragile bulbs and protects hands)
- Safety glasses(Wear when working with fixtures that produce heat or could shatter)
- Breaker access (panel)(Turn off power at the breaker for hardwired fixtures or if you suspect wiring issues)
Steps
Estimated time: 25-40 minutes
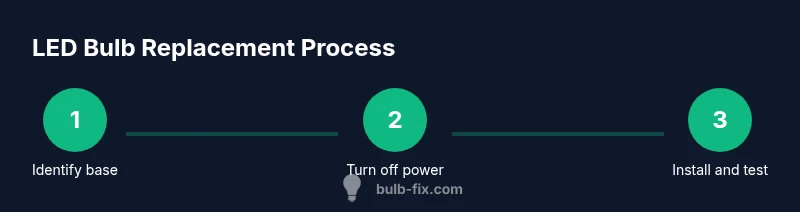
- 1
Identify base type
Examine the old bulb or socket to determine the base type (e.g., E26, GU10, B22). If needed, refer to the fixture label or user manual. Correct base matching prevents seating and fit issues.
Tip: Take a quick photo of the socket label for later reference. - 2
Turn off power
Switch off the light at the wall switch and, if possible, at the circuit breaker. This eliminates the risk of electric shock while handling hot fixtures.
Tip: Test with a non-contact tester to confirm no current is present. - 3
Cool before handling
Allow the fixture and bulb to cool if recently used. Thermal shock can crack or damage bulbs and sockets.
Tip: Wipe hands dry to prevent moisture and avoid slipping from your grip. - 4
Remove the old bulb
Gently loosen and remove the existing bulb without applying excessive force. If the bulb is stuck, do not twist harder—inspect base condition first.
Tip: If the bulb is stuck, try turning in the direction of the base's typical threading before asking for assistance. - 5
Inspect socket and base
Visually inspect the socket for corrosion, scorch marks, or looseness. A damaged socket may require replacement rather than a bulb swap.
Tip: If you see damage, stop and consult a professional before proceeding. - 6
Install the new LED
Insert the LED bulb firmly and avoid overtightening. Ensure the bulb sits evenly and the connector contacts are flush with the base.
Tip: Align the base tabs or threading gently to avoid bending connectors. - 7
Test the fixture
Restore power and observe the light for proper operation. If the bulb flickers or stays dark, recheck seating and compatibility.
Tip: If issues persist, try a different LED with the same base to confirm the problem lies with the bulb, not the fixture. - 8
Dispose of the old bulb
Seal the old bulb in a bag or container for recycling or disposal according to local guidelines. Do not throw if it contains hazardous materials.
Tip: Check local e-waste programs or retailer take-back options for LEDs.
Got Questions?
What base type should I use for my lamp?
Choose a base matching the socket (e.g., E26, GU10, B22d). If in doubt, consult the fixture label or manual and verify the old bulb shows the base type.
Match the bulb base to the socket by checking the fixture label or the old bulb. If unsure, check the manual.
Can I mix LED bulbs with older bulbs in the same fixture?
Mixing LED with incandescent bulbs in the same fixture can cause uneven light and potential dimming or overheating. Prefer matching bulb technology within a fixture.
It's best not to mix LED bulbs with older bulbs in the same fixture.
What should I do if my new LED flickers?
Flicker usually indicates incompatibility with dimmers or a loose seating. Re-seat the bulb, verify dimmer compatibility, or try a non-dimmable LED if the fixture isn’t on a compatible dimmer.
If it flickers, reseat the bulb and check dimmer compatibility; try a non-dimmable LED if needed.
Are LEDs safe to use in enclosed fixtures?
Many LEDs are designed for enclosed fixtures, but some models are not. Check packaging for enclosure compatibility and ensure adequate heat dissipation.
Check the bulb packaging to confirm it’s rated for enclosed fixtures.
Do LED bulbs require a different dimmer?
Yes, use a dimmable LED bulb with a compatible dimmer. Mismatched components can cause buzzing or failure.
If you want dimming, pair a dimmable LED with a compatible dimmer.
How should I dispose of LED bulbs?
LED bulbs should be recycled where possible. Check local programs or retailer take-back options. Do not throw them in regular trash if recycling is available.
Recycle LEDs whenever you can through local programs or retailer take-back.
Watch Video
Key Points
- Identify base type before buying.
- Always switch off power before handling bulbs.
- Use compatible LED bulbs for safety and longevity.
- Dispose of old bulbs responsibly.