Halogen Replacement Bulb: How to Choose and Install
A practical, safety-first guide to selecting and installing halogen replacement bulbs, covering compatibility, wattage, color temperature, installation steps, risks, and upgrade options.

With this guide, you’ll learn how to select a compatible halogen replacement bulb and replace it safely. You'll verify base type, wattage, and color temperature, power down the fixture, and install the new bulb correctly to avoid overheating or fixture damage. Also, you’ll discover when to upgrade to LED alternatives and how to handle safety warnings.
Understanding Halogen Replacement Bulbs
Halogen replacement bulbs belong to the broader family of incandescent lighting and are valued for their bright, crisp light and excellent color rendering. They tend to run hotter than many modern options, which is a key consideration for fixture placement and heat-sensitive surroundings. The Bulb Fix team notes that halogen lighting remains popular in task lighting and bathroom fixtures because it starts instantly, reaches full brightness without a warm-up period, and generally delivers very accurate color representation. When selecting a halogen bulb, you must consider three essential factors beyond brightness: the base/socket type, the bulb’s wattage, and the physical size that fits your fixture. Installing a bulb with excessive wattage can overheat the fixture or nearby components, shortening lamp life or creating a safety hazard. Also, pay attention to dimmer compatibility if your fixture is used with a dimmer switch; not all halogen bulbs work with every dimmer. Finally, remember heat output and proximity to heat-sensitive materials—keep combustible materials away and maintain proper clearance.
Compatibility Essentials: Bases, Sizes, and Wattage
Compatibility starts with the socket. Halogen bulbs come in several common base formats (such as GU10, MR16, G4, and G9), each designed for specific fixtures and voltage types. It’s crucial to match the base to the socket and to verify whether your fixture runs on low voltage (often using a transformer) or line voltage. In a lot of homes, track lighting and recessed fixtures use low-voltage halogen bulbs; others use standard mains voltage. Maximum wattage ratings on the fixture label or in the user manual must never be exceeded, because higher-wattage bulbs can cause overheating or fuse faults. If the exact base type isn’t obvious, remove the old bulb gently and inspect the base, or refer to the fixture’s documentation. When in doubt, bring the old bulb to a lighting retailer to confirm the base and wattage.
Color Temperature and Brightness Basics
Halogen bulbs deliver bright, high-contrast light with strong color fidelity. Brightness is measured in lumens, while the perceived warmth is tied to color temperature. Warm tones create a cozy atmosphere, while cooler tones feel more clinical and crisp. For residential spaces, many homeowners prefer warm white halogen lamps in living areas and kitchens, with neutral temperatures in workspaces. If you’re replacing a bulb in a room that already has halogen lighting, aim to match color temperature and brightness so the ambience remains consistent. When upgrading, you may encounter a broader range of color temperatures and beam angles, so consider how the light spreads across surfaces.
Safety First: Handling, Cooling, and PPE
Halogen bulbs get very hot in operation. Always power off the circuit and allow the fixture to cool completely before touching the bulb. Wear gloves or use a clean cloth to handle the bulb, avoiding skin oils that can wick into glass and reduce bulb life. If the bulb is in a recessed fixture or a high location, use a stable ladder and don’t overreach. Keep a fire-safe area clear of clutter, and consider using eye protection when removing or inserting bulbs if you expect debris or glass fragments to fall. If the fixture has a glass cover, remove it carefully to avoid cracking. After installation, test the fixture briefly to confirm proper operation before fully reassembling any covers.
How to Check Your Fixture for Compatibility
Start by turning off power at the switch and breaker, then remove the fixture cover if present. Look for a label nearby that lists maximum wattage, voltage, and sometimes base type. If there’s no label, remove the old bulb and note its base type and size, or photograph the socket area for reference. Verify whether the system uses a transformer (common in low-voltage halogen setups) and check for dimmer compatibility if you intend to keep dimming functionality. If you see signs of overheating, such as melted insulation or scorched components, stop and consult a professional. Always ensure you have the correct socket type and space for the new bulb’s dimensions.
How to Choose the Right Halogen Replacement Bulb
Pick a bulb that matches the fixture’s base type, maximum wattage rating, and the transformer requirements if present. Consider lumens for brightness and color temperature for the desired mood. If you’re updating a whole space, you may want to standardize on a single color temperature for consistency. Be mindful of beam angle and size—some bulbs are longer or bulkier and won’t fit in compact housings. If energy savings are a goal, explore LED alternatives that are compatible with your fixture; however, ensure the fixture and any dimmer or transformer are rated for LED use to avoid flicker or damage.
Replacing the Bulb: Step-by-Step Process Overview
Begin by preparing your work area, ensuring safe access and adequate lighting. Remove the old bulb as described in your fixture’s manual, inspect the base and socket for wear, and align the new bulb with the socket before inserting. If you’re dealing with a low-voltage setup, ensure the transformer is compatible with the new bulb. After seating the bulb, reassemble any covers and restore power to test the light. If the bulb does not illuminate, re-check seating, verify the correct base-type, and inspect the transformer and wiring for faults.
Troubleshooting Common Issues After Replacement
If the new bulb flickers or won’t light, re-check the seating and ensure the base is clean and free of oils. For low-voltage systems, inspect the transformer and wiring for loose connections and confirm that the transformer’s rating matches the bulb’s wattage. If the fixture dims unevenly, verify dimmer compatibility and that you have a compatible bulb with the dimmer. For buzzing sounds, power off and inspect for loose components or a loose ballast/driver. If you suspect a fixture issue beyond the bulb, consult a licensed electrician.
Alternatives and Upgrade Paths: LEDs and Energy Savings
LED replacements offer energy savings, cooler operation, and longer lifespans, but compatibility is key. Many fixtures can accept LED retrofit bulbs or modules designed for halogen sockets, sometimes with a driver or transformer adjustment. Before switching to LED, confirm electrical compatibility, heat dissipation in enclosed fixtures, and dimmer or transformer compatibility. If a direct LED alternative isn’t feasible, consider upgrading the fixture or using LEDs with dedicated LED drivers. The Bulb Fix team suggests evaluating long-term energy costs and maintenance when deciding between halogen and LED options.
Tools & Materials
- Halogen replacement bulb(Match base type (GU10, MR16, G4, G9, etc.) and wattage rating to fixture)
- Safety goggles(Protect eyes from glass shards or debris)
- Cotton or nitrile gloves(Avoid skin oils on bulbs; use clean gloves or a lint-free cloth)
- Ladder or stable step stool(Ensure a secure position and avoid overreaching)
- Screwdriver set(Used to remove covers or housings if required by the fixture)
- Non-contact voltage tester(Optional; verify power is off when working with exposed wiring)
- Soft cloth or microfiber wipe(Clean socket and bulb base if dust accumulates)
- Replacement bulb storage bag(Keep new bulbs protected until installation)
Steps
Estimated time: 15-30 minutes
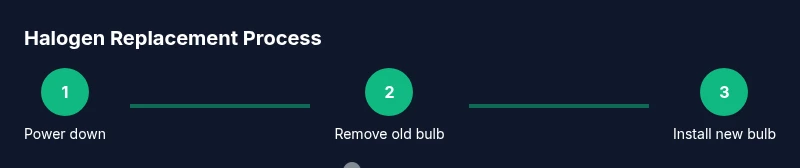
- 1
Power down and prepare
Switch off the light at the wall and, if possible, at the circuit breaker. Allow the fixture to cool completely before touching the bulb.
Tip: Wear gloves to avoid oils transferring to the bulb. - 2
Access the bulb
Carefully remove any covers or glass guards that protect the bulb. Use a stable ladder if needed and set it securely.
Tip: Keep track of any screws or clips to avoid losing parts. - 3
Remove the old bulb
Gently pull or twist the bulb out of its socket according to the base style (some bases pull straight, others twist). Do not force it.
Tip: Inspect the base and socket for signs of wear or damage. - 4
Prepare the new bulb
Check the new bulb’s base type and wattage. If using a low-voltage fixture, ensure the transformer is compatible with the new bulb.
Tip: Wipe the new bulb with a clean cloth if it has fingerprints on it. - 5
Install the new bulb
Insert or twist the bulb into the socket until it seats firmly. Avoid over-tightening. Reassemble any covers.
Tip: Align the bulb correctly to prevent contact with surrounding components. - 6
Test the fixture
Restore power and switch the light on. If it doesn’t light, re-check seating and wattage, then test again.
Tip: If the light flickers, try reinserting or test with a different compatible bulb.
Got Questions?
Can I use an LED replacement for halogen bulbs?
LED replacements can be used if the fixture and transformer are compatible; some LED options require drivers. Always check the fixture label and bulb instructions.
LED replacements can work if your fixture supports them; verify driver and transformer compatibility.
Is it safe to touch bulbs with bare hands?
Avoid touching the glass with bare skin; oils from hands can shorten bulb life. Use clean gloves or a cloth.
Don't touch bulbs with bare hands.
What base types do halogen bulbs use?
Common bases include GU10, MR16, G4, and G9. Each base fits a specific socket and requires the right fixture compatibility.
Halogen bulbs come in several base types like GU10 and MR16.
I replaced the bulb, but it won’t light. What should I check?
Inspect seating, verify the correct base and wattage, and check the fixture’s transformer or wiring for faults.
First, check seating and compatibility; if still dark, look at the transformer and mains wiring.
How should I dispose of spent halogen bulbs?
Dispose with household hazardous waste according to local guidelines; don’t put halogen bulbs in regular trash.
Check local rules for halogen bulb disposal.
Watch Video
Key Points
- Confirm base type and wattage before replacement
- Power off and allow cooling before handling
- Use gloves to avoid oil on bulb surfaces
- Match color temperature for consistent ambiance
- Consider LEDs only if fixture compatibility is confirmed