Halogen to LED Conversion: A Practical DIY Guide
Learn how to safely replace halogen bulbs with LED equivalents, assess compatibility, reduce energy use, and follow clear step-by-step guidance for a brighter, safer home.

In this guide you'll learn how to safely swap halogen bulbs for LED equivalents, choose compatible dimmers, and avoid common hazards. You'll need basic hand tools, the right LED bulbs, and careful attention to heat ratings and electrical safety. This article covers steps, safety tips, and troubleshooting to complete the conversion.
Why halogen to LED conversion matters for homeowners
Halogen bulbs have powered many fixtures for decades, but halogen to LED conversion offers meaningful advantages for most homes. According to Bulb Fix, LED replacements typically use far less electricity, generate much less heat, and last significantly longer than traditional halogen lamps. These benefits translate into lower energy bills, cooler fixtures in ceiling cans and wall sconces, and far fewer bulb replacements in hard-to-reach places.
Before you begin, it’s important to understand that every fixture can behave a little differently when you switch to LEDs. Some halogen-compatible fixtures were designed around halogen-specific wattages and heat outputs, while others are robust enough to handle a wide range of LED bulbs. Bulb Fix analyses indicate that most standard household fixtures adapt well to LED replacements that match the base size and voltage. The key is to verify compatibility before buying, so you don’t end up with lights that don’t fit or dimmers that buzz.
The decision to convert should also consider lighting quality. LED options offer a broader range of color temperatures, instant full brightness, and improved dimming smoothness in many cases. For living areas, a warmer color temperature is typically preferred; for task lighting, a cooler, more neutral white can improve visibility without causing eye strain. The Bulb Fix team emphasizes planning for heat dissipation and ventilation, especially in enclosed fixtures, to prevent premature LED failure.
In short, converting halogen to LED lighting is usually a wise long-term move for homeowners who want safer, more energy-efficient lighting with less maintenance. But a careful, planned approach—checking compatibility, choosing the right form factor, and ensuring proper installation—will maximize results and minimize surprises. Bulb Fix’s guidance is designed to help you navigate the typical fixtures found in living rooms, kitchens, hallways, and bathrooms.
Key considerations: base type, voltage, dimmer compatibility, fixture enclosure, and heat dissipation are the main pillars of a successful conversion. Focusing on these areas up front saves time and avoids costly mistakes.
note:bulb_fix_reference: "According to Bulb Fix, LED upgrades improve energy efficiency and reduce heat in common fixtures."
Tools & Materials
- LED bulbs with the correct base(Match base type (E26/E27, GU10, MR16, etc.) and ensure bulbs are dimmable if you intend to keep a dimmer.)
- Non-contact voltage tester(Verify power is off before handling any fixtures.)
- Screwdriver set (Phillips and flathead)(For loosening/tightening trim and bulb housing screws.)
- Electrical tape or wire nuts(Secure wire connections and insulate exposed conductors.)
- Gloves and safety glasses(Protect hands and eyes from sharp edges and dust.)
- Heat-resistant tape or clips (optional)(Use in enclosed fixtures if LED bulbs run hotter than the fixture is rated for.)
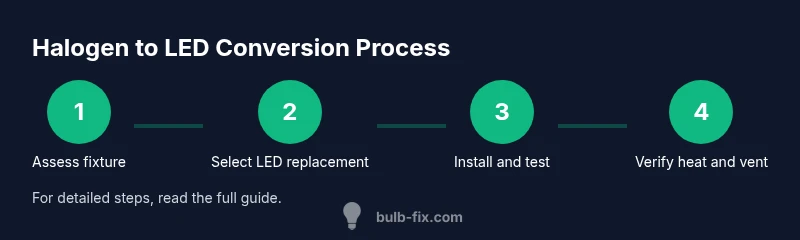
Steps
Estimated time: 60-90 minutes
- 1
Power down and verify
Turn off the circuit at the breaker and test the fixture with a non-contact tester to confirm there’s no live voltage. This prevents electric shock while you work.
Tip: If you’re unsure which breaker controls the fixture, switch off the main breaker to be extra safe. - 2
Remove the old halogen bulb
Carefully remove the existing halogen bulb by gently twisting or pulling the bulb, depending on base and fixture design. Note the orientation and any retaining clips so you can replicate the fit with the LED replacement.
Tip: Let the bulb cool completely before handling; halogen bulbs heat up very quickly. - 3
Inspect base and fixture compatibility
Check the bulb base type (e.g., E26/E27, GU10, MR16) and inspect the socket for any signs of wear or damage. If a fixture has a transformer or ballast, verify whether the LED replacement is rated for low-voltage or line-voltage operation.
Tip: If there is any sign of damage or discoloration, stop and replace the fixture rather than forcing an LED in. - 4
Choose the right LED replacement
Select an LED bulb that matches the base and voltage, is dimmable if a dimmer is present, and provides a color temperature suitable for the space. Consider the fixture’s heat profile and ensure the bulb’s heat considerations align.
Tip: Prioritize safety over brightness; LEDs that run cooler tend to last longer in enclosed fixtures. - 5
Install the LED bulb
Install the LED bulb with the same orientation as the halogen. Reconnect any retaining clips, tighten the base, and avoid overtightening, which can damage the socket.
Tip: Use a gentle hand when tightening;LED bulbs are solid but the screw bases can strip if over-torqued. - 6
Test function and dimming
Restore power and test the light. If you have a dimmer, slowly raise and lower the brightness to check for smooth operation and any buzzing or flickering.
Tip: If flickering or buzzing occurs, consider replacing the dimmer with an LED-compatible model. - 7
Assess heat and ventilation
Observe the fixture after a few minutes of operation. If you notice excess heat around the housing or dimming inconsistencies, reassess the fit or ventilation.
Tip: Enclosed fixtures may require bulbs rated for enclosed use; otherwise, heat buildup can shorten LED life. - 8
Document and store
Keep a simple note detailing which fixtures were converted and the date. This helps future maintenance and ensures you track when to replace bulbs.
Tip: Mark the fixture with a small label if you perform multiple conversions in one room.
Got Questions?
Can I replace halogen bulbs with LED in the same fixture?
In most residential fixtures, you can replace halogen bulbs with LED equivalents if the base, voltage, and dimmer compatibility align. Always verify the fixture supports LED and that heat will dissipate properly. If the fixture uses a transformer or ballast, make sure the LED replacement is rated for that configuration.
Yes, often you can, as long as the base, voltage, and dimmer are compatible and the fixture can ventilate heat properly.
Do I need to change the dimmer when switching to LED?
Not always. If your LED bulbs are labeled as dimmable and your dimmer is LED-compatible, you may not need to change it. If you notice flicker or buzz, replace the dimmer with a model rated for LED loads.
If your LEDs are dimmable and your dimmer supports LEDs, you might be fine; otherwise, use an LED-compatible dimmer.
Are LED bulbs safe to use in enclosed fixtures?
LEDs designed for enclosed fixtures should be used in such installations. Some LED bulbs aren’t rated for enclosed spaces, which can affect performance and lifespan.
Yes, but make sure the bulb is rated for enclosed fixtures.
What color temperature should I choose for living spaces?
Warm color temperatures (roughly 2700K–3000K) create a cozy feel, while neutral (around 3500K–4100K) can be better for kitchens and work areas. Consider mixing temperatures for layered lighting.
Warm temps are good for living areas; neutral temps work well for kitchens and work areas.
What should I do if the LED flickers after installation?
First, verify the base and voltage match. If the fixture has a dimmer, test with a non-dimmable LED replacement removed from the circuit. If flicker continues, replace the dimmer or choose a compatible LED bulb.
Check compatibility and dimmer status; flicker often means a compatibility issue.
How long do LED replacements typically last compared to halogen?
LEDs generally last much longer than halogen bulbs, reducing maintenance. However, lifespan depends on heat management and fixture ventilation, so proper installation matters.
LEDs usually last longer, but proper heat and ventilation are essential for longevity.
Watch Video
Key Points
- Plan before buying to ensure base and voltage match
- Check dimmer compatibility to avoid flicker
- Choose LEDs rated for heat and enclosed fixtures
- Test each fixture after replacement and document results
- Bulb Fix guidance emphasizes safety and planning for long-term efficiency