How to Replace Bulb with LED: A Practical Guide
Learn how to replace bulbs with LED safely, choosing the right base, installing correctly, and disposing of old bulbs with expert guidance from Bulb Fix.

You're about to learn how to replace a traditional bulb with an LED, safely and effectively. The goal is to improve energy efficiency, reduce heat, and cut maintenance, using the right base and color temperature. According to Bulb Fix, start by turning off power, verify compatibility, and have the correct LED bulb on hand before you begin.
Why LED is a smart swap for home lighting
Upgrading to LED bulbs is one of the simplest improvements homeowners can make for energy efficiency, lower heat output, and longer service life. LEDs use a different technology than traditional incandescents, producing light more efficiently and with less waste heat. According to Bulb Fix, the benefits stack when you replace bulbs in high-use fixtures like living rooms, kitchens, and hallways. When you plan how to replace bulb with led, you should think about the fixture type, base size, dimmer compatibility, and color temperature. This guide covers the critical steps, from identifying the correct LED bulb to safely changing it and disposing of the old bulb. You’ll also learn how small choices—such as warmth of the light and beam spread—affect the room’s mood and task performance.
How to choose the right LED bulb
Selecting an LED bulb starts with matching the base to your fixture. The most common bases are the standard screw-type (E26/E27) and the pin-based variants (GU10, GU24). Confirm the base printed on the old bulb and measure the socket if needed. Also check the bulb’s intended use: indoor, enclosed fixtures, or damp locations. Color temperature affects mood: warm whites for living spaces, neutral for kitchens, and cooler tones for task lighting. If your fixture has a dimmer, choose a dimmable LED that is explicitly compatible with your dimmer type. Finally, review the manufacturer’s ratings on the packaging to ensure the LED is suitable for enclosed fixtures or outdoor use if relevant. This is part of how to replace bulb with led correctly for long-term results.
Safety and compatibility checks before you start
Before you touch any bulb, turn off power at the switch. For added safety, switch off the circuit at the breaker. If you have access to a non-contact voltage tester, use it to verify the fixture has no live current. Inspect the fixture label for wattage or ballast information; LED bulbs typically require compatibility with its design. If you have a traditional dimmer, ensure it is compatible with LED loads; otherwise brightness control may be erratic. Keep a stable ladder or step stool, and work in a well-lit area. If you feel unsure about wiring or a complex fixture, pause and seek professional help. This preparation helps ensure a smooth, safe replacement.
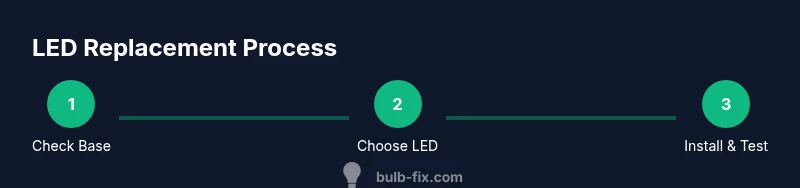
Step-by-step overview (how to replace bulb with led)
- Turn off power at the switch and, if possible, at the breaker; confirm there is no voltage before touching the bulb. 2) Remove the old bulb by gently turning it counterclockwise; let it cool and place it in a safe container. 3) Inspect the socket to confirm the base type and check for any signs of damage. 4) Select an LED bulb with the same base, correct size, and whether it is rated for enclosed or outdoor use if needed. If there is a dimmer, ensure the LED is dimmable and compatible with your dimmer type. 5) Install the LED bulb until snug; avoid overtightening to prevent base damage. 6) Restore power and test the light, watching for flicker or warmth that indicates an issue. 7) Dispose of the old bulb properly following local guidelines.
Maintenance, disposal, and troubleshooting
LED bulbs typically last longer than incandescent bulbs and require little maintenance. If you notice flicker, uneven brightness, or warmth near the base, first ensure the bulb is seated correctly and that the fixture is compatible with LED loads. For disposal, recycle where possible; many communities offer LED recycling programs at hardware stores or waste facilities. If you encounter continued flicker or buzzing, re-seat the bulb or try a different LED from the same base family. Proactive maintenance helps preserve lighting quality and safety over time.
Color temperature, brightness, and room planning
Color temperature and brightness influence how a space feels and functions. Warm, soft hues create a cozy atmosphere for living areas, while neutral to cooler tones support kitchens, home offices, and bathrooms. When replacing bulbs, compare brightness indicators (lumens) and color temperature cues on packaging. If replacing several fixtures, aim for a consistent color temperature to avoid an odd mix of tones. The Bulb Fix team recommends testing a few bulbs in a single fixture before committing to a full replacement to ensure the look and feel remain harmonious.
Tools & Materials
- LED bulbs with compatible base(Choose bulbs rated for your fixture base (e.g., E26/E27, GU10) and for enclosed or damp locations if needed. If a dimmer is present, pick dimmable LEDs.)
- Non-contact voltage tester(Optional but recommended to verify there is no live current before handling the bulb.)
- Ladder or sturdy step stool(Use a stable platform on a flat surface; ensure it is tall enough to reach safely.)
- Soft cloth or gloves(Handle bulbs by the base to avoid oils on the glass; helps prevent fingerprints.)
- Disposal bag or container(Securely hold the old bulb for disposal or recycling.)
- Marker or label(Optional for marking replacement bulbs to avoid mixing types.)
- Screwdriver (flathead or Phillips)(Only needed if the fixture has a cover plate that requires a screwdriver to access the socket.)
Steps
Estimated time: 15-25 minutes
- 1
Turn off power and prepare your workspace
Switch off the light at the switch and, if possible, switch off the circuit at the breaker. Clear the area and ensure a stable stance before touching the bulb.
Tip: Verify power is off with a tester before proceeding. - 2
Remove the existing bulb after cooling
Let the bulb cool completely, then gently rotate counterclockwise to unscrew it. Place the old bulb in a safe container for disposal.
Tip: Use a cloth or gloves to avoid slipping and reduce risk of breakage. - 3
Inspect socket and confirm base type
Look at the socket to confirm the base type and check for damage. Do not force-fit a bulb if the base doesn’t match.
Tip: If uncertain, bring the old bulb or take a photo to compare at the store. - 4
Choose an LED bulb compatible with the fixture
Select an LED bulb with the same base and appropriate ratings (enclosed/damp-rated). If there is a dimmer, ensure the LED is dimmable and compatible with your dimmer.
Tip: Read the packaging for compatibility notes before purchase. - 5
Install the LED bulb securely
Screw the LED bulb in until snug. Avoid overtightening to protect the base and avoid glass breakage.
Tip: Hold by the base and avoid gripping the glass. - 6
Restore power and test the light
Turn the power back on and switch on the fixture. Check for steady illumination and absence of flicker.
Tip: If you see flicker, reseat the bulb or try a different LED that’s compatible with your dimmer. - 7
Dispose of the old bulb properly
Place the old bulb in a recycling program or your local waste stream according to guidelines.
Tip: If the bulb is damaged, wear gloves and handle glass safely.
Got Questions?
Can I replace any incandescent bulb with LED?
In most cases, yes, you can replace incandescent bulbs with LED of the same base. Always verify base type, fixture rating, and dimmer compatibility before swapping.
In most cases you can replace incandescent bulbs with LED bulbs of the same base, but check the fixture rating and dimmer compatibility first.
Are LED bulbs always dimmable?
Not all LED bulbs are dimmable. Look for the dimmable label on the package and ensure your dimmer supports LED loads.
Not all LEDs are dimmable. If you want dimming, choose LED bulbs that are labeled dimmable and ensure your dimmer is compatible.
Do LED bulbs require special dimmers?
Some older dimmers can cause flicker or buzzing with LED bulbs. When possible, use a dimmer designed for LED loads or replace the dimmer with a compatible model.
Old dimmers may cause flicker with LEDs. Use an LED-compatible dimmer if you want reliable dimming.
How long do LED bulbs last?
LEDs generally last much longer than incandescent bulbs, but actual life depends on usage, heat, and fixture conditions. Check packaging for expected lifespans and warranty details.
LEDs last longer than traditional bulbs, but actual life varies with use and heat. Check packaging for specifics.
What color temperature should I choose for rooms?
Choose warmer tones for living areas and bedrooms to create comfort, and neutral to cooler tones for kitchens and workspaces to enhance clarity and focus.
Warm tones feel cozy; cooler tones aid tasks and focus. Pick room-appropriate temperatures.
Watch Video
Key Points
- Match the LED base to the fixture base exactly.
- Check dimmer compatibility before replacing in dimmed circuits.
- Turn off power and handle bulbs carefully to stay safe.
- Choose color temperature to suit each room’s mood and tasks.
- LEDs save energy and require less maintenance over time.