How to Change a Light Bulb Without a Ladder: Safe DIY Guide
Learn practical, safe steps to replace a light bulb without using a ladder. This Bulb Fix guide covers height assessment, tool selection, and a clear, step-by-step method for homeowners.

By the end of this guide you will know how to change light bulb without ladder safely and confidently. You’ll assess ceiling height, choose a stable alternative (like a sturdy step stool or extension pole), select the right bulb, and follow a clear, step-by-step plan. This approach minimizes risk, preserves balance, and uses common tools you likely already have around the home.
Why safely changing bulbs without a ladder matters
Replacing a ceiling bulb can seem straightforward, but the risk of falls, dropped glass, or socket damage is real. Learning how to change light bulb without ladder reduces injury and keeps your home safer. According to Bulb Fix, many households attempt risky maneuvers when a bulb burns out in a high fixture, and that can lead to unnecessary accidents. The goal is to reach the bulb with stable support, not to balance on loose furniture or fragile stools. Start by evaluating your ceiling height, the fixture type, and your comfort level with reaching tools. If the fixture is at or above shoulder height, you’ll want to create a deliberate setup rather than improvising. You’ll also want to consider alternatives to a ladder, such as a stable step stool designed for indoor use, or a long-handled reaching tool that can grip a bulb without requiring your full body in reach. Bulb Fix reminds homeowners that preparation is the key to a safe change: clear the area, test your reach, and position yourself so you can maintain three points of contact at all times. In this context, safe height access means choosing equipment you can control and can trust, rather than mounting yourself on unstable furniture.
Assessing height and choosing access methods
Height assessment is the first and most critical step. Measure from the floor to the bottom edge of the bulb—if this distance requires you to stretch beyond comfortable reach or to stand on anything other than purpose-built equipment, don’t attempt the change. A long-handled reaching tool or a stable extension pole can give you additional inches of reach without forcing you to stand on chairs. If you opt for a step stool, choose one with a wide base, non-slip feet, and a top that’s level and comfortable to stand on. In tight spaces, a wall-mounted or flush mount fixture may enable a shorter reach, while a lamp with a fiddled shade may require extra care to remove before you change the bulb. Bulb Fix notes that planning the access method ahead of time—and testing its stability before touching the bulb—greatly reduces the chances of slips. For very high ceilings or awkward fixtures, you should consider professional assistance rather than taking unnecessary risks.
Preparing your workspace and selecting tools
A well-prepared workspace makes the task safer and faster. Remove decorative items from the area, unplug or switch off the circuit, and ensure the room is well lit so you can see the bulb, socket, and any metal parts. Gather your tools in a nearby, stable zone so you don’t have to hunt for them while on a stool. Essential gear includes a sturdy step stool or platform, a compatible extension pole or reaching tool, non-slip footwear, gloves for grip and skin protection, and safety glasses to shield eyes from shards if a bulb breaks. If you’re replacing a ceiling bulb with LED to reduce future maintenance, plan for a heavier/longer bulb and that the fixture can support the weight. Keep a soft cloth to wipe the bulb’s contact points and the socket, and a backup bulb in case your first attempt doesn’t seat properly. Establish a clear exit path so you can retreat quickly if the setup becomes unstable. This approach aligns with Bulb Fix recommendations for safe DIY, where preparation directly translates into fewer missteps and safer handling of hot or glassy components.
Safe handling and bulb replacement techniques
Before you touch anything, confirm the power is off and the bulb has cooled. Set up your stable support and position your body so you can reach the bulb without overextending. Firmly grasp the bulb with gloves, rotate it counterclockwise to loosen, and avoid sudden twists that could snap the glass. If the bulb resists, don’t force it; pause, recheck your grip and alignment, and try again. Once loosened, remove the bulb smoothly and place it in a safe container. Inspect the socket for damage, corrosion, or discoloration; if you notice anything unusual, stop and consider a replacement fixture or professional help. Align the new bulb’s base with the socket and thread it clockwise until snug but not over-tightened. If you’re using a bulb with a larger base, ensure your tool can accommodate it without pinching fingers. After the bulb is seated, test the fixture by turning the power back on and ensuring the light operates correctly. Finally, tidy up the area and store your tools. Practicing these steps reduces the likelihood of accidents and makes future bulb changes easier, which is especially true for hard-to-reach fixtures.
Aftercare: disposal, cleaning, and gear maintenance
Headed bulbs contain glass and sometimes mercury; handle with care and dispose of them according to local guidelines. If you’ve dropped or cracked a bulb, use gloves and a dustpan to sweep shards into a rigid container; do not use a vacuum cleaner, which can spread glass and mess. Wipe the socket and surrounding area with a dry cloth, and inspect the fixture for heat buildup or discoloration after use. Reset your tools: wipe them clean, dry, and store them in a safe location, away from children and pets. When replacing, consider LED bulbs for longer life and lower energy costs, which Bulb Fix recommends as a practical upgrade for many households. If you frequently change bulbs in difficult fixtures, you may want to earmark a dedicated reaching tool for this purpose, as a set of long-handled guides will pay off in the long run. Finally, reflect on your process: if you needed to improvise beyond safe equipment, revise your setup next time to minimize risk and improve efficiency.
Bulb types, fixture compatibility, and safety thresholds
For high fixtures, the base type matters; common household bulbs use E26/E27 bases, with variations for candelabra or pin-based bases. Review the fixture’s maximum wattage and chose a bulb that fits both the socket and the cover/shade. LED bulbs are a strong choice for hard-to-reach fixtures because they produce less heat and last longer, reducing the number of risky changes. Some fixtures use unusual sockets or contain sensitive electronics; in those cases, you should rely on a professional if the risk of damage is high. Always ensure the replacement bulb meets the fixture’s weight limits and that the fixture can safely support the bulb. Bulb Fix emphasizes that compatibility, safety, and energy efficiency should guide your choice and that using a compatible, well-sized bulb makes future changes easier and safer.
Tools & Materials
- Stable step stool or platform(Non-slip feet; wide base; choose height for comfortable reach)
- Extension pole or reaching tool(Must be compatible with bulb type and fixture; test balance)
- Gloves(Grip and protect hands; keep ensure clean contact points)
- Safety glasses(Protect eyes from shards in case of breakage)
- Replacement bulb (correct base and wattage)(Know base type (e.g., E26) and LED vs incandescent)
- Non-slip footwear(Keep stable footing on smooth floors)
- Cloth or lint-free wipe(For cleaning contact points if needed)
- Flashlight(Extra lighting for tight fixtures)
Steps
Estimated time: 40-60 minutes
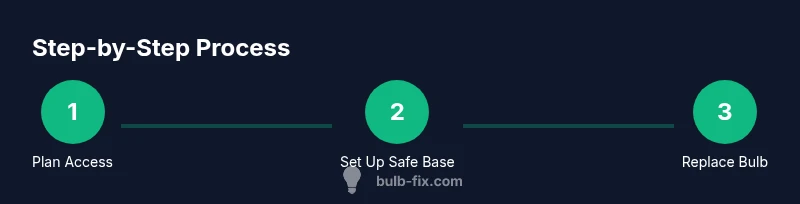
- 1
Power down and assess safety
Turn off the light at the switch and, if possible, at the breaker. Let the fixture cool completely before touching the bulb. Quickly assess the ceiling height and fixture type to decide the safest access method.
Tip: Always ensure power is fully off and the bulb has cooled before starting. - 2
Set up a stable base
Place your step stool on a level, non-slip surface. Check that it’s fully opened and locked, then position yourself so you can reach the bulb with minimal twisting or reaching.
Tip: Have a spotter hold the base if you’re near walls or furniture. - 3
Attach or extend your reaching tool
Extend the pole or tool to a length that puts the bulb within reach without overextending. Test balance by lifting slightly before attempting the bulb.
Tip: Do a quick balance test while standing on the stool but with light pressure on the base. - 4
Grip and remove the old bulb
Put on gloves and grip the bulb gently. Twist counterclockwise with steady, even pressure until it loosens completely. Let it drop into your hand or a safe container.
Tip: If the bulb sticks, stop and reattempt after rechecking grip and alignment. - 5
Inspect the socket
Look for cracks, corrosion, or discoloration. If you see damage, stop and consider replacing the fixture or requesting professional help.
Tip: Never force a damaged socket or try to bend metal parts to fit a bulb. - 6
Install the new bulb
Line up the base with the socket and rotate clockwise until snug. Avoid over-tightening, which can strip threads or crack the bulb.
Tip: If using a larger base, ensure the tool can accommodate it without pinching fingers. - 7
Test, clean up, and store tools
Restore power and test the light. If it works, wipe down the tools and store safely. Dispose of the old bulb properly if it’s spent.
Tip: Keep a spare LED bulb handy for high fixtures to minimize future changes.
Got Questions?
Is it safe to change bulbs without a ladder?
Yes, safety is possible with careful height assessment, a stable platform, and proper tools. Always switch off power and ensure the bulb is cool before attempting a change. If your fixture is very high or awkward, consider professional help.
Yes, with proper planning, a stable setup, and the right tools, you can safely change a bulb without a ladder. If in doubt, seek professional help.
What should I do if the bulb won’t unscrew?
Pause and recheck your grip and alignment. Apply gentle steady pressure and avoid forcing the bulb, which can cause breakage. If stubborn, try a slightly different angle or a fresh pair of gloves, or use a different tool approach.
If it won’t unscrew, stop and recheck your grip and angle. Don’t force it—try a gentle twist or switch to a different tool approach.
Can I substitute a chair for a step stool?
Chairs are generally not recommended for bulb changes due to instability and tipping risk. Use a purpose-built step stool or platform with a wide base and non-slip feet for safer access.
A chair is not recommended. Use a sturdy step stool or platform for safer access.
Should I use LED bulbs in high fixtures?
LED bulbs are often the best choice for hard-to-reach fixtures because they emit less heat, last longer, and require fewer changes. Ensure they are compatible with the fixture’s base and wattage rating.
LEDs are usually the best option for high fixtures—less heat and longer life.
How should I dispose of a broken bulb?
Carefully collect shards with gloves and a stiff card, place them in a rigid container, and follow local disposal guidelines. Do not vacuum shards as that can scatter glass. Clean the area with a damp paper towel and seal it for disposal.
If the bulb breaks, wear gloves, collect shards, and dispose according to local rules; don't vacuum the fragments.
Watch Video
Key Points
- Plan height access before starting.
- Use stable, purpose-built equipment—not furniture.
- Turn off power and let bulbs cool before handling.
- Choose compatible LED bulbs for easier future changes.