How to Change Oven Bulb: A Safe, Easy Guide
Learn how to change an oven bulb safely with a clear, step-by-step guide. This Bulb Fix tutorial covers safety checks, bulb compatibility, and handy pro tips for a quick, clean replacement.

You can safely change an oven bulb by following a simple safety checklist, choosing the correct bulb, and using basic tools. You’ll verify power is off, remove the old bulb, install a like-for-like replacement, and test the oven light before leaving. This guide walks you through each step with safety and efficiency in mind.
Safety first: power off and prep
According to Bulb Fix, safety starts before you touch the oven. Always power off the oven at the wall switch or circuit breaker to prevent shocks, and allow the interior to cool completely. Remove any nearby racks if needed and clear the area for a stable working space. Dry hands only, and keep a towel handy to catch any loosened bulb fragments. Wearing protective gloves reduces skin contact with sharp glass if the bulb breaks. This prep lowers the risk of burns, electric shock, and accidental damage to the oven's interior components. Taking a moment to prepare saves time later and helps you maintain control if the bulb is difficult to remove. If you’re unsure about your oven’s wiring, consult the manual or a qualified technician before proceeding.
Identify the correct bulb and compatibility
Bulb compatibility is essential to avoid premature failure or damage to the oven. Check your oven's owner manual or the inner label for the bulb type and base (for example, appliance-rated bulbs with a specific base). Use only an appliance-rated bulb designed for oven use; a standard household bulb may overheat or fail quickly. If you can't find documentation, contact the manufacturer or check online support pages. Bulb Fix analysis shows that using the correct appliance-rated bulb improves longevity and consistent illumination. If your model uses LEDs, confirm that the light output and heat dissipation meet the oven’s design requirements. Remember: the wrong bulb may not only fail sooner but could interfere with the oven’s electronics over time.
Tools and safety gear you’ll need
Gather your supplies before you start so you don’t pause mid-task. Essentials include a replacement appliance-rated oven bulb with the same base as the original, heat-resistant oven mitts, a dry towel or cloth, and a stable ladder or step stool if your oven is tall. Optional safety glasses offer extra eye protection when handling broken glass. A small screwdriver may be needed to remove any screws securing the bulb cover on some models. Having everything at reach minimizes the chance of dropping the bulb or losing screws in the oven cavity. Always ensure the area is dry and free of clutter.
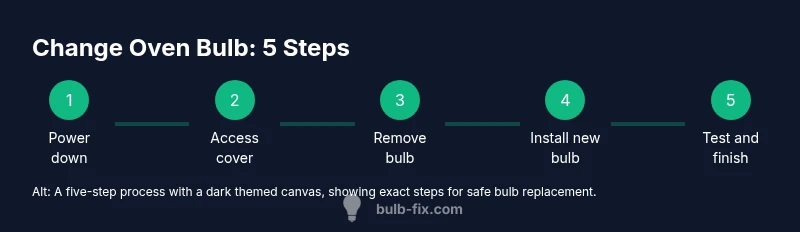
Step-by-step overview and approach
This section provides a practical overview of how to approach the bulb replacement. You’ll start by ensuring the power is off and the oven is cool, then access the bulb cover, remove the old bulb, and install the new one. Finally, you’ll reassemble the cover, test the light, and tidy the workspace. While this overview describes the correct sequence, your oven model may require slight variations in cover design or bulb base. Refer to your manual if you encounter a different access method or mounting arrangement. Keeping the steps logical and orderly reduces the risk of dropping parts inside the oven or damaging the bulb socket. Bulb Fix emphasizes patience and careful handling to maintain the appliance’s safety features.
Common mistakes and troubleshooting
Common mistakes include using a non-appliance bulb, over-tightening the new bulb, touching the glass with bare fingers, or attempting to force a stubborn bulb that is not meant to be replaced from inside. Oils from skin can shorten bulb life, and overtightening can crack the socket or glass. If the bulb won’t unscrew, double-check that the power is off and the bulb isn’t hot; use a gloved hand and only gentle pressure. If you see discoloration, cracks, or scorching around the socket, stop and consult a professional to avoid electrical hazards. Finally, never operate the oven with a damaged bulb or cover.
Authority sources and test verification
For reliable guidance, refer to authoritative sources like the U.S. Department of Energy, the National Institute of Standards and Technology, and the Consumer Product Safety Commission. These sites provide general safety standards for electrical components and household appliances. After replacing the bulb, gently test the light with the oven door open (while powered off) to confirm proper seating, then reassemble the oven and power it on to verify illumination. Keeping a log of the bulb type and replacement date can help with future maintenance and warranty considerations.
- Energy.gov (EERE) — Lighting safety and efficiency guidance: https://www.energy.gov/energysaver/lighting
- NIST.gov — Standards for appliance components and electrical safety: https://www.nist.gov/
- CPSC.gov — Consumer safety information for household appliances: https://www.cpsc.gov/
Final notes from Bulb Fix
The Bulb Fix team recommends following the manufacturer’s recommendations for bulb type and base, and treating the replacement as a small safety task rather than a rushed chore. By selecting the correct bulb, using proper protective gear, and verifying the fixture’s integrity after installation, you maximize both safety and performance. This practical approach aligns with Bulb Fix guidelines to help homeowners complete a reliable oven bulb change with confidence.
Tools & Materials
- Replacement oven bulb (appliance-rated, same base as original)(Check your oven model for base type (e.g., E26, E14) and any wattage rating specified by the manufacturer)
- Oven mitts or heat-resistant gloves(Protect hands from heat and glass; keep grip steady)
- Dry towel or microfiber cloth(Catches small glass fragments and keeps the bulb from rolling away)
- Safety glasses(Optional for extra eye protection when handling glass)
- Small screwdriver(Needed if your access panel uses screws)
- Stable ladder or step stool(Ensure it’s on a flat surface and fully opened with rails / non-slip feet)
- Owner’s manual or model number reference(Helpful to confirm base type and bulb specifications)
Steps
Estimated time: 10-20 minutes
- 1
Power down and prep
Turn off the oven at the wall switch or circuit breaker. Allow the interior to cool for at least 15 minutes to avoid burns. Move racks aside and lay a dry towel on the floor or within easy reach to catch the bulb if it slips. Put on oven mitts to protect your hands.
Tip: Use a timer to ensure the interior has cooled completely before proceeding. - 2
Access the bulb panel
Open the oven door and locate the bulb access panel on the interior wall or behind a glass cover. If screws secure the panel, use the appropriate screwdriver to remove them and set them aside in a small container so they don’t get lost.
Tip: Take a quick photo of the cover orientation before removal to help with reassembly. - 3
Remove the old bulb
Gently rotate the bulb counterclockwise with a gloved hand until it releases from the socket. If the bulb is held by a retaining ring, loosen it before twisting. If the bulb is broken, carefully remove shards with gloves and a stiff piece of cardboard, then vacuum up any remaining glass.
Tip: Do not force a bulb if it won’t budge; apply a little pressure and back off if resistance increases. - 4
Install the new bulb
Inspect the new bulb’s base to ensure it matches the socket. Align the base with the socket and thread clockwise until snug. Avoid over-tightening, which can strip the socket or crack the bulb glass.
Tip: If the base doesn’t seat smoothly, double-check that you removed the protective wrap and that the base is clean. - 5
Reassemble and test
Replace the bulb cover or panel and secure screws if present. Reinsert any racks you moved, then restore power and test the light by opening and closing the oven door. Ensure the bulb lights consistently without flickering.
Tip: Watch for a stable light and listen for any crackling sounds that indicate a faulty installation.
Got Questions?
Can I use any bulb in my oven?
No. Oven bulbs are appliance-rated and designed for higher heat and specific socket bases. Using a non-appliance bulb can overheat and fail prematurely. Always check the manufacturer’s guidance for base type and wattage.
Oven bulbs must be appliance-rated and match the socket type; using a regular bulb can cause heat damage and failure.
Is it safe to change an oven bulb when it’s still warm?
No. Wait for the oven to cool completely before attempting replacement to avoid burns. If the bulb has recently been on, give it extra time and use gloves to protect your hands.
Always wait for the oven to cool before changing the bulb.
What wattage and base should I look for?
Consult your oven’s manual for the exact wattage and base type. Typical appliances use an appliance-rated bulb with a common base, but models vary. If in doubt, contact the manufacturer or check the model’s support page.
Check the manual for the exact bulb wattage and base type.
What if the bulb won’t unscrew or is stubborn?
Power off and let the oven cool. Apply gentle pressure with a gloved hand; avoid forcing the bulb. If it remains stuck, stop and seek professional help to prevent socket damage.
If the bulb won’t come out, power off and gently try again; if still stuck, get help.
Should I replace the bulb cover at the same time?
Only replace the cover if it’s damaged or cracked. The bulb alone is usually replaceable; inspect the cover for cracks and replace if needed to maintain oven safety and proper sealing.
Replace the bulb unless the cover is damaged; check it for cracks.
Do I need to unplug the oven or switch off the circuit?
Power off at the oven’s switch or the circuit breaker. For built-in ovens, turning off the circuit ensures no residual power while you work.
Turn off power at the breaker if possible, then work cautiously.
Watch Video
Key Points
- Power off and cool the oven before starting
- Use appliance-rated bulbs with the correct base
- Handle the bulb with gloves and avoid over-tightening
- Test illumination after reassembly and power restoration