How to Replace an Oven Light Bulb: A Practical Guide
Learn how to safely replace an oven light bulb with practical steps, safety tips, and maintenance guidance. This Bulb Fix expert guide helps homeowners and DIY enthusiasts perform a correct light bulb oven replace.

Goal: Safely replace an oven light bulb by confirming the correct appliance bulb type for your model, powering down and cooling the oven, removing the bulb cover, exchanging the bulb, and testing the light. Gather a replacement bulb, gloves, and basic tools. This guide includes safety tips, compatibility checks, and troubleshooting basics.
Why replacing the oven light bulb matters
A burnt or dim oven light can hide important details inside the cavity, making it harder to monitor baking progress and check for spills or hotspots. The light bulb oven replace is a routine maintenance task that homeowners can perform with common tools and a little care. By understanding why bulbs fail and how to choose a compatible replacement, you’ll save time, reduce cooking surprises, and avoid unnecessary pan handling in a hot oven. Oven bulbs are built to endure higher temperatures than standard household bulbs, but they can still fail due to heat cycles, vibrations, or poor connections. Always use an appliance-rated bulb and respect the wattage limit your model specifies. Following these guidelines helps preserve oven performance while maintaining safety in the kitchen.
Understanding oven bulb types and compatibility
Oven bulbs fall into a few broad categories, and getting the right type is essential for safe operation and consistent brightness. Most ovens require an appliance-rated bulb designed to withstand repeated heating and cooling. The base and size vary by model; some units use screw-in bases, while others rely on pin or bayonet bases. Before buying a replacement, check the current bulb for markings (wattage, voltage, base type) or consult the owner’s manual. If you cannot read the markings, use the model number to look up the correct bulb type from the manufacturer’s support site. If LEDs or halogen variants are offered, ensure they are compatible with the oven’s electrical design. In short, match the bulb’s wattage, base, and appliance rating to your specific oven to avoid premature failure or heat issues.
Safety first: hazards and precautions
Replacing an oven bulb carries electrical and thermal risks. Always ensure the oven is powered off completely; disconnect from the wall or switch off the circuit at the breaker when possible, and allow the interior to cool for at least 15–30 minutes. Wear gloves and safety glasses to protect against broken glass and skin contact with hot surfaces. Do not replace bulbs with the door or racks still in place if you’re uncertain about the safety of reaching inside. If the bulb breaks, avoid touching shards with bare hands; use tongs and a stiff brush to remove pieces and seal the area to prevent contamination.
Reading the bulb label and selecting a replacement
To pick the right replacement, read the markings on the current bulb or the oven’s labeling. Note the wattage (often 15–40 watts for typical ovens, though higher wattage may exist), the voltage (usually 120V in many regions), and the base type. Always choose an appliance-rated bulb intended for ovens and avoid decorative bulbs or non-appliance variants. If the current bulb does not show markings, refer to the model number in your manual or on the oven’s interior label to determine the correct specification. Keeping this information handy helps prevent returns and ensures the new bulb lasts as long as possible.
Tools and preparation to reduce friction
Prepare a tidy workspace so the replacement goes smoothly. Gather a clean, dry cloth, a pair of gloves, safety glasses, a flashlight, and the replacement bulb. If your oven uses a decorative cover, you may need a small screwdriver to remove screws. Clear the area around the oven and place any removed parts on a protected surface to avoid scratches. Having everything within reach minimizes the chance of dropping the bulb or losing small parts.
Common mistakes and how to avoid them
Common missteps include using a non-appliance bulb, misreading wattage, or forcing a bulb into a socket. Avoid touching the new bulb with bare fingers; the oils can shorten its life or cause hotspots. Do not overtighten the bulb or force the cover; use a gentle, hand-tighten approach. If the bulb won’t light after installation, recheck the socket contacts and ensure the door switch is functioning. If the oven’s light still doesn’t come on, the problem may lie beyond the bulb and require service.
Post-replacement care and maintenance tips
After a successful light bulb oven replace, reassemble any covers, restore power, and test the light. Wipe the glass cover with a lint-free cloth to remove fingerprints and smudges. Record the bulb’s wattage and installation date in a home maintenance log to establish a replacement timeline. Consider keeping a spare bulb on hand and checking the socket’s condition periodically for signs of corrosion or looseness.
Quick maintenance plan to extend bulb life
Design a simple maintenance routine to extend bulb life. Inspect the interior light every 3–6 months for dimming or flickering; replace promptly to avoid failing during cooking. When you replace bulbs, do so with the oven at a safe, powered-down state and store spare parts in a dry, cool place away from heat sources. This proactive approach reduces last-minute scrambles and keeps your kitchen running smoothly.
Tools & Materials
- Replacement appliance bulb (oven-rated)(Check wattage and base type in manual or on existing bulb)
- Gloves (cotton or nitrile)(Wear to prevent oils on bulb)
- Safety glasses(Protect eyes from glass shards)
- Soft cloth or microfiber cloth(To wipe lens or glass cover)
- Screwdriver (Phillips or flathead)(Needed for some models with screw-on covers)
- Flashlight/headlamp(Improve visibility inside the oven)
- Step stool or stable ladder(Use only if needed to reach the oven safely)
- Owner's manual or model reference(Helpful for bulb specification)
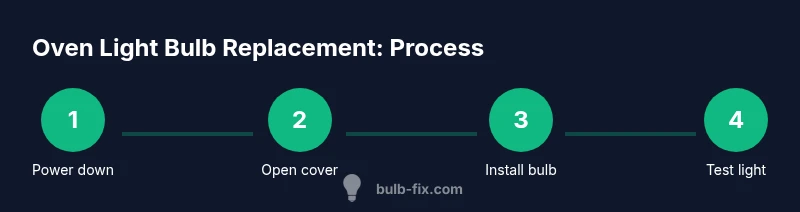
Steps
Estimated time: 15-30 minutes
- 1
Power down and cool the oven
Ensure the oven is completely off. If possible, unplug the unit or switch off the circuit at the panel. Allow the interior to cool for at least 15–30 minutes before touching any components.
Tip: Unplug or switch off at the breaker to minimize risk of electric shock. - 2
Open door and locate the bulb cover
Carefully open the oven door and locate the small glass lens or metal cover over the bulb. If there are screws, use the appropriate screwdriver to remove them.
Tip: Use a flashlight to improve visibility; avoid pressing on internal components. - 3
Remove the old bulb safely
Put on gloves, gently twist or unclip the bulb from its socket, and lift it out. If the bulb is broken, avoid direct contact with shards and use kitchen tongs to remove pieces.
Tip: Do not squeeze or yank; grip the base, not the glass. - 4
Check bulb specs and compatibility
Inspect the current bulb or the oven label to confirm wattage, base type, and voltage. Only install a replacement rated for appliance use in ovens.
Tip: If in doubt, consult the owner's manual or contact the manufacturer. - 5
Install the new bulb
Carefully insert the new appliance bulb into the socket and twist until snug. Do not overtighten; finger-tight is usually enough.
Tip: Handle the bulb with gloves to avoid skin oils affecting longevity. - 6
Reassemble, test, and complete
Replace the cover or screws, restore power, and turn on the oven light to verify function. If it fails, recheck the bulb type and socket contact.
Tip: If the light still doesn’t work, there may be a socket issue or wiring fault.
Got Questions?
Can I replace an oven light bulb while the oven is still plugged in?
No. Always disconnect power before replacing. Unplug the unit or switch off at the breaker, then wait for the oven to cool.
No. Always unplug or switch off the breaker and let it cool before replacing the bulb.
What type of bulb should I use for my oven?
Check the owner’s manual or the current bulb for compatibility. Use an appliance-rated bulb that matches the wattage, base, and voltage specified by the manufacturer.
Check your manual or the bulb for the right appliance-rated bulb.
My oven light won’t turn on after replacement. What should I check?
Verify the new bulb is correctly seated, check the door switch as a possible fault, and inspect the socket for corrosion. If necessary, test with a known-good bulb.
Make sure the bulb is seated, the door switch works, and the socket is clean. If it still fails, consider contacting support.
Is it safe to replace the bulb with the oven door open?
Power must be off; do not rely on a warm or hot oven. Open door only after confirming power is disconnected.
Safer to replace with power off and door closed to avoid burns or shock.
How often should oven bulbs be replaced?
Oven bulbs are designed to burn out over time. Replace as needed when you notice the light failing.
Bulbs fail over time; replace when you notice the light is dim or out.
Watch Video
Key Points
- Power down before starting any replacement
- Match wattage and base to your oven model
- Wear gloves when handling bulbs
- Test the light after reassembly