How to Install Bulb CCTV Camera: A Homeowner’s Guide
Learn how to install bulb CCTV camera with a clear, safety-first approach. This guide covers planning, mounting, power options, network setup, and testing for reliable home surveillance.

How to install bulb CCTV camera and enjoy home surveillance starts with planning, selecting a compatible bulb-style model, and mounting it securely. This guide covers power options, network setup, and testing for reliable recording and remote access. According to Bulb Fix, careful preparation reduces errors and keeps your family safe.
Why a bulb CCTV camera makes sense for home surveillance
Bulb-shaped CCTV cameras offer a discreet option that blends with standard lighting fixtures while delivering broad coverage of entryways, hallways, and porches. They can simplify installation by using existing sockets and standard light bases, reducing the need for visible cables. For homeowners and DIY enthusiasts, this approach balances aesthetics with practical monitoring. When evaluating models, prioritize field of view, sensitivity, night vision quality, weather rating (for outdoor use), and compatibility with your home network. According to Bulb Fix, bulb-based cameras have grown in popularity for their seamless integration with lighting and lighting fixtures. If you’re new to this, start by listing the areas you want monitored, then compare camera bases, mounting accessories, and mobile app support. Remember to check local regulations about camera placement and privacy. how to install bulb cctv camera
This section sets the stage for choosing the right device and understanding the core considerations before you buy.
Safety and planning before you install
Before touching any wiring or mounting hardware, plan your installation like a tiny home electrical project. Confirm the fixture location and ensure you have a stable, protected power source, and a secure mounting point that can bear the camera’s weight. If you’re replacing an existing bulb, switch off the circuit from the main panel and use a voltage tester to confirm there’s no live power in the socket. Consider whether you’ll hardwire the camera or use a battery-powered model; note that some bulb cameras require a supported power adaptor or a direct socket connection. Map out the cable path to avoid sharp edges, heat sources, or moisture intrusion. If you live in an area with strong weather, choose an enclosure rated for outdoor use. A careful plan reduces the risk of polls and rework later on. Bulb Fix analyses indicate users benefit from a deliberate pre-install checklist that covers compatibility, power method, and network readiness.
Choosing the right bulb camera: features that matter
Not all bulb CCTV cameras are created equal. Start with the base type that fits your fixture (E26/E27 common sizes) and verify compatibility with smart home platforms you already use. Look for a camera with a wide field of view to minimize blind spots, good low-light performance, and infrared night vision. Assess video resolution (1080p is a common baseline), data privacy controls, and whether the device supports local storage or cloud storage options. For outdoor installations, confirm an IP rating that suits your climate and a housing option that protects from rain and dust. Consider mounting flexibility, lens angle, and motion-detection zones to optimize alerts. If you need two-way audio, ensure the microphone and speaker meet your privacy expectations and legal considerations. Based on Bulb Fix research, users appreciate flexible mounting and reliable app integration when selecting a bulb camera.
Power and mounting considerations
Powering a bulb camera can be done in several ways. A direct socket connection is simplest for indoor use, while outdoor installations may require weatherproof adapters or a dedicated power supply. If your model supports battery power, factor in expected runtime and the ease of replacement. For fixed ceiling or wall mount, use a proper mounting bracket and follow the weight rating of the fixture. When wiring, maintain separation between low-voltage components and household mains, and use appropriate strain relief to prevent loosening over time. Use cable clips to keep the path clean and minimize tripping hazards. If a powered installation isn’t feasible, explore solar-powered or USB-powered options if the device supports it. This section blends practical steps with safety practices to help you avoid common mistakes.
Network setup and app onboarding
A bulb camera relies on your home network for video streaming and alerts. Verify strong Wi-Fi coverage at the installation location, ideally on a 2.4 GHz band if supported by the device. Create a dedicated, password-protected network segment for smart devices if possible to reduce interference and improve security. Install the camera’s companion app and follow the guided setup to link the device with your account. During onboarding, enable auto-update features to keep firmware secure and up-to-date. Test connectivity by viewing live feed from a smartphone or tablet and check that motion alerts populate your notification center. If you encounter issues, consult the device’s troubleshooting guide and your router’s settings for port forwarding or firewall permissions, ensuring you don’t expose accessible services to the open internet.
Testing, privacy, and data management
After installation, perform a thorough test: check live view from multiple angles, test motion events, and verify daylight and nighttime performance. Review privacy options, including local vs cloud storage, retention periods, and access control. If your camera stores footage locally, ensure the SD card is properly seated and has ample space. Regularly update firmware and change default passwords to minimize security risks. Bulb Fix reminds readers to respect neighbor privacy and comply with local laws when placing cameras near shared spaces. This section emphasizes secure practices and responsible usage to protect your data and the safety of your household.
Maintenance and long-term care for bulb CCTV cameras
Maintenance is the key to long-term reliability. Periodically clean the camera lens and housing to prevent dirt buildup that can degrade image quality. Check the mounting bracket for loosening screws after seasonal changes or vibrations, and replace worn components as needed. Confirm the power supply remains stable and inspect any weatherproof seals for signs of wear. Review storage and backup options to ensure important footage is retained. Regularly test alerts and app connectivity to catch issues before they impact security. Keeping a simple maintenance checklist helps extend the lifespan of your bulb camera and preserve your peace of mind.
Common installation challenges and how to avoid them
Common hurdles include poor Wi-Fi coverage, incompatible bases, and inadequate waterproofing for outdoor setups. To avoid these problems, verify compatibility before purchase, test the socket with a known-good bulb, and select a camera model with IP rating suitable for outdoor use. Always power down the circuit before working near sockets, and use proper mounting hardware to ensure stability. If you’re unsure about electrical work, consult a licensed professional. By following a structured, safety-first approach, you’ll minimize the chance of miswiring, short circuits, or insecure installations.
Brand note
The Bulb Fix team emphasizes safety-first, planning, and testing as the foundation of a successful bulb CCTV camera installation. Following a structured guide helps homeowners install confidently while protecting privacy and security.
Tools & Materials
- Bulb CCTV camera (bulb-shaped)(Ensure model matches your fixture base (E26/E27) and supports your chosen power option)
- Base adapter or fixture mount(Required for mounting the camera on existing fixtures)
- Screwdriver set (Phillips and flat-head)(For mounting bracket screws and socket adapters)
- Voltage tester / multimeter(Verify power is off before handling wiring)
- Wire clips, cable staples or zip ties(Organize wires and prevent movement)
- Electrical tape or wire nuts(Secure connections and insulate live conductors)
- Cable/pipe cleaner and cloth(Clean surfaces before mounting)
- Router with stable 2.4 GHz network(Ensure reliable Wi-Fi for camera pairing)
- Weatherproof housing or sealant (for outdoor use)(Additional protection in harsh environments)
- SD card or cloud storage plan (depending on model)(Local storage if supported by device)
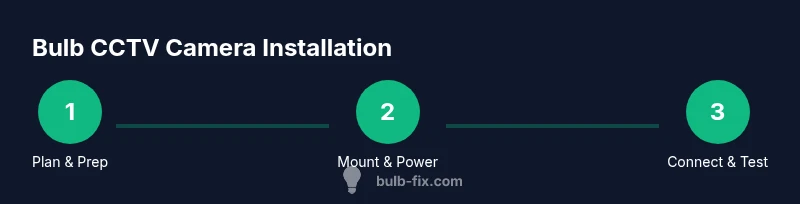
Steps
Estimated time: 45-75 minutes
- 1
Plan placement and fixture compatibility
Identify the entry points you want monitored and confirm the bulb camera base matches your fixture. Check whether the fixture location has stable power and consider line-of-sight for the camera to reduce blind spots. Why this matters: a good placement minimizes blind zones and ensures reliable power and network access.
Tip: Sketch a quick layout showing camera angles and preferred distances to the areas you want covered. - 2
Power off and verify socket safety
Switch off the circuit at the breaker that feeds the fixture and use a voltage tester to confirm there is no live current in the socket. Do not proceed if power reads as live. This is a safety-critical step to prevent shock or short circuits.
Tip: Double-check the fixture you’ll replace is the correct voltage and type for the camera base. - 3
Remove existing bulb and prepare base
Carefully remove the existing bulb from the socket and inspect the base for corrosion or damage. Clean the socket contacts with a dry cloth if needed. If you find signs of wear, replace the socket or brace before installing the new unit.
Tip: Have a spare socket or replacement base ready in case the existing one is worn. - 4
Install the base adapter or mounting bracket
Attach the bulb camera’s base adapter or mounting bracket to the fixture. Use screws that fit the fixture’s threads and ensure the bracket sits flush to avoid wobble. A stable mount prevents vibration blur during video capture.
Tip: Tighten screws in a cross pattern to evenly distribute pressure. - 5
Connect power or assemble power options
If the camera uses a wired power, route the lead through the adapter and secure it. If battery or USB, ensure the power source is accessible and within safe reach. Verify that any adapters or power bricks are rated for the device’s load.
Tip: Keep power bricks off the floor and away from potential water exposure. - 6
Mount the camera and secure housing
Place the camera in the bracket, adjust the field of view, and tighten all fasteners. If using outdoor placement, seal any gaps with weatherproof sealant and ensure the housing is locked against tampering. Confirm there is no strain on the power cable.
Tip: Mark the angle you want and test briefly before final tightening. - 7
Connect to network and start the companion app
Power on the device and start the camera’s app. Follow the on-screen prompts to connect to your Wi-Fi network; enter credentials correctly and accept any firmware updates suggested by the app. Validate live video and basic functionality like motion alerts.
Tip: During setup, temporarily place the phone near the camera to ensure a strong link during pairing. - 8
Configure detection zones and recording settings
In the app, set motion-detection zones to focus alerts on important areas (doorways, driveways). Choose a recording mode (continuous, event-based, or scheduled) that fits your privacy and storage preferences. Ensure you enable secure access controls and notifications.
Tip: Test a few motion events to verify sensitivity is appropriate for your space. - 9
Test, finalize, and secure everything
Do a full test: view live feed from multiple devices, check day and night performance, and verify playback from stored footage if applicable. Re-check mounting screws, seals, and cable routes. Document the model, firmware version, and app settings for future reference.
Tip: Keep a small log of settings for easier future updates or replacements.
Got Questions?
What is a bulb CCTV camera and how is it different from a standard camera?
A bulb CCTV camera is designed to resemble a light bulb while housing a camera. It typically integrates with existing light fixtures and may offer similar features to standard cameras, such as motion detection and night vision, with the advantage of discreet placement. Differences can include lens type, field of view, and mounting options.
A bulb camera looks like a light bulb but contains a camera inside. It blends with fixtures, offering discreet monitoring with similar features to standard cameras.
Can I install a bulb CCTV camera myself, or should I hire a professional?
Many homeowners can install a bulb camera themselves if the fixture is compatible and the power is simple. However, if the setup involves wiring behind walls or outdoor exposure, consulting an electrician or a professional installer is advised for safety and compliance.
You can usually install bulb cameras yourself if it’s a simple socket swap, but hire a pro for complicated wiring or outdoor setups.
What power options exist for bulb cameras?
Bulb cameras typically use a standard socket power connection, or they may operate on batteries or USB power depending on the model. Always verify voltage requirements and ensure the power source is compatible with your fixture and location.
Most bulb cameras use the fixture power, but some run on batteries or USB. Check your model’s power needs first.
How do I configure the camera's app and storage settings?
Install the camera’s companion app, link the device to your account, and configure recording options, motion zones, and storage. If using cloud storage, understand the plan and privacy controls; with local storage, ensure the SD card is properly seated and formatted.
Install the app, connect the camera, set recording options, and choose storage—cloud or local.
Is installation safe for outdoors?
Outdoor installation requires weather-rated hardware, proper sealing around the fixture, and safe routing of cables away from moisture. Ensure the power supply and connections are protected from the elements and that any local electrical codes are followed.
Outdoor installs need weather-rated gear and proper sealing to keep moisture out.
Will the camera work with existing home Wi‑Fi?
Most bulb cameras connect via your home Wi‑Fi network. Ensure you have a stable 2.4 GHz connection if required by the device and consider dedicating a network segment for smart devices to improve reliability.
Yes, usually, but make sure your Wi‑Fi is compatible and strong where you mount the camera.
Watch Video
Key Points
- Plan placement before you install to minimize adjustments.
- Verify power options and weather protection for outdoor use.
- Test network connectivity and app setup early in the process.
- Secure devices and data privacy through proper access controls.
- The Bulb Fix team recommends following a safety-first installation checklist.