How to Take Bulb Out: Safe DIY Bulb Removal
A practical, safety-focused guide on how to take a bulb out, covering screw-in, bayonet, and pin-based bulbs, with tips, tools, and disposal guidance from Bulb Fix.

You will learn how to take bulb out safely, covering common bulb types, essential safety steps, and what to do before and after removal. This guide highlights practical techniques, the right tools, and how to avoid damaging the socket or fixture. By following these steps, you’ll remove bulbs without risk of shock or breakage.
Why learning how to take bulb out matters
Knowing how to take bulb out safely matters for every homeowner. It reduces the risk of electric shock, burns from hot glass, and broken bulbs that can scatter sharp shards. A proper removal preserves the socket and surrounding fixture, and it ensures you can replace bulbs without damage. The Bulb Fix team emphasizes calm, deliberate actions, especially when fixtures are mounted high or in dark corners. By practicing these techniques, you also extend bulb life by avoiding oil transfer from your skin, which can shorten filament life on certain bulb types. In short, safe removal is a foundational DIY skill for any home lighting project.
Safety first: protecting yourself and the fixture
Before you touch any bulb, switch off the power at the switch and, if possible, unplug the fixture or remove its fuse from the circuit. Wear protective gloves to avoid cuts if the bulb shatters, and eye protection if you’re working overhead. Keep a clear workspace and have a bucket or tray ready to catch any debris. Avoid touching the glass with bare hands, since sweat or oils can cause glazing issues on some bulbs. If the fixture is hot, wait for it to cool down completely. These steps reduce both personal risk and potential socket damage.
Different bulb types and bases you'll encounter
There are several base types you might meet when taking bulbs out. The most common are the Edison screw bases (ES/E26 or E27) which unscrew counterclockwise. Bayonet bases require a small twist and pull motion, while pin-based bulbs (GU10, G4) may need a gentle pull or a push-and-turn action. LED bulbs come in many base styles, and some compact fluorescents (CFLs) have additional safety considerations due to mercury content. The key is identifying the base before applying force so you use the correct removal method, preventing socket damage and bulb breakage.
Planning your approach: assessing the fixture and base
Survey the fixture to determine if you’re dealing with a ceiling, wall, or table lamp. Check whether a shade, glass cover, or guard will need to be removed to access the bulb. If you’re dealing with a fragile or recessed socket, consider using a tool like a bulb changer or a simple pair of pliers with protective tape to avoid slipping. Always confirm the replacement bulb matches the base and wattage rating found on the fixture label or the old bulb. When you’re ready, position yourself for safe access and ensure your hands are dry.
Step-by-step overview for screw-in bulbs (common case)
Screw-in bulbs are the most straightforward to remove. Begin by turning off power and letting the bulb cool. Gently grip the bulb near its base with a finger and thumb, then rotate counterclockwise until it loosens. If it’s stiff, pause, apply a tiny amount of even pressure, and try again—never use excessive force. Once free, tilt the bulb away from your face and slide it out of the socket. Clean the socket area with a dry cloth before inserting a new bulb to remove dust or oils that could affect contact.
Step-by-step overview for bayonet and pin-based bulbs (alternative methods)
Bayonet bulbs require a small backward twist while keeping the base aligned with the socket, then a straight pull. Pin-based bulbs (GU-type) may need a slight press on the base to release locking mechanisms or a gentle wiggle to disengage pins from slots. Always support the bulb while removing it to prevent the glass from shattering. If the bulb feels stuck, check for a retaining ring, clip, or safety feature that may need to be released before removal. After removal, inspect the socket for corrosion, bent contacts, or corrosion that could affect future operation.
Troubleshooting common issues when removing bulbs
If a bulb won’t twist or pull out, pause and re-check that power is off and the bulb is cool. Try a little extra grip with a rubber-gloved hand, or use a bulb-tipping tool designed for tough removals. If the bulb head is broken or shattering is possible, avoid direct contact with shards and use thick gloves and tweezers to remove fragments. For stuck bulbs, avoid aggressive prying; instead, seek a repair-friendly approach, like loosening the connection by gradually reversing the threads or base mechanism. If you notice arcing, burning smells, or melted plastics, discontinue and consult a professional.
Replacing a bulb after removal and disposing safely
With the old bulb removed, verify the fixture’s wattage rating and select a replacement of the same base type. Insert the new bulb slowly and avoid touching the glass with bare fingers; oils can shorten bulb life. Tighten the bulb until snug—do not overtighten, as this can strip the socket or break the bulb. If a bulb breaks during removal, carefully collect shards with stiff gloves and place them in a rigid container for disposal. Always rinse and dry the hands after handling broken glass.
Quick checks after completion and energy considerations
Reinstall any shades or guards, restore power, and confirm the bulb lights without flickering. If you installed an LED replacement, ensure compatibility with dimmers or smart switches to avoid buzzing or dimming issues. Finally, dispose of any broken glass and old bulbs according to local regulations. Keeping a small, organized toolkit near your fixtures will make future bulb removals faster and safer. This simple maintenance step can reduce energy waste and keep your lighting reliable.
Tools & Materials
- Safety gloves (nitrile or leather)(Protect hands from sharp edges and oils; choose snug-fitting gloves.)
- Safety glasses(Eye protection in case of breakage.)
- Stable ladder or chair(Use a sturdy, well-placed surface; have a spotter if possible.)
- Replacement bulb with same base and wattage(Match base type (E26, GU10, etc.) and wattage rating.)
- Soft cloth or microfiber cloth(Wipe away dust from the socket area before reinserting.)
- Flashlight(Good for dim fixtures or high ceilings.)
Steps
Estimated time: 15-25 minutes
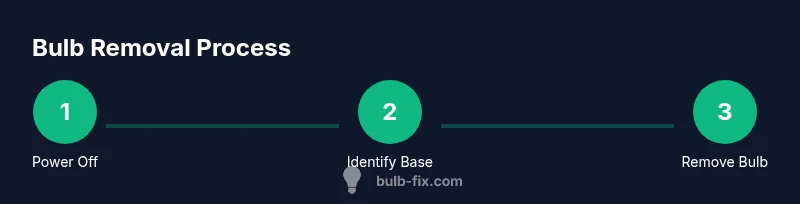
- 1
Power off and prep
Turn off the fixture at the wall switch, and unplug if possible. Set up your ladder or chair and put on gloves and eye protection.
Tip: Wait a few moments for any residual heat to dissipate before touching the bulb. - 2
Identify the bulb type
Look at the base and check for screw-in, bayonet, or pin-based design. Confirm the wattage and base to avoid installing the wrong bulb.
Tip: If the fixture has a shade, remove it carefully to access the bulb without dropping parts. - 3
Remove screw-in bulb
Grip the bulb firmly near the base and rotate counterclockwise until it loosens. Keep the bulb at an angle to avoid hitting the shade or fixture.
Tip: If it’s tight, pause and apply steady, even pressure—don’t force the bulb. - 4
Remove bayonet or pin-based bulb
For bayonet bases, twist slightly and pull outward. For pin-based bulbs, press or wiggle as needed to release the locking mechanism.
Tip: Support the bulb with your other hand to prevent dropping it. - 5
Inspect and clean
Check the socket contacts for corrosion or debris. Wipe with a dry cloth if needed before inserting the new bulb.
Tip: Dry sockets ensure better contact and longer bulb life. - 6
Insert replacement and test
Align the base with the socket, insert, and gently twist or push until secure. Restore power and test the light.
Tip: If flickering occurs, re-seat the bulb or try a new bulb of the same base.
Got Questions?
Is it safe to remove a bulb while it’s still hot?
No. Wait for the bulb to cool completely to avoid burns or shattering. If you must handle it sooner, use protective gloves.
No. Wait until the bulb cools to avoid burns or breaking the glass.
What should I do if the bulb won’t twist loose?
Ensure power is off and the bulb is cool, then apply steady, even pressure. If still stuck, try a light grip with gloves or consult a professional.
Make sure power is off and the bulb is cool; then apply gentle, steady pressure. If it won’t loosen, consider professional help.
Can I use oil or lubricant to loosen a stuck bulb?
Lubricants are not recommended for bulb bases and can damage sockets. Use proper grip and alternate removal methods instead.
Lubricants aren’t recommended; use steady grip and alternative removal methods.
What bases are most common for household bulbs?
Most homes use Edison screw bases (E26/E27) and some use bayonet or pin-based bases like GU10 or G4. Check the base type before buying replacements.
Common bases include Edison screw, bayonet, and pin-based types like GU10.
What should I do if the bulb breaks while removing it?
Wear gloves, carefully collect shards with stiff paper or tliers, and dispose in a rigid container. Clean the socket and surrounding area before inserting a new bulb.
If it breaks, wear gloves and carefully pick up shards; dispose safely and clean the area.
Do I need to replace the fixture after removing a bulb?
Usually not. Replacing the bulb is all that’s necessary unless the socket or wiring shows damage, in which case consult a professional.
Usually you just replace the bulb. If you notice damage, call a professional.
Watch Video
Key Points
- Power off before touching any bulb.
- Identify base type to choose removal method.
- Use proper grip and gentle force; do not twist aggressively.
- Inspect socket for damage and clean before replacement.
- Dispose of broken bulbs safely and match wattage on replacement.