Replace Brake Light Bulb: A Homeowner's Guide
Learn how to replace a brake light bulb safely and efficiently. This guide covers identifying the correct bulb, tools needed, step-by-step replacement, safety tips, and disposal. Bulb Fix provides practical, homeowner-friendly instructions to keep your vehicle road legal and safer on the road.

You can safely replace a brake light bulb and restore proper signaling by identifying the correct bulb type for your vehicle, gathering a small toolkit, and following a clear, step-by-step process. According to Bulb Fix, verify the socket type before purchasing, handle bulbs with gloves to prevent skin oils from shortening bulb life, and test the light before finishing.
Why replacing a brake light bulb matters
Brake lights are the primary warning signal to drivers behind you. When a brake light bulb fails, you lose a critical safety cue that helps prevent rear end collisions. The Bulb Fix team emphasizes that maintaining fully functional signaling reduces risk and helps drivers respond in time. In many places a burned out brake light bulb can lead to a traffic ticket, so keeping your bulbs in good working order is not just a convenience but a legal responsibility. Beyond safety and law, a new bulb often means crisper rear visibility at night and in poor weather, helping you drive with confidence. This section explains how a simple bulb swap fits into broader vehicle maintenance and why homeowners should learn this basic repair. You will gain not only a working brake light but also a better understanding of your car lighting system and how to care for it long term.
Safety first: precautions when working on vehicle lights
Working on vehicle lighting involves basic electrical systems and glass bulbs, so safety comes first. Always turn off the engine, remove the key, engage the parking brake, and allow the area to ventilate. Wear gloves to prevent oils from your skin transferring to the glass, which can shorten bulb life or cause hot spots. If a bulb has recently been on, wait for it to cool before touching. Keep a clean, dry workspace and use a flashlight to inspect the housing for cracks, corrosion, or moisture. If you will be removing a trim panel or lens, do not use excessive force; prying too hard can crack the cover or damage clips. Finally, test the brake lights only after reassembly to confirm proper operation. Following these precautions minimizes risk and ensures the replacement goes smoothly, whether you are performing maintenance in a driveway or a garage. Bulb Fix highlights safety as the foundation of any DIY lighting task.
How to identify the correct replacement bulb
Start by checking your vehicle manual or the existing bulb for markings that indicate the base type and wattage. If the old bulb is present, take note of its shape and contacts, and look for any numbers on the glass or base. When buying a new bulb, match the socket base type and the number of filaments to the old bulb. If you cant read the markings, bring the old bulb to an auto parts store and ask for a matching replacement. The Bulb Fix team stresses that accuracy here saves time and reduces the risk of buying an incompatible bulb. In many cases the correct bulb is clearly marked on the packaging, but double-check in your manual to confirm.
Understanding bulb bases and socket variations
Brake light bulbs come in several base styles, including single and dual filament designs, and may use twist, bayonet, or plug-in sockets. The exact base affects how you align the bulb in the housing and how you connect the electrical contacts. Some vehicles require a particular base for the brake function and a separate base for the taillight function. Always verify base type before purchasing and inspect the socket for damage or corrosion. Bulb Fix notes that mismatched bases are a common source of frustration during DIY replacements, so take a few extra minutes to confirm compatibility.
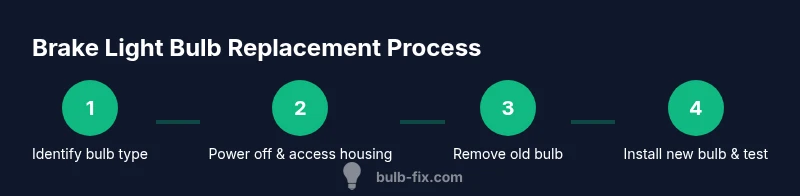
Step-by-step overview for brake light bulb replacement
A successful replacement follows a consistent sequence: access the bulb, remove the old bulb, inspect the socket, install the new bulb in the same orientation, reconnect any wiring, and test the brake light. Some models require removing a cover or trim piece, while others provide direct access through the trunk. If a factory seal or clip holds the lens in place, release it carefully to avoid cracks. After installation, perform a thorough test with the brake pedal and quickly inspect the lens for cracks or moisture. This overview aligns with safe practices and helps you anticipate potential hurdles. Bulb Fix reminds homeowners that patience and careful observation reduce the chance of accidental damage.
Common mistakes and how to avoid them
Common mistakes include touching the glass with bare skin, using excessive force to remove a stubborn bulb, and failing to test the circuit after installation. Oils from skin can shorten bulb life, so use gloves or a clean cloth when handling. Forcing a bulb into a mismatched socket can bend contacts and create intermittent signals. Always verify the bulb matches the socket and recheck the fit before reassembling. Another frequent error is neglecting the housing seal, which can introduce moisture and cause corrosion. By slowing down and following the steps, you minimize these risks and improve long-term reliability.
Troubleshooting after replacement
If the brake light still does not illuminate after replacement, recheck the fuse and wiring for damage or loose connections. Some vehicles require a quick reset after a bulb change, so reapply power gently and test again. If the light works intermittently, inspect for loose sockets, cracked lenses, or corroded contacts. In some cases, the issue lies with wiring rather than the bulb itself, and professional diagnostics may be warranted. Bulb Fix recommends a methodical approach: verify power, inspect connections, and substitute a known good spare bulb to isolate the fault.
Maintenance tips to extend bulb life
To extend the life of brake light bulbs, avoid touching the glass with bare fingers, replace bulbs in pairs when practical, and protect bulbs from moisture and vibration. Regularly inspect the housing for cracks and moisture, clean contacts, and keep the lens clear of dirt. Consider keeping a spare bulb in your emergency kit and checking all exterior lighting during routine vehicle checks. This proactive approach reduces the chance of a sudden failure on the road and keeps signaling reliable. Bulb Fix emphasizes that simple habits preserve safety and avoid last minute scrambles.
Recycling old bulbs and disposing safely
Used bulbs contain materials that can be recycled or responsibly disposed of. Do not throw broken bulbs into regular trash; place intact bulbs in a bag and take them to an appropriate recycling facility or auto parts retailer that handles light bulb disposal. Some communities offer household hazardous waste collection events that accept automotive bulbs. Before disposal, ensure the bulb is cool and safely wrapped to prevent injury. By following local guidelines, you help reduce waste and protect the environment.
Tools & Materials
- Replacement brake light bulb(Bring a bulb that matches your car's socket type and wattage)
- Gloves (nitrile or latex)(Keep oils off the glass and avoid fingerprints on the bulb)
- Owner's manual(Check bulb type and service access for your model)
- Flashlight(Shine into the housing for visibility)
- Screwdriver or trim removal tool(If needed to remove access panel or lens)
- Towel or rag(Protect surfaces and catch any small parts)
- Safety glasses(Eye protection in case of lens shattering)
Steps
Estimated time: 30-45 minutes
- 1
Prepare the workspace and safety checks
Park on a flat surface, engage the parking brake, and turn off the ignition. Remove the key and allow the car to cool if the lights were recently on. Put on gloves to handle the bulb and avoid skin oils, and gather the tools you'll need before you start.
Tip: Never work on a hot bulb; give it time to cool and avoid cracking the glass. - 2
Access the brake light housing
Open the rear hatch or trunk to locate the brake light housing. Depending on the model, you may need to remove a trim panel or lens cover. Use a flashlight to illuminate the area and identify fasteners, clips, or a twist cap.
Tip: If a panel is difficult to remove, check for hidden screws around the edges and use a trim tool to avoid scratching. - 3
Disconnect the electrical connection
If there is a plug or connector on the bulb assembly, disconnect it gently by pressing the release tab and pulling straight out. Do not yank the wiring.
Tip: Keep the connector in a safe spot to avoid losing it during replacement. - 4
Remove the old bulb
Twist or pull the bulb out of its socket, depending on the style. Do not twist too hard to avoid damaging the socket. Note the orientation so you can install the new bulb the same way.
Tip: If resistance is high, apply slight pressure and rotate slowly rather than forcing it. - 5
Inspect the socket and housing
Check for corrosion, burns, or melted plastic around the socket. If you see damage, replace the socket or entire assembly instead of forcing a new bulb in. Clean the contacts if needed.
Tip: A clean contact improves electrical connection and longer bulb life. - 6
Install the new bulb
Insert or twist the new bulb into the socket with the same orientation as the old one. Ensure it sits firmly and does not wobble. Reconnect any electrical plug if you removed one.
Tip: Handle the new bulb by its glass only; avoid touching the glass with bare fingers. - 7
Test the brake light
With the car in park and the key out, manually press the brake pedal and observe the light. If available, turn on the ignition briefly to verify operation before reassembling the lens or panel.
Tip: Test from a safe distance and have a helper if possible. - 8
Reassemble and perform a final check
Secure the lens or trim panel, ensure all clips are seated, and close the hatch. Do a final test after a short drive to confirm reliability and road visibility.
Tip: Keep the old bulb in a safe place for verification or return if needed.
Got Questions?
Do I need to disconnect the car battery before replacing a brake light bulb?
In most cases you do not need to disconnect the battery, but it is a good safety measure if you will be working near exposed wiring. Turn off the ignition and remove the key before starting.
You usually don't have to disconnect the battery, but turning off the ignition is recommended before starting.
How can I tell if the bulb is burnt out?
If the brake light does not illuminate when you press the brake, or if you observe a dark or flickering filament when you remove the bulb, it likely needs replacement. Always verify with a test after installation.
If it doesn't light up when you brake, it might be burnt out; test again after replacement.
What if my vehicle uses a dual filament bulb?
Dual filament bulbs serve different functions; one filament for brake and another for taillight. Replacing requires matching the correct base and ensuring both circuits are connected. If in doubt, check your owner's manual.
If you have a dual filament bulb, make sure you replace both functions with the correct base.
Can I reuse a bulb that looks fine?
A visually intact bulb can still be burnt out internally. If in doubt, replace with a fresh bulb to ensure reliable signaling. Don't assume it is still good just because it looks fine.
Even if it looks fine, it may be burnt out inside, so replace it.
What should I do if the new bulb still doesn't work?
If the new bulb does not light, inspect fuses, connectors, and wiring for damage. A bad fuse or corroded connection is a common cause and may require professional inspection.
If the new bulb won't light, check fuses and wiring for issues.
Is it easier to install LED brake lights?
LED options exist but may require different bulb bases or adapters. Check compatibility with your vehicle electrical system and potential warranty implications before switching.
LED replacements can be more complex due to compatibility, so verify fit first.
Watch Video
Key Points
- Identify the correct bulb type before purchasing.
- Wear gloves and handle bulbs by the glass.
- Test the light after installation to confirm proper function.
- Check for damage in the socket and housing before installation.
- Dispose of old bulbs safely and recycle when possible.