Replacing a Blinker Bulb: A DIY Guide
Learn to replace a blinker bulb safely with practical steps, tools, and troubleshooting tips. Bulb Fix walks homeowners through bulb bases, socket checks, and testing after replacement for reliable signals.

Replacing a blinker bulb is a straightforward DIY task you can complete at home with basic safety gear and the right base type. This guide outlines the exact steps, tools, and safety precautions to ensure a reliable indicator light while avoiding common mistakes.
What replacing blinker bulb accomplishes and safety basics
Replacing a blinker bulb restores the essential signaling function of your vehicle or fixture, keeping you and others on the road safe. The task is generally quick and inexpensive when you have the correct bulb base and socket access. From a safety standpoint, power down the circuit before handling any bulb, wear eye protection, and avoid touching the new bulb with bare fingers since oil can shorten its life. According to Bulb Fix, safety comes first: verify the bulb base matches the socket, inspect for corrosion, and handle the bulb with clean gloves. This initial preparation reduces the likelihood of a fast-wearing bulb or a blown fuse after installation. In this article you will learn to identify the base type, select a compatible bulb, and complete a safe, effective replacement with confidence.
Bulb types and socket basics
Blinker bulbs come in several base configurations and sizes, and the base dictates how you install and remove the bulb. The two broad categories are screw-in bases and bayonet-style bases, with many automotive blinkers using a bayonet or a wedge base. Some sockets require you to twist the bulb to release it, while others accept a straight pull. Check your vehicle’s owner manual or the label on the lens housing to identify the exact base. It’s also wise to confirm the color and brightness match the original so you don’t surprise yourself with a different hue or intensity. If you’re replacing a bulb in a fixture rather than a car, the same principle applies: match base type, wattage, and size to the socket. Bulb Fix stresses the importance of compatibility to avoid premature failure and ensure consistent signaling.
Tools, safety gear and prep steps
Before you start, assemble a few essential items and safety gear. Have a replacement bulb with the correct base, safety glasses, work gloves, a clean cloth, a flashlight, and a minimal screwdriver if the housing uses screws. If you’re working on a car, consider disconnecting the negative battery terminal for extra safety, especially in tight engine bays. Keep a small container for old bulbs to avoid rolling or breaking glass. Proper prep reduces surprise during the actual bulb swap and makes the process smoother and safer. Bulb Fix also recommends reviewing the vehicle’s fuse box diagram to locate the specific blink relay and fuse in case you need to troubleshoot later.
Accessing the bulb housing
Access methods vary by vehicle and fixture. For many car blinkers, you’ll remove a cover panel or the plastic lens housing. Some models require you to pop the cover with a small flathead screwdriver (gently, to avoid scratches). In other designs, you’ll access the bulb by twisting a socket housing counterclockwise. If you’re dealing with a ceiling or wall fixture, remove the outer lens first and locate the bulb inside. Take notes of how many screws hold the housing, which direction the lens turns, and how the wiring is routed. Keeping track of these details prevents confusion when you reassemble.
Removing the old bulb and inspecting socket
With the housing open, carefully disconnect any wiring connector if it’s a plug-in style. Gently release the bulb by twisting or pulling straight out, depending on the base type. Inspect the socket for corrosion, burn marks, or melted plastic. If you see corrosion, you can clean the contacts with a dry brush or a clean cloth, but avoid applying liquids that might conduct electricity. If the socket looks damaged or melted, replace the socket or the entire assembly rather than forcing a new bulb into a compromised connection. A quick visual inspection now saves time later and improves reliability.
Installing the new bulb correctly
Take the replacement bulb by its base or use clean gloves to avoid skin oils. Align the base with the socket and insert or twist until it seats firmly. Do not force the bulb; if it doesn’t fit smoothly, re-check the base type and socket orientation. For bayonet-style bases, you’ll insert, then twist to lock. For screw-in bases, thread clockwise until snug without overtightening. After seating, reattach any connectors and ensure there is a snug seal so moisture can’t creep in. Replacing bulbs in a car or fixture is a precise operation; an improper seating can cause flickering or failure.
Testing and troubleshooting common issues
Restore power and test the blinker by activating the turn signal or hazard lights. If the bulb does not blink, re-check the bulb orientation and seating, inspect the fuse corresponding to the blinker circuit, and verify the relay if applicable. A bulb that glows but doesn’t blink may indicate a bad flasher relay or a faulty ground. If replacement bulbs continue to fail, look for wiring damage, loose connectors, or corrosion in the socket. Bulb Fix emphasizes testing as the final proof of a successful replacement and recommends keeping a spare bulb on hand.
Reassembly and post-checks
Reassemble the housing by reversing the removal steps: snap the lens or cover back into place, reattach screws if used, and ensure the seals are intact. Wipe away fingerprints and fingerprints on the bulb glass to avoid smudges that could affect surface heat dissipation. For car blinkers, reattach the battery terminal if you disconnected it. Finally, perform a quick field test by driving or moving the lights to ensure consistent operation. If anything looks off, revisit the steps or consult a professional.
Maintenance, safety & disposal
Keep your replacement bulbs in a dedicated box and avoid leaving them in areas with extreme temperatures. Regularly inspect socket contacts for corrosion and clean as needed. Dispose of old bulbs according to local regulations; many bulbs contain materials that need proper recycling. When performing any electrical work, never bypass safety features or remove protective covers. Keeping to a standard procedure lowers the risk of shock, injury, or a failed replacement in the future. Bulb Fix reminds homeowners to log the replacement in their vehicle maintenance records as a simple safety practice.
Authority sources and practical references
For guidance beyond hands-on steps, refer to official resources on lighting safety and electrical standards. The U.S. Department of Energy provides consumer-friendly guidance on bulb types and efficiency, while OSHA outlines general electrical safety practices. These sources help homeowners understand why precise bulb selection and safe handling matter. Bulb Fix’s approach combines practical steps with safety-minded research to support confident at-home maintenance.
- https://www.energy.gov/eere/ssl/led-lighting
- https://www.energy.gov/eere/ssl/leds
- https://www.osha.gov/
FAQ section (quick answers to common questions)
Tools & Materials
- Replacement blinker bulb (correct base for your vehicle or fixture)(Match the socket type and brightness; check the owner manual for base compatibility)
- Safety glasses(Protect eyes from shards and debris)
- Work gloves(Keep oils off the bulb and protect hands)
- Flashlight or headlamp(Illumination in tight spaces)
- Screwdriver set (flathead/Phillips)(Needed if housing uses screws)
- Clean cloth(Wipe socket contacts or lens seals gently)
- Dielectric grease (optional)(Use sparingly to improve contact and reduce moisture intrusion)
- Owner’s manual or vehicle guide(Helps identify base type and fuse location)
- Small container or tray(Store removed bulbs safely during the swap)
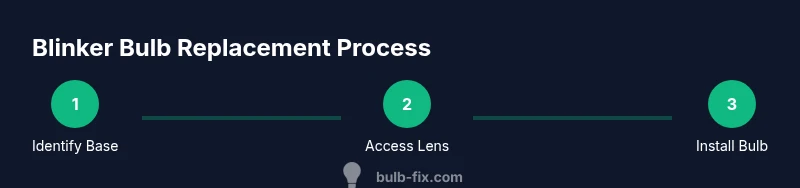
Steps
Estimated time: 15-25 minutes
- 1
Verify bulb base and location
Consult the manual or lens note to confirm the exact base type and the switch location for the blinker bulb. This ensures you buy the right replacement and access the bulb safely.
Tip: Double-check the base type (screw-in vs bayonet) before purchasing the bulb. - 2
Power down and secure the area
Turn off the vehicle or fixture and remove keys. If working on a vehicle, disconnect the negative battery terminal to reduce risk of shock or short circuits.
Tip: Allow any residual energy to dissipate before touching components. - 3
Access the bulb housing
Remove any protective lens or cover by following the manufacturer’s screws or clips. Use gentle, even pressure to avoid cracking the housing.
Tip: Keep track of screws and clips in a small tray to prevent loss. - 4
Disconnect and remove the old bulb
If the base is plug-in, unplug the connector; if it’s a twist-lock, rotate to release. Gently remove the bulb from the socket and inspect the contacts for corrosion.
Tip: Do not yank; apply steady pressure along the bulb axis for an even release. - 5
Inspect and prepare the socket
Check for corrosion, melted plastic, or bent contacts. Clean carefully with a dry cloth; consider applying a tiny amount of dielectric grease if contacts appear dry and clean.
Tip: If there’s visible damage, replace the socket assembly rather than forcing a new bulb in. - 6
Install the new bulb
Align the base with the socket and insert or twist until it seats firmly. Avoid touching the glass with bare skin; use gloves or clean hands and hold by the base.
Tip: For bayonet bases, a quarter-turn usually locks; for screw bases, snug is sufficient—don’t overtighten. - 7
Reconnect wiring and reseat the housing
Reconnect any connectors, reattach the lens, and secure all fasteners. Ensure seals are intact to prevent moisture intrusion.
Tip: Before reassembly, perform a quick visual check to confirm the bulb is fully engaged. - 8
Test the blink function and code checks
Power the circuit and trigger the blinker to confirm proper operation. If the bulb falters, re-check seating, fuses, and relays as needed.
Tip: If the bulb glows but doesn’t blink, the issue could be a faulty flasher relay or wiring fault. - 9
Finalize and secure
Reassemble any remaining housings and secure with screws. Clean fingerprints from glass to improve heat dissipation and ensure visibility.
Tip: Keep a spare bulb in the glove box or maintenance kit for quick future replacements.
Got Questions?
Do I need to disconnect the car battery before replacing the blinker bulb?
For most household fixtures, you don’t need to disconnect power if you’re careful. For cars, disconnecting the negative terminal provides extra safety when working around the electrical system. Always follow the vehicle manual and local safety guidance.
Usually you don’t have to disconnect the battery for a simple bulb swap in a fixture, but for a car you should follow the manual and disconnect the negative terminal for safety.
How do I know which bulb base to buy?
Check the owner’s manual or the label on the lens housing to identify the exact base type (e.g., screw-in vs bayonet). If you’re unsure, take the old bulb to an auto parts store or reference the housing diagram in the manual.
Look up the base type in the manual or on the lens label. If in doubt, bring the old bulb for comparison.
Why does the new bulb still not blink after replacement?
The problem can be a faulty flasher relay, a blown fuse, or an electrical ground problem. Re-check the fuse for the blinker circuit and inspect the ground connection. If the relay is faulty, it will require replacement.
If it still won’t blink, check the fuse and relay for the blinker circuit and confirm a solid ground.
Can I replace the blinker bulb without removing the lens cover?
Some designs allow bulb replacement without removing the lens, but many require lens removal for safe access. Refer to the vehicle’s manual or the fixture’s instructions to avoid cracking the lens.
Often you’ll need to remove the lens, but some setups allow direct bulb access—check the manual.
What should I do if the socket is corroded?
If you see corrosion, clean the contacts and consider replacing the socket if corrosion is deep or persistent. Do not use liquids to clean electrical contacts. Replace damaged components to prevent future failures.
Clean light corrosion with a dry cloth and replace the socket if corrosion is severe.
Are LED blinkers different from incandescent bulbs?
Yes. LED blinkers draw less current and may require resistors or a compatible flasher module. When replacing, ensure you choose an LED-appropriate bulb or fixture to avoid hyper-flashing or other signaling issues.
LED blinkers often need compatible electronics; check compatibility before swapping.
Watch Video
Key Points
- Identify the correct bulb base before purchasing.
- Power down and protect your eyes and hands during replacement.
- Ensure proper seating to prevent flicker or failure.
- Test the blink function and inspect fuses/relays if needed.
- Dispose of old bulbs responsibly and store replacements for future use.