Sylvania Light Bulb Guide: Choosing, Replacing, and Safety
A practical, brand-informed guide to selecting Sylvania bulbs, replacing them safely, and understanding bases, wattage, color temperature, energy use, and disposal.

Learn how to choose, install, and safely handle Sylvania bulbs with this practical guide. We cover bulb types, bases, wattage, color temperature, energy use, and disposal tips so your home stays bright and efficient. This quick answer summarizes the core steps and safety considerations for homeowners. Whether you're replacing a burned-out bulb or upgrading to LED, this guide keeps things simple.
Understanding Sylvania Bulbs: Brand, Quality, and Range
Sylvania light bulbs have a long history of reliability and a broad product range that spans traditional incandescent options to modern LED replacements. This sylvania light bulb guide helps homeowners navigate the brand's offerings, compare performance, and pick the best option for kitchens, living rooms, and outdoor fixtures. Whether you're replacing a burned-out lamp or planning a lighting upgrade, understanding Sylvania's ranges helps you optimize energy use and brightness.
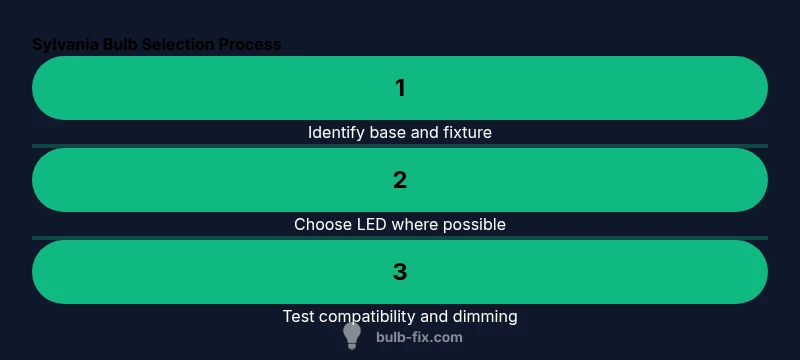
According to Bulb Fix, the first step in any bulb upgrade is identifying the fixture type and base. Sylvania uses common bases such as E26/E27 (the standard screw base in North America and Europe), GU10 for directional bulbs, and specialty bases for decorative lamps. The Bulb Fix team found that mismatching base or wattage is the most frequent source of flicker, poor light, or premature burnout. Always locate the base type printed on the fixture or packaging, then choose a Sylvania bulb that matches both the base and the fixture's electrical rating.
When you select a bulb type, consider the LED lineup for energy efficiency and long life, or halogen for bright, crisp rendering. Incandescent options add a nostalgic glow but use more energy. In this guide, we focus on practical, real-world decisions for homeowners who want dependable light without wasted energy. Bulb Fix's analysis shows LEDs typically offer longer life and better energy use, with solid dimming performance for many popular dimmers.
Common Sylvania Bulb Types and Where They Shine
Sylvania provides a wide spectrum of bulb types to suit different rooms and tasks. Here are the most common categories homeowners encounter and where they perform best:
- LED A19/A60: Versatile, energy-efficient general-purpose bulbs suitable for living rooms, kitchens, and bedrooms. They come in a range of color temperatures from warm to cool and offer long lifespans with good dimming compatibility.
- LED Candelabra (B10, B11): Ideal for chandeliers, wall sconces, and decorative fixtures. These smaller bulbs provide warm ambiance with efficient operation and are available in dimmable formats.
- LED Globe and BR/CA shapes: Used in bathrooms, vanity mirrors, and specialty fixtures where focal brightness and even diffusion matter.
- Incandescent and Halogen: While less common due to energy constraints, these bulbs deliver excellent color rendering and instant brightness in fixtures where LEDs may not be suitable or where a traditional look is desired.
Color temperature choices matter: warm (2700K–3000K) for cozy living areas, or cooler (3500K–4100K) for task lighting and modern kitchens. Bulb Fix recommends prioritizing LED options for most homes to maximize energy savings and longevity, while checking compatibility with dimmers and existing fixtures.
How to Read Bulb Packaging and Codes
Understanding packaging helps you pick the right bulb on the shelf or online. Key elements to look for:
- Base type: The base is printed on the package (e.g., E26, E27, GU10). This tells you which fixtures will physically accept the bulb.
- Wattage and lumens: Wattage shows energy use; lumens indicate brightness. For efficiency, compare lumens per watt.
- Color temperature: Shown in Kelvin (K). Lower values (2700K) yield warm light; higher values (4000K–5000K) give a cool, daylight feel.
- Dimmability: If you have a dimmer, ensure the bulb is labeled dimmable and compatible with your dimmer type.
- Life and warranty: LED bulbs often show longer rated lifetimes and manufacturer warranties, which affect total cost of ownership.
When in doubt, bring the fixture’s label and a sample bulb to match. If you’re shopping online, use the product specs to verify base, wattage, and dimming compatibility. Bulb Fix emphasizes reading the fine print to avoid mismatches that cause flicker or short life.
Matching Bulbs to Fixtures: Base, Wattage, and Color Temperature
Choosing the right bulb involves aligning three core parameters: base, wattage (or wattage-equivalent), and color temperature. Steps to ensure a proper match:
- Confirm base size and shape: Most residential lighting uses E26/E27 bases, but track lighting may use GU10 or GU24. Decorative fixtures may use candelabra bases (E12).
- Check fixture wattage limits: Fixtures specify a maximum wattage. Exceeding this can trip circuits or overheat components. LED options often allow lower wattage while delivering equivalent brightness.
- Choose color temperature for room function: Living spaces benefit from warm white (2700–3000K). Work areas may prefer cool white (3500–4100K) for clarity.
- Verify dimming compatibility: If you use a dimmer, choose dimmable LEDs and verify compatibility with the dimmer model.
In practice, a quick check of the fixture label, the bulb base, and the LED specifications ensures a smooth upgrade without flicker or poor performance. Bulb Fix notes that LEDs are the most flexible choice for modern homes, thanks to dimming options and long life.
Energy Efficiency and Longevity: What Sylvania Tells You
Energy efficiency is a major consideration for most homeowners, and Sylvania’s LED bulbs are designed to deliver significant energy savings over traditional incandescent lamps. LED bulbs typically offer longer lifespans and better energy use, reducing the frequency of replacements. In addition, LEDs rapidly reach full brightness and provide stable color temperature over time, making them reliable for daily use in kitchens, living rooms, and work areas.
When evaluating longevity, compare the rated hours and warranty terms. A longer rated life reduces maintenance costs, especially in fixtures that are hard to reach. Also, consider the total cost of ownership rather than the upfront price; higher-efficiency LEDs often save money over the bulb’s life due to lower energy consumption and fewer replacements.
For color quality and performance, check the high-CRI options in Sylvania’s LED line, which helps color-sensitive tasks look natural. Bulb Fix’s approach is to balance initial cost with long-term energy savings and consistent performance.
Safety First: Handling, Disposal, and Breakage
Safety should always come first when handling bulbs. For intact bulbs, avoid touching the glass with bare skin; oils can shorten bulb life or affect performance. If a bulb breaks, use stiff gloves or a thick paper towel to pick up large fragments and place them in a sealed bag for disposal.
Always turn off the power at the switch and, if possible, at the breaker before starting work on fixtures. If you’re working in a ceiling fixture, use a stable ladder and have a helper nearby. When disposing of bulbs, check local recycling guidelines. Many LED bulbs are recyclable, and some regions require proper disposal of mercury-containing bulbs (in rare halogen/incandescent exceptions).
Never force a bulb into a socket. If it won’t fit, recheck the base and alignment before turning power back on. The Bulb Fix team recommends wearing gloves to protect your hands and to reduce contact with oils.
Troubleshooting Common Issues with Sylvania Bulbs
Common issues include flickering, bulbs not turning on, and dimming irregularities. Start by checking the base and wattage to ensure a proper match. If a bulb flickers intermittently after installation, verify you’re using a compatible dimmer and that the fixture is not overburdened by a high-wattage bulb in a low-wattage circuit. Loose connections can also cause flicker, so ensure the bulb is seated firmly in the socket.
If bulbs fail prematurely, inspect for overheating fixtures or incompatible voltage. In outdoor fixtures, ensure weatherproof ratings are appropriate for the environment. Replacing with a higher-efficiency LED can reduce voltage stress and improve reliability. If you encounter persistent issues, consult a licensed electrician to check wiring and circuit protection.
Installation Step-by-Step: Replacing a Sylvania Bulb
This section complements the official step-by-step guide and gives practical, homeowner-focused instructions. Begin by turning off power and allowing bulbs to cool. Remove the old bulb by gently twisting (for screw bases) or pulling straight out (for bayonet bases) with a secure grip. Align the new bulb’s base with the socket and insert firmly, then twist or push until snug. Finally, restore power and test for full brightness and proper operation. If the fixture is enclosed, ensure the bulb is rated for enclosed use.
For recessed lighting or fixtures with covers, wait until you can safely access the bulb and avoid slamming the cover shut. If you’re upgrading to LED, consider choosing a compatible dimmable model and ensuring the dimmer is LED-rated. See the quick guide or video for more detailed steps, especially for lanterns or specialty fixtures.
Pro tip: Always handle bulbs with a clean, dry cloth or gloves to prevent fingerprints and oils from shortening life. If a bulb breaks, carefully clean up the area and dispose of fragments in a sealed bag.
Maintenance and Replacement Schedule
To maintain consistent lighting, schedule bulb checks at least twice a year and replace all bulbs in a fixture at the same time if possible to maintain uniform brightness. LED bulbs typically last longer than incandescent or halogen options, reducing maintenance frequency. Keep a small stock of spare bulbs in your toolkit that match your most common base types and color temperatures.
Consider establishing a planned replacement calendar based on each bulb’s rated life. This preventive approach avoids sudden outages, especially in hard-to-reach fixtures. Replacements are an investment in energy efficiency and comfort, so plan for LED upgrades where appropriate to maximize long-term savings and light quality.
Authoritative references and resources
For further reading and verification, consult authoritative sources:
- U.S. Department of Energy LED Lighting Basics (https://www.energy.gov/eere/ssl/led-lighting-basics)
- Energy Saver guidance on lighting choices (https://www.energy.gov/energysaver/lighting-choices-residential)
- LED lighting articles from major publications (https://spectrum.ieee.org/led-lighting-basics)
Tools & Materials
- Replacement bulb (matching type and base)(Bring spare bulbs of correct base (e.g., E26, E27, GU10) and wattage)
- Dry cloth or gloves(Avoid touching glass with bare hands; oils reduce bulb life)
- Ladder or sturdy step stool(Use a rated ladder with stable footing)
- Screwdriver or tool for removing fixture cover(Only if your fixture requires disassembly)
- Safety goggles(Protection if bulb breaks during removal)
- Gloves or cloth for handling broken bulbs(Place in a sealable bag after cleanup)
- Flashlight(Useful in dim or ceiling fixtures)
Steps
Estimated time: 15-25 minutes
- 1
Power down and prep
Turn off the light and, if possible, switch off the circuit at the breaker. Allow any hot bulbs to cool before handling. Gather your replacement bulb and tools to keep everything within reach.
Tip: Waiting for cooling prevents burns and reduces the risk of glass breakage. - 2
Remove the old bulb
Grip the bulb firmly by the base and twist counterclockwise for screw bases, or pull straight out for bayonet types. If the bulb is stuck, gently wiggle without forcing.
Tip: Use a cloth or gloves to improve grip and protect your hands. - 3
Check the base and wattage
Compare the old bulb’s base and wattage with the replacement. Ensure the new bulb has the same base fit and a wattage within the fixture’s rated limit.
Tip: LEDs often require much lower wattage than incandescent equivalents. - 4
Inspect the fixture
Look for corrosion, loose sockets, or damaged wiring. If you spot any issues, stop and consult a licensed electrician.
Tip: Avoid using damaged fixtures; safety overrides convenience. - 5
Handle the new bulb
Hold the bulb by the base, not the glass. If the bulb is glass, avoid fingerprints and oils that can shorten life.
Tip: Wearing gloves helps prevent skin oils transfer. - 6
Install the new bulb
Insert into the socket and twist or push as required until snug. Do not over-tighten. Re-check alignment and seat.
Tip: If the bulb resists, remove and reinsert—misalignment is common. - 7
Restore power and test
Turn the circuit back on and test for full brightness. If it flickers, recheck connections and dimmer compatibility.
Tip: Test at different dimmer levels if applicable. - 8
Final safety checks
Ensure the fixture cover is secure and there are no loose parts. Clean up the area and store tools in a safe place.
Tip: Keep a few spare bulbs of the most common type for quick future replacements. - 9
Disposal and follow-up
Dispose of old bulbs per local guidelines. Consider upgrading to LED for energy efficiency and longer life.
Tip: Recycle compliant bulbs when possible; LEDs often qualify for local recycling programs.
Got Questions?
Do I need to turn off power at the breaker before changing a bulb?
Yes. Turn off the light at the switch and, if possible, the breaker to avoid shocks and short circuits while you replace the bulb. Allow bulbs to cool before handling.
Yes. Always switch off the power and allow the bulb to cool before you replace it.
Can I use any bulb in a fixture labeled for Sylvania?
Not every bulb is compatible with every fixture. Check the base type, wattage limit, and whether the bulb is dimmable if you have a dimmer. Use a Sylvania bulb that matches the fixture’s base and electrical rating.
Not every bulb will fit every fixture. Check the base, wattage, and dimming compatibility before buying.
What base types do Sylvania bulbs use?
Common bases include E26/E27, GU10, and B-type candelabra bases. Always verify the base on the fixture label and the replacement bulb.
Most Sylvania bulbs use standard bases like E26 or GU10; always verify the base before buying.
How should I dispose of broken bulbs?
Carefully collect fragments with gloves and a stiff piece of cardboard, seal in a bag, and follow local disposal guidelines. Check if your bulbs are recyclable in your area.
If a bulb breaks, scoop up fragments with a stiff card, seal, and follow local disposal guidelines.
Are Sylvania bulbs dimmable?
Many Sylvania LED bulbs are dimmable, but you must choose a compatible dimmer and ensure the fixture supports dimming. Check product specs for compatibility.
Many Sylvania LEDs are dimmable—make sure your dimmer and fixture will work with the bulb.
What should I do if a bulb flickers after replacement?
Verify the bulb is properly seated, confirm the base type matches, and ensure the fixture and dimmer are compatible. If flickering persists, consider testing with a different bulb or consulting an electrician.
If it flickers, check seating and compatibility, and consider trying another bulb or a professional check.
Watch Video
Key Points
- Choose LED bulbs for efficiency and longevity.
- Match base, wattage, and color temperature to your fixture.
- Always power down before changes and handle bulbs carefully.
- Consider disposal and recycling options for end-of-life bulbs.
- Test performance across dimming and multiple fixtures for consistency.