How to Deal with Bulbs: Safe Handling, Replacement, and Disposal
Learn how to deal with bulbs safely and effectively—from selecting the right bulb type to replacing, troubleshooting, and responsible disposal. This Bulb Fix guide covers safety gear, correct wattage, LED upgrades, and maintenance to keep your home lit efficiently.

This guide shows you how to deal with bulbs safely, choose the right type for each fixture, replace them correctly, and dispose of old bulbs responsibly. You’ll learn the essential safety steps, common mistakes to avoid, and practical tips for energy-efficient lighting upgrades—delivered in clear, actionable steps you can apply today.
Why dealing with bulbs safely matters
Lighting touches every room, but bulbs can pose risks if mishandled. The basics of how to deal with bulbs center on safety, proper wattage, correct bases, and careful handling to prevent burns, glass breakage, and electrical faults. According to Bulb Fix, most incidents occur when bulbs are hot, sockets are worn, or the wrong wattage is used. Beyond safety, proper handling protects fixtures and helps you maximize energy efficiency. In this section you’ll see why small habits matter—cool bulbs, inspect sockets for wear, and choose the right replacement—to ensure reliable lighting without unnecessary hazard. This is a practical guide to dealing with bulbs that you can apply room by room, from kitchen downlights to bedside lamps.
Understanding bulb types and their uses
Bulbs come in several types, each with distinct advantages and limitations. Incandescent bulbs are cheap upfront but energy-inefficient; CFLs save energy but take time to reach full brightness; LEDs are long-lasting, highly efficient, and come in a range of color temperatures; halogen bulbs offer crisp, bright light with good dimming performance. When you learn how to deal with bulbs, you’ll recognize which type is best for task lighting, ambient lighting, or decorative fixtures. Also keep an eye on the base and shape—E26/E27 screw bases are common, while GU bases, B22s, and pin bases work in specialty fixtures. Selecting the right bulb reduces waste and improves overall lighting quality.
Matching bulbs to fixtures: base types, wattage, dimmers
Fixture compatibility is a core part of dealing with bulbs. Verify the base type before buying: common residential bases include E26/E27 screw-in, B22 bayonet, and various pin-based styles like GU10. Wattage matters for heat and brightness—never exceed the fixture’s rating, and if you have a dimmer, ensure the bulb is dimmable and compatible with the dimmer hardware. Incompatible bulbs can cause buzzing, flickering, or premature failure. If you’re unsure, remove the old bulb and check its base markings, then match to the fixture’s label or manual. This reduces the risk of wasted bulbs and saves energy over time.
Color temperature and mood: choosing the right light
Color temperature is a key factor when dealing with bulbs. Warm light (roughly 2700K–3000K) creates a cozy mood for living spaces, while neutral (3500K–4100K) suits kitchens and bathrooms, and daylight (5000K–6500K) improves focus in workspaces. Consider the activity in each room and the other light sources to pick bulbs that balance with natural light. Energy-efficient LEDs are available across this spectrum, and many fixtures support tunable color temperature. The right choice enhances comfort, reduces eye strain, and supports daily routines.
Tools and safety gear you should have
To deal with bulbs safely, assemble a basic toolkit and wear proper safety gear. Essential items include gloves to protect your hands and avoid transferring oils to bulbs, safety glasses to shield eyes, and a sturdy ladder or step stool for high fixtures. Keep replacement bulbs of the correct type and base on hand, plus a voltage tester for any electrical work beyond simple replacements. A small flashlight helps you see inside fixtures, especially in dim hallways. Having these items ready speeds up the process and reduces risk when you’re dealing with bulbs.
Common installation mistakes and how to avoid them
Common errors include overtightening bulbs, using incompatible wattage, failing to fully seat the base, and mixing bulb types in fixtures with dimmers or ballast requirements. To avoid these mistakes, always verify the fixture’s rating on the label, inspect the socket for corrosion or bent contacts, and gently test seating before applying power. If a bulb is resisting removal, don’t force it; instead, switch off power at the breaker and re-check the base alignment. Proper alignment and gentle handling extend bulb life and fixture reliability.
Troubleshooting burned-out bulbs and flickering lights
If a bulb burns out quickly or flickers, start with the simplest explanations: burnt-out filament, loose connection, or a failing ballast or dimmer. Turn off power, remove the bulb, and reseat it firmly to rule out a loose connection. Check the fixture for corrosion or damaged sockets. For LEDs, flickering can indicate incompatible dimmers or early driver failure; in that case, replace with a dimmable LED and a compatible dimmer. If problems persist, consider testing with a known-good bulb to isolate the fixture from the circuit.
Disposal and recycling: handling old bulbs responsibly
Bulbs must be disposed of correctly depending on type. Incandescents are generally recyclable with curbside trash guidelines in many areas; CFLs (and compact fluorescent tubes) contain trace amounts of mercury and require special recycling. LEDs should be recycled through electronics recycling programs. Before disposing, seal or bag fragile bulbs to prevent breaks and follow local rules. Being mindful of disposal reduces environmental impact and keeps your home safe from broken glass and hazardous materials.
Upgrading to LED: benefits and considerations
Upgrading to LED bulbs offers significant energy savings, longer life, and lower heat output. When dealing with LEDs, ensure the fixture supports the lower wattage if replacing incandescent bulbs and confirm compatibility with dimmers. Look for high lumens per watt and a favorable color temperature for the space. LEDs also come in various shapes and bases, so verify the size and socket type before purchasing. This upgrade often pays for itself over time through reduced energy bills and fewer replacements.
Maintenance and future-proofing your lighting setup
Regular checks preserve lighting performance. Schedule a quick seasonal review to replace aging bulbs, clean dirty fixtures, and test emergency lighting if applicable. Label fixtures with their bulb type and approximate replacement timeline to simplify future maintenance. Consider a plan for LED upgrades in high-traffic areas and in exterior lighting where bulb replacements are difficult. By building routine maintenance into your home care, you’ll keep lighting consistently bright and efficient.
Tools & Materials
- Gloves(Nonslip, preferably leather or cotton; protects hands from hot bulbs and glass)
- Safety glasses(Eye protection in case of glass breakage)
- Ladder or sturdy step stool(Use on a stable surface; keep three points of contact)
- Replacement bulbs (correct type and base)(Always match base and wattage rating to fixture label)
- Voltage tester(Confirm power is off before working on wired fixtures)
- Screwdriver (flathead/Phillips)(Only if needed to remove covers or fixtures)
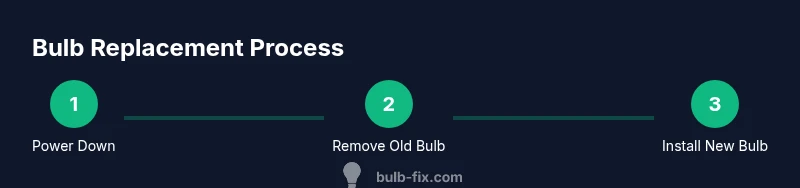
Steps
Estimated time: 20-30 minutes
- 1
Power down and cool the fixture
Turn off the light switch and, if possible, switch off the circuit at the breaker. Allow the bulb to cool for at least 5–10 minutes to prevent burns when handling.
Tip: If the fixture has a glass cover, wait until it’s cool and handle it with care to avoid cracking. - 2
Position your safe workspace
Set up a stable ladder on a flat surface. Have a helper hold the ladder if you’re reaching high fixtures. Wear gloves and safety glasses before touching the bulb.
Tip: Maintain three points of contact on the ladder at all times. - 3
Remove the old bulb
Gently grasp the bulb with a gloved hand and twist counterclockwise to release from the socket. Do not pinch the glass; support the base as you twist.
Tip: If the bulb is stuck, stop and reassess rather than applying force to the glass. - 4
Inspect the socket and base
Check for corrosion, bent pins, or cracks in the socket. If you see damage, stop and replace the fixture or consult an electrician.
Tip: Never use a bulb with a damaged base; it can create a poor connection or shock risk. - 5
Install the new bulb
Align the base with the socket and insert. Gently twist clockwise until snug—do not over-tighten, which can strip the threads or damage the socket.
Tip: If using a dimmer, ensure the bulb is dimmable and compatible with the dimmer type. - 6
Test and tidy up
Restore power at the switch or breaker and test the fixture. If it flickers or hums, recheck connections or try a different bulb of the same type.
Tip: Dispose of the old bulb properly per local guidelines and clean up any glass shards safely.
Got Questions?
What should I do if a bulb won't come out of the socket?
First ensure power is off at the breaker. Gently rotate the bulb counterclockwise while supporting the base. If the bulb is still stuck, check for a damaged socket and do not force it. Consider using a rubber jar opener grip to get extra torque safely.
If the bulb won’t come out, make sure power is off, then gently twist counterclockwise while supporting the base. If it’s still stuck, inspect the socket for damage and avoid forcing it.
Can I mix bulb types in the same fixture?
It’s best to avoid mixing bulb types in a fixture, especially if it uses a dimmer or ballast. Different bulbs emit different heat and electrical characteristics which can cause flicker, uneven light, or shortened life. Replace with bulbs that match the fixture’s rating.
Mixing bulbs can cause flicker and uneven lighting, so stick to bulbs that match the fixture’s rating and dimmer compatibility.
Are incandescent bulbs safe to use in today’s homes?
Incandescent bulbs are generally safe but use more energy and generate more heat. Consider upgrading to LEDs where possible to improve efficiency and reduce running costs, especially in high-usage fixtures.
Incandescent bulbs work, but LEDs save energy and reduce heat, making them a smart upgrade where possible.
What’s the difference between lumens and watts?
Watts measure energy use, while lumens measure brightness. Modern bulbs use fewer watts to produce the same or more light, especially with LEDs. Look for high lumens per watt for better efficiency.
Lumens tell you brightness; watts tell you energy use. LEDs give you more light per watt, so aim for higher lumens per watt.
How do I dispose of LED or CFL bulbs?
LEDs should be recycled through electronics recycling programs. CFLs contain small amounts of mercury and require proper recycling as well. Check local guidelines and use a dedicated recycling drop-off if available.
Recycle LEDs and CFLs through local electronics programs; CFLs contain mercury, so don’t throw them in the trash.
Is it safe to replace bulbs with wet hands?
Never replace bulbs with wet hands. Water increases the risk of electric shock when handling live fixtures. Dry hands and use dry gloves, then proceed.
Never handle bulbs with wet hands. Dry hands and use dry gloves for safety.
Watch Video
Key Points
- Always power down before touching bulbs.
- Match bulb type, base, and wattage to the fixture label.
- Use safety gear and stable ladders for high installations.
- Dispose of bulbs responsibly according to local rules.
- Upgrade to LED when appropriate for energy savings and longevity.