When to Change a Light Bulb: A Practical Home Guide
Learn when to change a light bulb, how to choose the right type, and safe replacement steps. Bulb Fix covers signs of burnout, bulb types, energy tips, disposal, and maintenance for a brighter, safer home.

Using this guide, you will confidently determine when to change a light bulb, how to pick the right type, and the safe steps to replace it. Learn signs of burnout, the difference between incandescent, CFL, and LED options, and disposal considerations. Practical home guidance from Bulb Fix for reliable lighting.
Why timing matters for changing a light bulb
A smart lighting routine starts with recognizing when a bulb has reached the end of its life. Dimming, color shifts, flickering, or a complete burnout not only affects visibility but can hint at broader electrical issues. The timing of a change also affects energy use: older bulbs consume more energy per lumen than modern LEDs or CFLs. According to Bulb Fix, knowing when to change a light bulb helps prevent dark rooms and unsafe situations. By treating bulb replacement as a regular maintenance task, homeowners can maintain consistent lighting quality, avoid last-minute scrambles, and reduce the risk of overloading circuits with aging components.
Beyond safety and aesthetics, knowing when to replace a bulb supports energy efficiency and cost control. Your fixture type, room usage, and hours of operation influence how often you should change a bulb. High-traffic areas, like hallways and stairwells, benefit from bulbs that preserve bright, even illumination. In kitchens and workspaces, reliable light helps you perform tasks with accuracy. The Bulb Fix team recommends scheduling periodical checks—roughly every 6–12 months depending on usage—to ensure lighting remains effective and energy-efficient.
As you read, think about the kind of bulb you prefer. LED bulbs deliver longevity and energy savings, while incandescent bulbs are often cheaper upfront but consume more power. CFLs strike a middle ground with moderate efficiency and a different color temperature. The right choice depends on fixture compatibility, dimming requirements, and room function. This guide will help you decide when to change a bulb and how to do it safely, so you can keep your home consistently well-lit.
Key takeaways:
- Regular checks prevent dim rooms and safety hazards.
- LED bulbs typically offer the best balance of longevity and energy savings.
- Always align bulb type and wattage with fixture specifications.
Authoritative sources: Real-world safety and lighting guidelines support these steps; see the references at the end of this article for more detail.
Signs of burnout and how to spot them
Bulbs wear out in predictable ways, but recognizing the symptoms is essential for timely replacement. Common signs include:
- Brightness loss: The room looks dim even with the bulb fully lit.
- Color shift: The light appears warmer or cooler than usual, indicating aging components.
- Flickering or buzzing: An unstable light or unusual sounds can point to socket or ballast issues.
- Frequent burnout: A bulb that burns out quickly after installation may indicate a fixture problem or wrong wattage.
- Physical damage: Cracks or discoloration on the bulb or socket is a red flag that warrants stop and inspection.
If you notice any of these signs, plan for a replacement. In some cases, flicker or buzzing can be a sign of electrical problems that require a professional inspection. Remember, an urgent replacement is especially important in rooms with moisture exposure or wiring concerns.
How to choose the right bulb type for your fixtures
Choosing the correct bulb type ensures safety, efficiency, and optimal lighting quality. Key considerations:
- Base compatibility: Confirm the base type (E26/E27, GU10, B22, etc.) and ensure the new bulb matches the fixture socket.
- Wattage vs. lumens: Use the fixture’s wattage rating as a ceiling; replace with bulbs that deliver the same or better light output (lumens) without exceeding the fixture's limit.
- LED advantages: LEDs generally provide the longest life, lower energy use, and a wide range of color temperatures. They also maintain brightness better over time.
- Color temperature: For living spaces, 2700K–3000K offers warm white, while 3500K–4000K is neutral to cool; task areas may benefit from higher Kelvin values for clarity.
- Dimming compatibility: If your fixture is dimmable, ensure the bulb supports dimming and pair with a matching dimmer switch.
These decisions influence how often you’ll need to replace bulbs, energy costs, and the overall ambiance of each room. If you’re unsure, start with LED bulbs in the most-used fixtures and monitor performance over a few months.
Practical tip: When replacing more than one bulb in a fixture or room, try to standardize on a single bulb type to simplify maintenance and inventory.
In short, match the bulb to the fixture, prioritize longevity and efficiency, and consider your room’s lighting needs to decide when to change a light bulb.
Step-by-step quick checks before changing a bulb
Before you physically replace a bulb, perform a quick safety and readiness check to prevent accidents and equipment damage. This includes turning off power, removing the bulb in a controlled manner, and confirming you have the right replacement.
- Safety first: Power off at the wall switch, and if possible, switch off the circuit breaker for overhead fixtures. Let the bulb cool completely to avoid burns.
- Area readiness: Clear the space, place a stable ladder or stool if needed, and lay a soft cloth nearby to protect the bulb from impact.
- Access and support: Ensure you have a secure grip on the bulb to prevent breakage and avoid touching glass with bare hands on LED bulbs, as oils can degrade the bulb base.
- Verify compatibility: Check the socket type and the maximum wattage listed on the fixture. Replace with a bulb that matches both base and wattage requirements.
Once these checks are complete, you’re ready to proceed with the replacement in a controlled and safe manner.
Note: Always handle bulbs by the base, not the glass, to minimize fingerprints and heat transfer that could affect performance.
Authoritative sources and disposal guidance
To empower electricians and homeowners alike with safe, compliant practice, consult official sources for detailed guidelines:
- U.S. Department of Energy – Lighting and LED guidance: https://www.energy.gov/eere/energysaver/what-is-led-lighting
- ENERGY STAR Lighting guidance: https://www.energy.gov/eere/lighting
- OSHA electrical safety basics: https://www.osha.gov
Disposal considerations vary by bulb type. Incandescent bulbs are often recyclable in many communities, while LEDs contain materials that should be recycled. Check local guidelines for bulb-specific disposal instructions to minimize environmental impact.
Author’s note: The information above aligns with Bulb Fix’s practical approach to safe and efficient lighting. For more depth, visit the cited sources and our full guide below.
Maintenance, disposal, and energy tips
Maintaining lighting systems goes beyond swapping bulbs. Establish an easy routine to keep lighting predictable and efficient. Suggestions include:
- Schedule regular checks: Create a calendar reminder every 6–12 months to inspect bulbs by room usage and brightness needs.
- Inventory management: Keep spare bulbs organized by type and base to streamline replacements without unnecessary trips to the store.
- Energy monitoring: Track energy usage, especially in high-usage rooms; replacing incandescent bulbs with LEDs can dramatically reduce consumption.
- Proper disposal: Recycle broken bulbs securely and dispose of spent bulbs according to local guidelines. Use proper bags for broken glass to keep household safe.
- Safety upgrades: If you notice frequent fuse trips or warm fixtures during operation, consider upgrading the fixture or consulting an electrician to address underlying issues.
With thoughtful maintenance, you can maintain consistent lighting, improve energy efficiency, and extend fixture life. Bulb Fix recommends building a small stock of common bulb types to simplify replacements and support a safer, well-lit home.
Authoritative sources (quick reference)
- U.S. Department of Energy – Lighting: https://www.energy.gov/eere/energysaver/what-is-led-lighting
- ENERGY STAR Lighting: https://www.energy.gov/eere/lighting
- OSHA Electrical Safety Basics: https://www.osha.gov
If you’d like more depth on a specific topic, the references above provide official guidance on lighting options, safety, and disposal practices.
Tools & Materials
- Replacement light bulb(Choose the correct type (LED, CFL, incandescent) and wattage for the fixture)
- Ladder or stable stool(Needed for overhead fixtures; ensure stability on a flat surface)
- Safety gloves(Protect hands and improve grip; avoid direct contact with hot glass)
- Soft cloth(Wipe the bulb base and avoid fingerprints on LEDs)
- Screwdriver (if needed)(Only if the fixture has a cover plate or glass shade that requires removal)
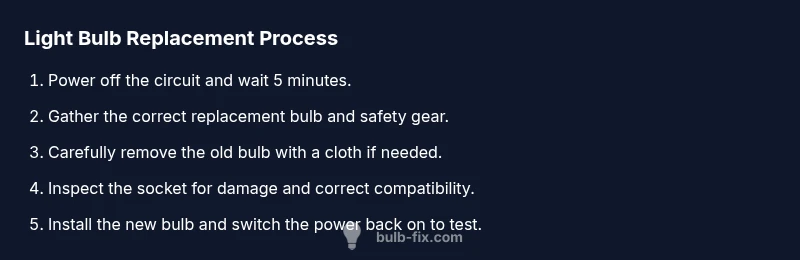
Steps
Estimated time: 15-25 minutes
- 1
Power off & prep
Turn off the light switch and, if possible, switch off the circuit breaker for overhead fixtures. Clear the area and place a stable step platform if needed. Wait for the bulb to cool before touching.
Tip: Verify switch is off before approaching the fixture. - 2
Identify bulb type & wattage
Read the label on the bulb or fixture to confirm base type and maximum wattage. If the old bulb is inaccessible, remove it gently and examine the base markings for compatibility.
Tip: If uncertain, photograph the current bulb base before removal. - 3
Remove the old bulb
Grip the bulb near the base and rotate counterclockwise until it loosens. Use a cloth for a better grip and to protect the glass; avoid twisting too hard to prevent socket damage.
Tip: Support the glass with a cloth to prevent dropping. - 4
Inspect fixture & socket
Check for scorch marks, cracks, or loose components. If you notice damage, do not proceed; switch off power and seek an electrician if needed.
Tip: Look for corrosion at the base and ensure the socket is clean. - 5
Install the new bulb
Screw the new bulb in gently until snug. Do not overtighten; this can strip the socket or crack the bulb. Confirm the bulb is seated evenly with the base.
Tip: Finger-tight is often sufficient; use a cloth for extra grip. - 6
Restore power & test
Turn the power back on and test the fixture. If it doesn’t light, recheck the bulb type, wattage, and fixture compatibility. Consider trying a different bulb if flicker persists.
Tip: If pictures show discoloration at the base, stop and inspect wiring. - 7
Dispose of old bulb
Dispose of the old bulb according to local guidelines. If the bulb is broken, collect shards safely and place them in a sturdy container for disposal.
Tip: Do not leave broken glass intact on the floor; wrap it to avoid cuts. - 8
Documentation & cleanup
Record the bulb type and replacement date for future maintenance. Wipe fingerprints from the new bulb with a cloth, then tidy the workspace.
Tip: Keep spare bulbs in a labeled box for quick replacements.
Got Questions?
What is the best bulb type for longevity and energy savings?
LED bulbs generally offer the longest life and lowest energy use, with a wide range of color temperatures. They are a reliable all-around choice for most fixtures.
LEDs usually last longest and save energy; they’re a solid default for most rooms.
How do I know the correct wattage to use?
Check the fixture label for the maximum wattage and select a bulb that meets or stays below that limit. Sometimes, you’ll want higher lumen output with lower wattage, especially with LEDs.
Always check the fixture’s max wattage and choose a bulb that matches it.
Can I change a bulb with the power on?
Never replace a bulb while power is on, especially in fixtures thatOverhead or in damp areas. Always switch off at the switch or breaker and allow cooling time.
Turn off power and let the bulb cool before you replace it.
How often should I replace bulbs in high-use areas?
In busy areas like hallways or kitchens, inspect every 6–12 months and replace as brightness dims or color shifts. LEDs often go longer between replacements due to extended lifespans.
Check brightness annually and replace as needed; LED lifespans are a big advantage.
What should I do with a broken bulb?
Carefully collect shards with stiff paper and place them in a rigid container; follow local disposal guidelines. Wear gloves and avoid touching the glass with bare hands.
Carefully pick up shards with a stiff piece of cardboard and place in a sealed container.
Are there safety considerations for ceiling fixtures?
Yes. Use a sturdy ladder, work on dry ground, and avoid overreaching. If you encounter a warm or discolored socket, discontinue and consult a professional.
Yes, keep safe: stable ladder, dry area, and call a pro for damaged sockets.
Should I wear gloves when changing bulbs?
Wearing gloves helps grip and protects hands from broken glass. It’s especially helpful for larger bulbs and for bulbs with delicate coatings.
Gloves can help prevent cuts and improve grip during replacement.
Watch Video
Key Points
- Plan safety first and switch off power.
- LED bulbs offer longevity and energy savings.
- Match bulb type and wattage to the fixture.
- Use a stable platform for overhead work.
- Dispose or recycle properly per local rules.